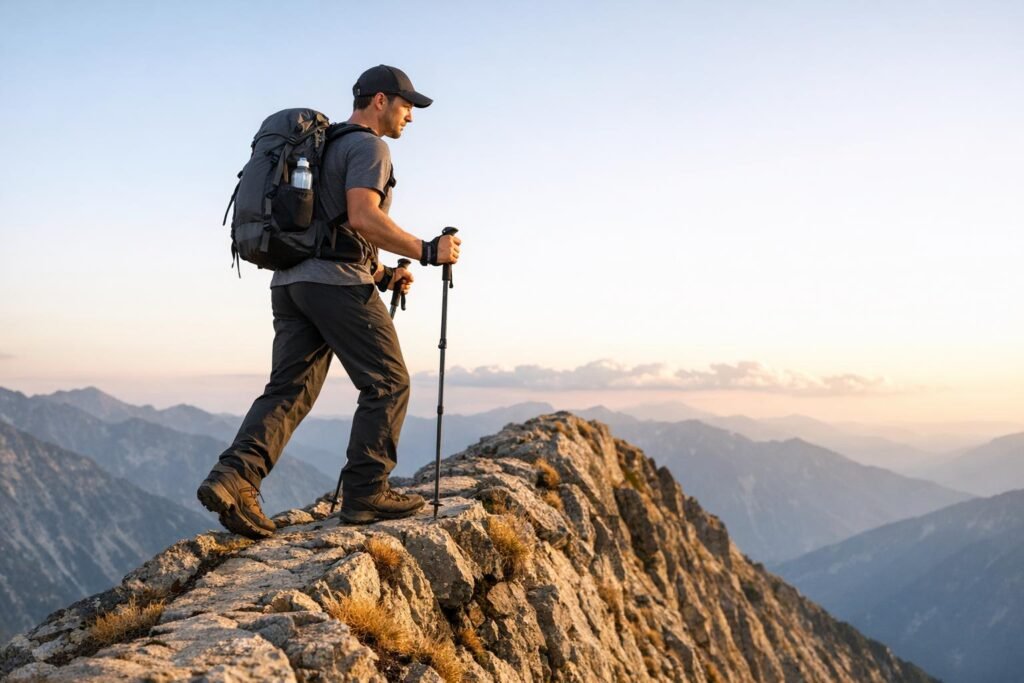
Navigating exposed terrain requires preparation, focus, and the right techniques. Whether it’s steep ridges, loose scree, or narrow paths with drop-offs, these challenges demand both physical and mental readiness. Here’s a quick guide to help you stay safe and confident:
- Stay low and stable: Bend your knees to lower your center of gravity. Avoid leaning back on descents.
- Manage fear and focus: Use breathing techniques like box breathing to stay calm. Focus on one step at a time.
- Master footwork: Use short, deliberate steps on unstable surfaces like talus or scree. Angle your downhill foot slightly outward on sidehills.
- Use trekking poles and natural handholds: Poles improve balance but stow them for technical scrambles.
- Plan for safe passing and retreat: Stick to the trail, move one at a time on narrow paths, and know when to turn back.
- Adapt to weather and seasonal conditions: Watch for signs of storms, and adjust your techniques for snow, ice, or rain.
- Prepare with the right gear and route planning: Tools like GPS devices and traction aids, combined with detailed trip plans, are essential.
Quick Comparison
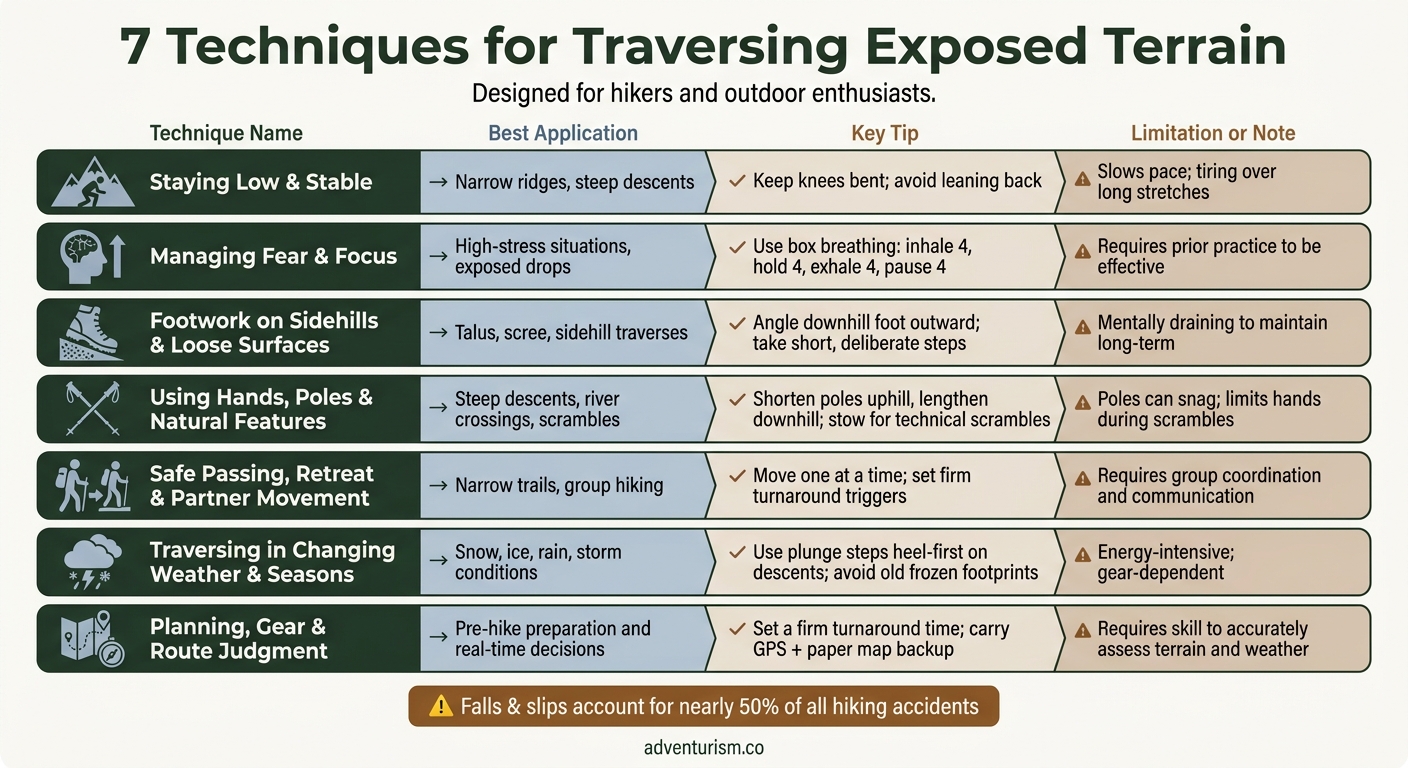
| Technique | Best Application | Key Tip |
|---|---|---|
| Staying Low & Stable | Steep descents, narrow ridges | Keep knees bent, avoid leaning back |
| Managing Fear | High-stress situations | Use box breathing to calm nerves |
| Footwork on Sidehills | Slopes, loose rocks | Take short, deliberate steps |
| Trekking Poles & Handholds | Loose or steep terrain | Adjust pole length for terrain |
| Safe Passing & Retreat | Narrow trails | Move one at a time; set turnaround points |
| Weather Awareness | Changing conditions | Watch for storm clouds or icy patches |
| Gear & Route Planning | Pre-hike preparation | Use GPS tools and pack traction aids |
Start small by practicing these techniques on safer trails before tackling exposed routes. With the right skills and preparation, you’ll be ready to handle challenging terrain confidently.
7 Exposed Terrain Techniques: When & How to Use Them
Scrambling Basics that Every Hiker Should Know [Tips & Techniques]
sbb-itb-5a98267
Understanding Exposed Terrain Hazards
Before heading out onto exposed terrain, it’s crucial to recognize the risks. Falls and slips are the most common hiking injuries, making up nearly 50% of all accidents.
Loose rock poses a major danger. Surfaces like scree (small gravel to baseball-sized stones) and talus (larger rock fragments) can be deceptively unstable. A rock that looks secure might shift or roll when you step on it. Older talus slopes, where soil and vegetation have filled in gaps, tend to be more stable. In contrast, younger slopes, particularly those formed from volcanic activity, are much looser. Wet conditions add another layer of risk – rain can quickly turn a seemingly manageable scramble into a slippery hazard.
The slope angle and runout affect the severity of falls. A gentle, vegetated slope might slow or stop a slide, but a steep, barren slope offers no such cushion. As Charlie Brumbaugh explains:
"Exposure is more a feeling that there is nothing below you in the event of a fall rather than a steepness."
The steeper the slope and the longer the runout, the greater the consequences of even a minor mistake.
Environmental factors like wind, temperature, and sun also play a role. Strong winds at higher elevations can throw off your balance, especially on narrow ridges. Snow, firm and stable in the morning, softens as the day warms, increasing the risk of slipping or triggering rockfall. Timing is key – early morning traverses on snow or ice are much safer than attempting them later in the day.
The best way to prepare for exposed terrain is to practice on safer trails first. As Peter Schilling advises, navigating exposed areas requires dynamic footwork – moving fluidly without fully settling your weight on each step. This kind of body awareness builds over time. Start with easier rocky trails, where a mistake won’t lead to serious consequences, and gradually work your way up.
Building these skills and understanding the hazards are essential for staying stable and confident on exposed routes.
1. Staying Low and Stable
The first technique, staying low and stable, is all about creating a solid foundation for navigating tricky, exposed terrain. By keeping your knees slightly bent, you lower your center of gravity, which reduces the risk of losing balance. A higher center of gravity makes tipping over more likely, especially when the trail gets unpredictable – like when a rock shifts or the path narrows. This bent-knee posture also acts like a shock absorber on steep descents, helping you move in a more controlled way. As Montem Life explains:
"Slightly tilt the torso forward and hold the body’s center of gravity above the support foot." – Montem Life
One common mistake hikers make is leaning back on downhill slopes. While it might feel natural, it can actually cause your feet to slide out from under you, leading to a loss of control. Instead, focus on taking short, deliberate steps. Long strides can shift your center of gravity too far forward, making it harder to recover if you stumble.
When dealing with loose scree or talus, plan a few steps ahead to maintain balance. On wet rock, take it slow and place your entire foot flat on the surface. This increases contact and traction, reducing the chances of slipping. If you do slip, you’re more likely to fall uphill, where the slope can help slow your descent naturally. Even your gear plays a role in maintaining stability.
A poorly packed backpack can throw off your balance. If heavy items are placed too high or strapped to the outside, your center of gravity shifts upward and backward, making you more prone to tipping. To avoid this, pack heavier items close to your back and centered within the pack. This keeps your stance steady and controlled, which is crucial for handling exposed terrain.
"Balance is the key to walking through rough terrain and steep slopes of stones and boulders." – Camotrek
Fatigue is another factor that can undermine your stability. As your legs tire, your coordination suffers, and your footing becomes less reliable. Preparing for a hike by strengthening your core and lower body can help you maintain this low, active stance for longer periods without losing form.
2. Managing Fear and Mental Focus
Staying physically steady is only half the battle when you’re navigating exposed trails. A wandering or fearful mind can be just as risky as unstable footing. When the path narrows and a steep drop looms beside you, your body naturally reacts – your heart races, your breathing quickens, and decision-making might falter. But fear doesn’t have to control the situation; it can be redirected into something useful.
"This mind over mountains approach isn’t about pretending fear doesn’t exist – it’s about transforming it into your most powerful hiking tool." – Sarah Thompson, Author
One technique to manage fear and regain focus is box breathing: inhale for four counts, hold for four, exhale for four, and pause for four. This structured rhythm not only calms your nerves but also anchors your thoughts, keeping them from spiraling. For steeper climbs, try rhythm breathing – match your breath to your steps, inhaling for three steps and exhaling for three. If you’re hiking at higher altitudes, where oxygen is scarcer, you can shorten the cycle to two steps per breath to maintain a steady flow of oxygen.
Your body language also plays a huge role in managing your mental state. Slouching or hunching forward can increase feelings of stress, while standing tall with open, relaxed shoulders signals calmness to your brain. As Sarah Thompson explains, "Hunching forward actually triggers stress responses, while an open posture tells your brain ‘we’ve got this.’" To reinforce this, do a quick progressive muscle scan: check for tension in areas like your shoulders, jaw, or hands. If you notice tightness, consciously release it before continuing.
When the trail feels overwhelming, narrow your focus to just the next step. This mental adjustment helps separate actual trail conditions from imagined fears, keeping you grounded in the present moment.
Another helpful strategy is tactile grounding. Pay attention to the grip of your trekking poles or the texture of the rock under your hand. These sensations can pull your mind back to reality. Many hikers also rely on power phrases to stay centered – statements like "I’m taking one careful step at a time" or "Limited visibility means a slower pace, not danger" can help quiet anxious thoughts and keep your perspective realistic.
Once you’ve mastered mental focus, you’ll be ready to shift attention to the precision of your footwork, which we’ll explore next.
3. Footwork on Sidehills and Loose Surfaces
When navigating challenging terrain, staying calm and moving with intention is key. Controlled, deliberate steps help maintain balance and reduce the risk of missteps.
Sidehills can be especially tricky. The instinct to keep both feet pointed straight ahead often leads to instability, like rolled ankles. Instead, angle your downhill foot slightly outward to protect your ankles and improve balance. Extend your downhill trekking pole for added lateral support as you traverse the slope.
On talus, which consists of uneven rock fragments at the base of cliffs, short and nimble steps work best. Always test the stability of a rock before committing your full weight to it. Rocks covered in heavy lichen or moss are usually more stable, as they’ve remained undisturbed for a long time. Plan your path several steps ahead to maintain smooth momentum and avoid abrupt stops.
"Move nimbly on talus (short, quick steps), take your time and make sure that the rock you are stepping on is solid before you shift your full body weight onto it to avoid moving rocks and injuries." – CamoTrek
Scree, the loose gravel and small stones found on many slopes, requires a different strategy. When ascending, move diagonally to reduce slipping and avoid dislodging stones. On the descent, keep your knees slightly bent and take small, controlled steps to maintain balance. Resist the temptation to let gravity take over, as this can lead to a dangerous, uncontrolled run. Wearing gaiters can help keep debris out of your boots, allowing you to focus entirely on your footing.
| Surface Type | Recommended Footwork | Primary Benefit |
|---|---|---|
| Sidehill | Point downhill foot slightly outward | Prevents ankle rolls and improves lateral balance |
| Talus | Short, nimble steps; test each rock | Avoids tipping on unstable boulders |
| Scree | Diagonal ascent; small steps on descent | Minimizes sliding and reduces rockfall risk |
| Steep Downhill | Small steps; slightly bent knees | Absorbs shock and prevents runaway momentum |
| Soft Snow | Kick steps up; plunge steps (heel-first) down | Creates a secure platform for each foot |
Up next, discover how to coordinate hand and pole techniques with these footwork strategies for even greater stability on challenging terrain.
4. Using Hands, Poles, and Natural Features
While solid footwork is the foundation of safe movement on exposed terrain, the way you use your upper body can make a big difference. Knowing how and when to rely on trekking poles, natural supports, or just your hands can significantly improve your balance and safety.
Trekking poles are particularly helpful on loose scree, muddy trails, steep descents, and river crossings. They expand your base of support and help reduce strain on your knees. In fact, studies show that trekking poles can decrease knee compression force by 12% to 25% on steep descents. For uphill sections, shorten your poles by 2–4 inches for better support. On downhill stretches, lengthen them by the same amount to improve braking. When traversing a slope, adjust the poles asymmetrically – shorten the uphill pole and lengthen the downhill one to keep your shoulders level. A handy technique called the double pole plant involves planting both poles firmly ahead to navigate obstacles more effectively. However, when the terrain becomes more technical, it’s time to put the poles away and rely on your hands.
For situations like scrambling over rocks, climbing steep boulder fields, or tackling vertical steps, stow your poles so you can use both hands freely.
"For technical scrambling and rock hopping, collapse and stow the poles. You need both hands free for grabbing rocks and balancing." – Jake Thornton, Senior Gear Editor, Peak Gear Guide
On moderately difficult trails, a hybrid approach can work well. Collapse one pole and use the other for light balance, while keeping one hand free to grab stable natural supports like tree roots or boulders. If you’re using handholds on rocks, make sure to test them first with a firm push or pull to ensure they’re stable.
A critical safety tip: don’t tighten your wrist straps too much. In case of a fall, your hand needs to release the pole quickly to avoid wrist injuries. Insert your hand from below through the strap to support your grip without restricting movement. This technique reduces fatigue while keeping you safe.
5. Safe Passing, Retreat, and Moving with a Partner
When hiking on narrow or exposed trails, staying on the established path is non-negotiable. If you’re on a narrow ledge, the hiker with the most secure footing should hold their position while others pass one at a time. This approach is especially critical in areas prone to rockfall. Always move one person at a time, with the rest of the group staying alert for debris. To maintain group safety, set a pace that matches the slowest member’s ability.
Knowing when to retreat is just as important as knowing how to move forward. Most hiking fatalities don’t stem from a single mistake – they’re often the result of about four poor decisions strung together. Before hitting the trail, establish clear turnaround triggers, such as specific times, worsening weather, or signs of fatigue. Also, have a Plan B route ready in case conditions change.
Avoid "summit fever" – the urge to push on despite deteriorating conditions. Speak up if it’s time to turn back.
"Almost always, hiker fatalities arise because of a string of multiple small, seemingly unrelated decisions that we have made in the leadup to disaster. In hiking, the number commonly cited is just four poor decisions." – Slower Hiking
Hiking with a partner can significantly improve safety, but it requires open communication. Regularly check in with each other, and if someone is struggling, redistribute shared gear like tents or stoves to even out the load.
"Just because you own the tent, stove and water filter doesn’t mean you must carry them all. Distribute these shared items among your hiking group to help even out the weight." – Valerie Loughney, REI Pack-Fit Professional
Every hiker should carry their own essentials – food, clothing layers, and navigation tools – to be prepared for emergencies. Partnering up also helps mitigate individual blind spots, especially in unfamiliar or challenging terrain.
These strategies – partner communication, gear distribution, and clear decision-making – are key to navigating safely in exposed and unpredictable conditions.
6. Traversing in Changing Weather and Seasonal Conditions
Weather in exposed terrain can shift in an instant. As Emily Jannet, an Outdoor Gear Expert, warns:
"Storms move faster than you can hike, especially in the mountains."
Understanding the sky can give you a head start. Cumulonimbus clouds often indicate thunderstorms, while lenticular clouds suggest strong winds, especially on ridgelines. If you notice static electricity or your hair standing on end, it’s a clear sign to descend to lower elevations immediately.
Snow and ice bring their own challenges. Snow tends to be firmer and more stable in the morning but becomes slushy and unpredictable under the afternoon sun. It’s best to avoid following existing footprints – overnight freezing can turn them into slick ice patches by morning. Instead, create fresh steps and use the plunge step technique: strike the slope heel-first with your toes pointing up to create a secure platform during descents. This is crucial, as data from Accidents in North American Mountaineering highlights over 300 snow-related incidents in a decade, many of which occurred because hikers didn’t adjust their techniques or gear in time.
For firm snow or ice, pair your crampons with anti-bot plates to stop wet snow from clumping. But don’t forget to remove them when conditions soften – using crampons on slushy snow can actually make things worse. As Dunham Gooding and Jason D. Martin from the American Alpine Club explain:
"Crampons are required only when you walk or climb on firm snow or ice. It doesn’t matter whether you are on a glacier or not. If wearing crampons doesn’t increase your security, you should stow them until the conditions change."
Rain-soaked dirt and scree slopes also demand special care. Keep your feet flat and horizontal to maintain balance, and if you slip, aim to fall uphill. Shorten your steps, slow your pace, and always have an escape plan ready before the terrain deteriorates.
Finally, take a moment to evaluate your gear and route choices to ensure you’re prepared for whatever the terrain throws your way.
7. Planning, Gear, and Route Judgment
Good preparation is the backbone of safely navigating exposed terrain. Smart decisions about exposed routes start well before you hit the trail. Tools like CalTopo or AllTrails Plus can help you spot steep drop-offs and technical sections that might not show up on standard maps. For summit-specific weather, check Mountain Forecast – conditions on exposed ridges can be drastically different from those at the trailhead.
Make sure to leave a detailed trip plan with someone you trust. As Trekology emphasizes:
"Leaving a detailed trip plan with a trusted person is one of the most critical hiking safety tips you can follow. It is your primary safety net, transforming a potentially dire situation into a manageable one."
Your trip plan should include the trail name, a description of your vehicle, bailout points, and your expected return time. This information can significantly narrow the search area for rescue teams if something goes wrong.
Route judgment is where all that planning meets real-time decision-making. Set a firm turnaround time (e.g., "If I’m not at the ridge by 2:00 PM, I’ll head back") and stick to it, no matter how close the summit might seem. This helps avoid commitment bias, or "summit fever", a psychological trap that researchers identify as a leading cause of hiking accidents. Along with solid route decisions, having reliable and redundant gear is critical for safety.
Gear redundancy is key – carry a paper map as a backup to your GPS device, and consider a Garmin inReach Mini or a rescueME PLB1 for emergency communication in areas without cell service. For icy or snowy exposed sections, Kahtoola MICROspikes are a smart addition to your pack. And to maintain balance, keep your day pack under 10% of your body weight.
| Gear Category | Recommended Item | Why It Matters on Exposed Terrain |
|---|---|---|
| Navigation | Garmin GPSMAP 67 ($500) | Durable, long battery life, rated Best Overall Handheld GPS |
| Traction | Kahtoola MICROspikes | Critical for icy or snowy exposed sections |
| Emergency SOS | rescueME PLB1 | No subscription fee, 7-year battery life |
| Stability | Black Diamond Trail Ergo Cork ($170) | Cork grips manage sweat; ideal for long descents |
| Emergency Shelter | SOL Escape Lite Bivvy | Breathable material prevents condensation buildup |
Building Skills Step by Step for Newer Hikers
Start by practicing each technique on easier terrain to build confidence and minimize risks. This approach lets you develop your skills in a controlled environment, where a small mistake won’t lead to major consequences.
Begin with easy trails – less than 5 miles long and with minimal elevation gain. These routes are perfect for getting used to your gear and gradually building your endurance. A good rule of thumb: trails with more than 500 feet of elevation gain per mile will feel like a constant uphill climb, so it’s wise to work up to them slowly.
Once you’re comfortable on flat or gently sloping paths, move on to older talus slopes and well-traveled boulder fields. These areas are more stable than untouched rocky terrain because soil and vegetation have filled the gaps between stones. Use these spots to refine your footwork and weight-testing skills. Focus on looking 4 to 5 steps ahead, tapping each rock with your lead foot before fully committing your weight, and taking short, quick steps to avoid lingering on unstable surfaces. This gradual progression will help you prepare for more challenging terrain while setting the foundation for strength training.
"It takes practice to develop a feel for various types of terrain, so if this one felt uncomfortable then find a more mild route to practice on before returning." – Peter Schilling, Mountaineering Expert
Off-trail strength training is also key to building the stability you’ll need for tougher hikes. Exercises like Poliquin step downs – where you stand on a step and slowly lower your heel to the floor – mimic the strain of hiking downhill and strengthen your knees. Pair these with deficit lunges from a raised platform to improve your range of motion and prepare your body for the demands of uneven terrain. Rowan Smith, Founder of Summit Strength, emphasizes the importance of preparation:
"It is entirely possible to prepare your body and your mind for a big elevation change hike, even if where you live is absolutely as flat as a pancake."
As your confidence grows, gradually tackle more difficult terrain. Moderate trails – typically 5 to 8 miles long with uneven surfaces and some rocky sections – are a good next step once you’ve mastered easier paths. From there, the skills you’ve practiced – like stable footwork, maintaining three points of contact, controlled breathing, and sound route judgment – will carry over seamlessly to harder, more exposed routes.
Technique Comparison Table
Techniques adapt to different terrains, and this table pairs methods with conditions to ensure safer navigation. Each approach targets specific trail challenges, as detailed below.
| Technique | Best Application | Main Benefits | Limitations |
|---|---|---|---|
| Staying Low & Stable | Narrow ridges | Provides balance on tight ridges; reduces fall risk | Slows you down; can be tiring over long stretches |
| Belly Breathing / One-Word Focus | High-stress situations, fear of heights | Eases panic; improves mental clarity | Doesn’t aid physical stability; requires prior practice |
| Short, Quick Steps | Talus slopes, unstable rock | Keeps momentum on loose terrain | Mentally draining to maintain for long periods |
| Flat-Footing on Sidehills | Steep dirt slopes, sidehill traverses | Boosts surface contact; directs slips uphill | Feels awkward on very steep or narrow paths |
| Kick Steps / Plunge Steps | Snow ascents and descents | Creates secure footing in soft snow | Energy-intensive; only works in soft snow conditions |
| Trekking Poles & Natural Handholds | Downhills, river crossings, brushy areas | Reduces knee strain; adds stability points | Poles can snag on obstacles; limits hand use during scrambles |
| Diagonal Ascent | Scree and loose talus slopes | Minimizes backward sliding; lowers rockfall risk | Adds extra distance to the route |
| Planning & Route Judgment | Pre-hike and real-time decisions | Helps avoid summit fever with clear turnaround points | Requires skill to assess terrain and weather accurately |
Techniques that maximize physical stability, like plunge stepping, often require more energy or specific conditions. On the other hand, mental strategies such as belly breathing are less taxing but depend on prior practice to be effective.
For those just starting out, trekking poles and flat-footing are practical and easy to learn, offering solid results with minimal effort. More experienced hikers can benefit from honing advanced skills like diagonal ascent and dynamic footwork on scree, which can turn challenging terrain into a more manageable experience. This comparison highlights the importance of matching your approach to the terrain you’re tackling.
Wrapping Up
Exposed terrain doesn’t have to feel overwhelming. By applying techniques like staying low, keeping a calm mindset, and learning to assess the terrain, you can approach exposed trails with confidence.
Start small. Begin with easier, less risky routes to get comfortable with different types of terrain before tackling more challenging alpine paths. Even minor adjustments in your approach can make a big difference in reducing risk.
As mountaineering expert Camotrek wisely notes:
"Traveling in the wilderness requires relevant knowledge, experience, and skills."
For more tips, gear advice, and in-depth trail guides, check out Adventurism.co. With the right preparation and deliberate steps, you’ll be ready to take on any trail.
FAQs
How do I know if a slope’s runout is too dangerous?
To determine if a slope’s runout poses a danger, keep an eye out for warning signs of instability. These might include recent landslides, visible water seepage, or unusual vegetation patterns that could signal excessive water content. A history of landslides or evidence of ongoing movement are also clear indicators of heightened risk. For a deeper understanding of the slope’s safety, consult local hazard assessments or geological surveys.
When should I stow trekking poles and use my hands instead?
When the trail becomes less demanding or the terrain flattens out, it’s a good idea to stow your trekking poles and rely on your hands instead. This approach is particularly useful when facing obstacles that call for precise movements. Using your hands not only improves your balance but also lets you tackle tasks like climbing or stabilizing yourself on uneven ground with greater ease.
What are the best turnaround triggers on exposed routes?
When navigating exposed routes, the smartest move is to identify safe spots where you can pause or retreat. Look for areas like stable ground, patches of vegetation, or higher terrain that offer more security. If your footing starts to feel unsteady, lying down can help increase friction, or you can shift to a more secure position. Above all, prioritize your safety – stop or turn back if conditions deteriorate or if your current path feels unreliable.