
One of the joys of living life is that if you love the outdoor world, you can enjoy it to the fullest! In a world where we are used to complete cleanliness and having food taste a certain way from cooking on the stove, it is very enjoyable to experience cooking outdoors over a campfire.
However, if you are unsure how to measure the temperature of outdoor campfire cooking, it might be difficult to do so in the first place. So, what is the best way to do it?
To measure outdoor campfire cooking temperatures, you need to know the specific temperatures for cooking meats, vegetables, and baked goods to ensure everything you eat remains safe. You can do this by using simple tools such as a grill thermometer, or, once you are comfortable enough, putting your hands above the fire to feel the temperature of the campfire. It is also important to observe where the flame and coal are.
There might be quite a few questions when it comes to cooking outside, like how do you know if the temperature is hot enough, what specific temperature should you cook vegetables, meats, and breads? Other times, you might want to expand your knowledge on the subject.
Regardless of the case, we have you covered with this ultimate guide to measuring campfire outdoor cooking. For more learning on this subject, we encourage you to continue reading.
What Basics Should You Know About Campfire Cooking Temperature?
To understand the basics of campfire cooking temperatures, it is important to know how hot it can get. This can range anywhere between 600 degrees Fahrenheit (320 degrees Celsius) to over 2000 degrees Fahrenheit (1100 degrees Celsius). This depends on several factors, such as the fire size, the type of wood, and the stage of the fire.
When cooking over an open fire, it is important to keep the temperature between 800 and 1200 degrees Fahrenheit (430 to 650 degrees Celsius).
How Should You Measure the Cooking Temperature of an Outdoor Campfire?
As stated previously, there are a few ways to measure cooking temperature when using an outdoor campfire.
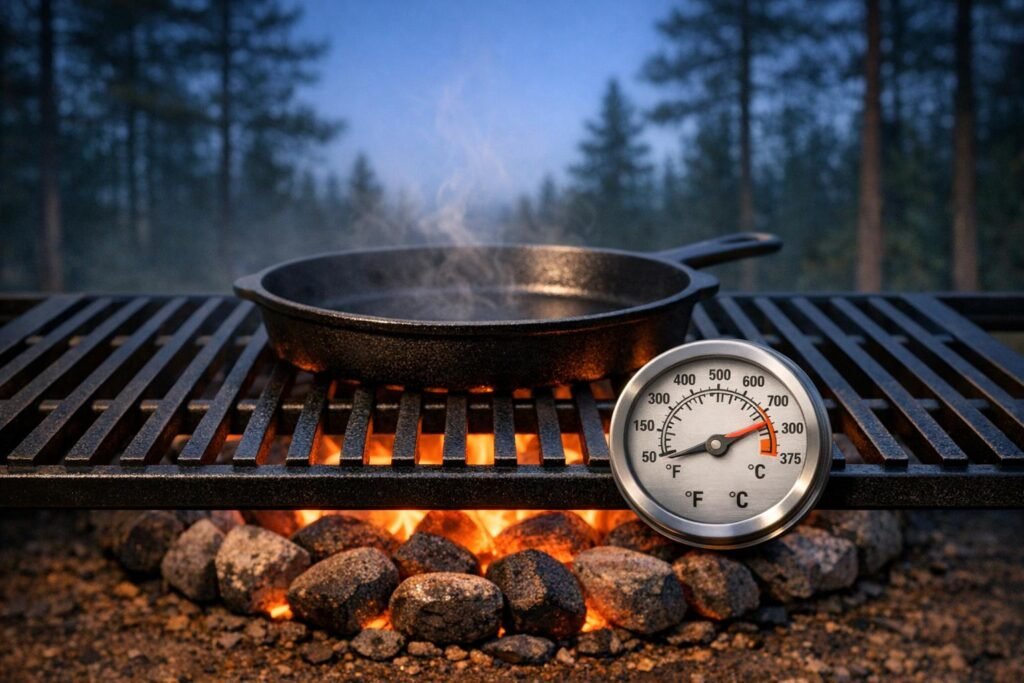
1. Use a Grill Thermometer
When you are first starting or want to know the exact temperature of something, it is wise to use a grill thermometer to ensure you get the best temperature from your campfire. Simply put the thermometer on the grill grate or above the coals to check the fire’s temperature.
On top of that, you can use a grill thermometer to check the temperature of your meat. In doing so, it helps prevent your food from being under- or overcooked.
2. Hand Test Method
On the other hand, yes, pun intended, you can hand test the temperature by simply putting your hand above the campfire and feeling how hot or cool it is. You can do this by putting your palm down roughly 6 inches above your cooking area.
If the heat is too intense, pull your hand away to avoid burning. Below is a quick graph showing how the temperature changes over time as you lower your hand.
These temperatures are rough estimates of how hot it truly is, but they are still a good guideline to follow.
| Heat intensity | Estimated temperature | Amount of time to hold a hand above the fire |
| Low temperature | 325 to 350° F | Between 5 and 7 seconds |
| Medium | 350 to 375° F | Between 3 and 4 seconds |
| Medium-high | 400 to 500° F | Between 1 and 2 seconds |
| High | 600° F | Less than 1 second |
3. Flame and Coal Observation
Many people measure the temperature of a campfire by observing the flame and coals. For example, an orange or yellow flame is usually around 1000 degrees Fahrenheit, whereas a blue flame indicates a much higher temperature (around 2000 degrees Fahrenheit).
On the other hand, you can check the coals to gauge the temperature. If the coals are glowing red, they are suitable for cooking because they provide even, steady heat around 800 degrees Fahrenheit.
What Are the Best Techniques for Campfire Cooking
Aside from cooking over the campfire in itself, there are some techniques you should learn to better not only your cooking techniques but also your overall experience with cooking over a campfire. These include cooking with grates, using aluminum foil, cooking over hot coals, and utilizing one-pot meals. Let us review each one below.
1. Using Aluminum Foil for Cooking
Using aluminum foil is an excellent way to cook your food over a campfire! Not only is it effective, but much of the hard work is done for you because the foil itself traps heat and moisture, creating an extremely flavorful, evenly cooked meal.
This method is best for cooking vegetables, fish, or foil-packed meals. For best results, ensure the coals are between 400 and 500 degrees Fahrenheit (205 and 250 degrees Celsius).
2. Cook Over Hot Coals
Although cooking over a flame is good, cooking over hot coals reduces the risk of burning your food. Also, the food will cook evenly through, rather than some parts being well done while others are not.
It is fairly easy to cook using hot coals. All you need to do is make sure the campfire burns for at least 30 minutes, so it creates a bed of hot coals. Make sure you spread the coals out evenly under the grill grate before putting the food on top.
Doing this method might mean that you are cooking more slowly. However, all of the best things are worth waiting for!
Here are some examples of how long to cook certain meats:
- Raw chicken: roughly 1 hour and 15 minutes, while basting every 30 minutes.
- Beef: When cooking directly on hot coals, beef takes 2 to 3 minutes per side for a medium-rare steak, depending on thickness. If your steak is thicker, it will take 20 to 40 minutes total.
- Pork: Depending on the size, it will take 1 to 2 hours, or 10 to 15 minutes per 2 pounds of meat. However, for a pot roast, you can expect to cook it for at least 2.5 hours to ensure it is thoroughly cooked.
When cooking over hot coals, it is important to monitor the heat so the cooking remains consistent, which can be done using the methods we mentioned above. It is also important to prevent flare-ups that can burn your food, which can happen with a campfire.
3. Use Cooking Grates for Temperature Control
Cooking grates are excellent for temperature control because they let you adjust the height at which you cook. If you want it to cook faster, lower it to your desired height; if it needs to cook slower, raise it to where you feel is right. If you are unsure, use a grill thermometer to ensure you are getting your desired temperature.
We recommend rotating the food and grating every 15 to 20 minutes to ensure even cooking. This also helps avoid any hot spots in the food.
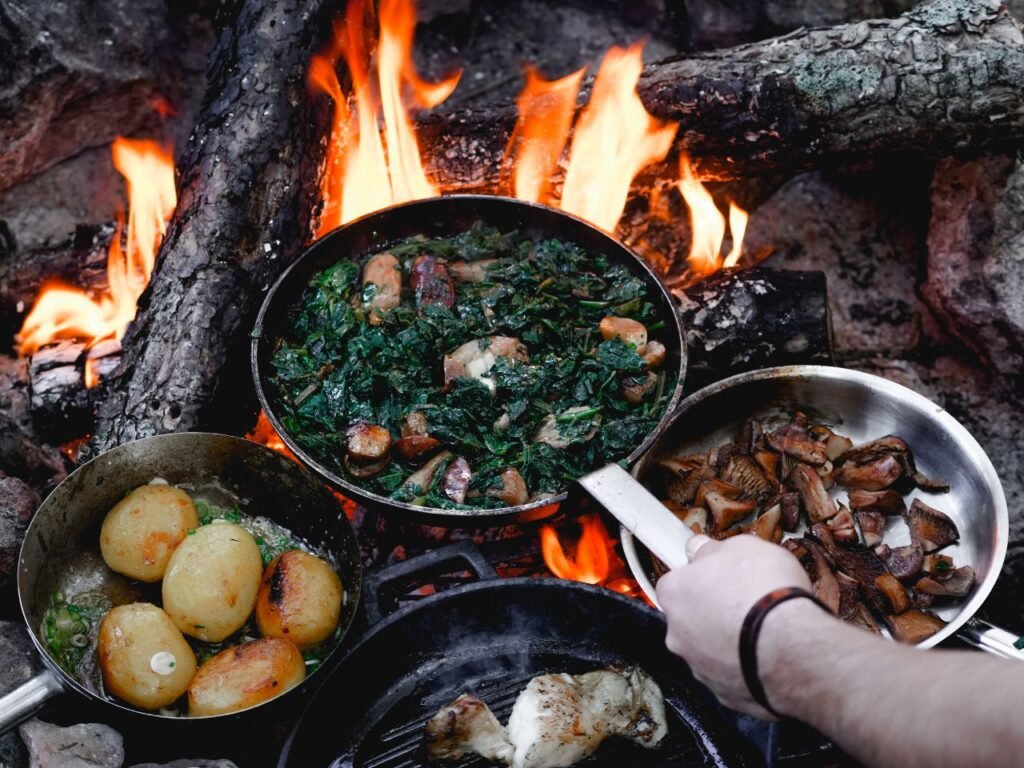
4. Utilize One-Pot Meals
Although some people may be against this method, using one-pot meals is an excellent way to ensure everything is cooked thoroughly and evenly, saving you loads of time and energy and way fewer dishes to clean after you are finished!
What Temperatures Should You Measure When Cooking Specific Foods
There are specific temperatures for cooking certain foods, like meats, breads, desserts, and vegetables. Measuring the specific temperature of specific foods will ensure you get the perfect meal each time. Let us go into more specifics below.
1. Vegetables
Thankfully enough, you do not need to cook vegetables at high temperatures. They do well when cooked at around 350 degrees Fahrenheit (175 degrees Celsius).
Cooking vegetables in aluminum foil, as mentioned above, allows them to cook evenly and soften quickly. Lastly, cooking time for vegetables varies, but when you expose them to this temperature, most veggies will be ready in 20 to 30 minutes.
2. Meats
Cooking with meat requires a higher temperature to ensure it reaches a safe internal temperature and cooks correctly. The temperature we recommend is roughly 450 degrees Fahrenheit (230 degrees Celsius). Different meats require different cooking times, but it is wise to check the temperature frequently to ensure it is not over- or underdone.
To ensure the meat cooks thoroughly, it is wise to use a Dutch oven, a cast-iron skillet, or a grill grate. Meats require a steadier cook than vegetables, so it is important to cook them properly.
3. Breads or Desserts
What is a camping trip without some delicious bread or dessert? When cooking these lovely treats for your family, it is extremely important to do so thoroughly. Make sure to bake bread or desserts at a minimum of 350 to 400 degrees Fahrenheit (175 to 205 degrees Celsius).
It is important to monitor the coals and keep the lid on your Dutch oven (if using one) to maintain a consistent temperature. Also, while baking bread, keep it over the fire for at least 45 minutes. For desserts, use the toothpick test to ensure it is thoroughly cooked through.
How to Increase Your Campfire Temperature
It is fairly easy to increase the temperature of your campfire. There might be a few reasons you want to do this, like making sure it is hot enough for your food to cook, or, even better, creating a unique flavor for you to enjoy! Still, let us review how you can do so below:
- Adding dry firewood: One of the best ways to ensure your food gets enough heat is simply adding more dry firewood to your campfire. Doing so lets you get the steady heat you want. Make sure you are not adding too much wood at once, as this can make the cooking process harder to control. It is also important not to add green or wet wood, as this will cause the fire to smoke rather than burn.
- Move your food closer to the flames: Although this may not raise the campfire’s temperature, it will definitely raise the temperature of your cooking!
- Build the fire properly: Make sure you add kindling and smaller sticks first. Once the fire is stronger, you can add larger logs to keep it burning for a long time. On top of this, there are several ways to build a long-lasting fire. Some of the most popular ones are in the shapes of a teepee, a log cabin, a lean-to fire, or a Swedish fire. It is important to monitor your fire and keep some water nearby in case of emergencies.
What Are the Stages of a Campfire?
Although you might not think it is important, understanding the different stages of a campfire can help you know when to start cooking and give you better control over the fire.
For example, if you think about starting to cook your food during the initial ignition, then you are not going to get very far. Also, there might be some ashes blowing in different directions, which could land directly on your food. Although having your meals taste smoked is delicious, tasting ashes is the last thing you want!
1. Ignition
When you first start your campfire, it is important to learn how to ignite it. Make sure you utilize kindling and small twigs. Kindling can be dry leaves, hay, newspaper, small pieces of cardboard, or similar materials. On top of this, make sure you use small twigs to get the fire started. You can start the fire with a simple lighter, lighting different areas to get it going.
2. Growth
Once the fire is established and hot enough, add medium to large sticks to it. We recommend doing so in a teepee or log-cabin style. However, it is whatever type you are most comfortable with. After several minutes of using medium sticks, you can now place larger logs inside, which allows the burn to last much longer and provide more heat. Once this part is utilized, you can sit back and enjoy the rest of the evening!
3. Fully Developed
Depending on the materials used, the wood’s moisture content, and the wind speed, the time it takes for a fire to reach its peak (or fully develop) will vary. However, a fire can fully develop in as little as a few minutes, so keep that in mind when igniting a fire. On top of this, when the fire is fully developed, the logs should burn at a steady rate, which allows you to cook with ease.
4. Coaling
Once the flames are reduced, all you have left is coaling. Although it does not seem hot from a distance, it would not be wise to place your foot or hand in it, as it is still extremely hot. Coaling can still reach 2000-3000 degrees Fahrenheit (1090 to 1650 degrees Celcius), depending on conditions. Because of this, it provides the perfect steady temperature for grilling meat or roasting vegetables.
5. Burnout
Lastly, the coaling will eventually fade, leaving only the burnout, which occurs when the fire weakens and goes out. This means two things:
- The campfire loses its heat overall.
- It is almost extinguished (this may take several hours unless you use water to put the fire out).
- Your campfire is only left with a few glowing embers and ashes.
What Tools Do You Need for Campfire Cooking?
When it comes to campfire cooking, you might consider using roasting sticks or a BBQ grill basket to keep your food inside. Although these tools are excellent for fast cooking, those who want to make a larger meal, especially if you have a big family, might need the tools we mention below.
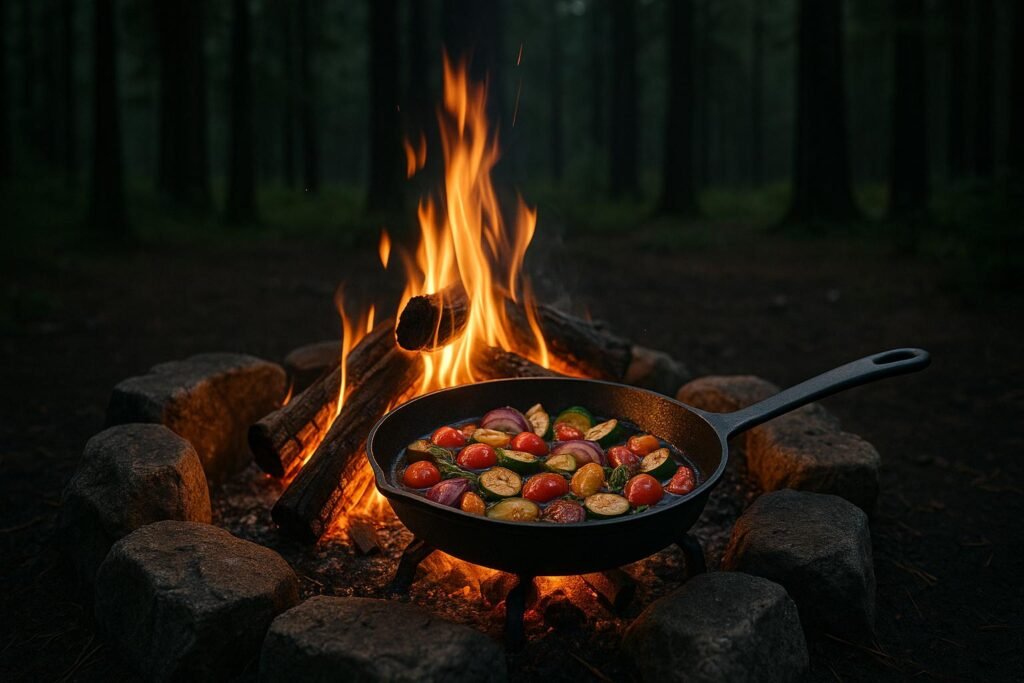
1. Cast Iron Skillets or Pans
Although they are heavy to load and carry while camping, they are an excellent way to keep food hot and at the right temperature. Another thing to keep in mind is that a cast-iron skillet or pan will hold up rather well at extremely high temperatures (up to 650 degrees Fahrenheit). In contrast, nonstick pots and pans can release toxic fumes at high temperatures.
2. Dutch Oven
Dutch ovens are also an excellent choice for campfire cooking for multiple reasons. The first is that Dutch ovens can withstand extremely high temperatures, just like cast iron. Another boon is that Dutch ovens provide even heat for cooking.
Lastly, you can cook a lot of large meals with this beauty, especially if you are trying to feed a large number of people! You can make roasted chicken, soups, or similar dishes in one large bowl. This will, of course, mean less cleanup on your end!
3. Campfire Cooking Grate
The last tool that would be great to use is a campfire cooking grate. Not only can you find one that is height-adjustable, but you can also get a grate that is large or small enough for your everyday outdoor needs.
What Are Some Safety Tips You Need to Know While Cooking With High Temperatures?
It might be well-known that campfire cooking is definitely not the same as cooking on a stove at home. Even still, if you are not careful, you can burn yourself. However, when cooking at high temperatures, especially with flames, it is important to use protective gear, such as long-handled utensils or welding gloves. In addition, it is essential to avoid direct flames when cooking.
Final Thoughts
To summarize everything, measuring outdoor cooking temperatures can be fairly easy. All it takes is a little bit of practice to ensure you know the exact temperature. On top of this, it is wise to ensure you cook your food properly. Keeping that in mind, if this article was educational for you, we recommend reading our other informative articles right here on Adventurism. We wish you the best while cooking food over a campfire!