

- Angels Landing (Zion NP): Famous for its narrow, chain-supported ridge.
- Highlights: 2.5 miles, 1,488 ft gain. Permit required.
- Best Time: Spring/Fall. Closed April 21–24 for maintenance.
- Half Dome (Yosemite NP): Iconic cable climb to a granite summit.
- Highlights: 14-16 miles, 4,800 ft gain. Permit lottery in March.
- Best Time: Late summer/early fall.
- Bright Angel Trail (Grand Canyon NP): Descend 5,000 ft into the canyon.
- Highlights: Rest stops, water (seasonal). Plateau Point closed until May 15.
- Best Time: Early morning in spring/fall.
- Delicate Arch Trail (Arches NP): See Utah’s iconic sandstone arch.
- Highlights: 3 miles, 480 ft gain, no shade.
- Best Time: Sunrise or sunset.
- Skyline Trail (Mount Rainier NP): Alpine meadows and glacier views.
- Highlights: 5.5 miles, 1,700 ft gain. Reservation needed (May–Sept).
- Best Time: July–October.
- Fairyland Loop (Bryce Canyon NP): Hoodoos and peaceful landscapes.
- Highlights: 8.3 miles, 950 ft gain.
- Best Time: April–October.
- Emerald Lake Path (Rocky Mountain NP): Alpine lakes and mountain views.
- Highlights: 3.2 miles, 406 ft gain. Timed entry permit needed (May–Oct).
- Best Time: Early morning, May–October.
- Lost Mine Trail (Big Bend NP): Panoramic desert and mountain views.
- Highlights: 4.8 miles, moderate.
- Best Time: October–May, early morning.
Quick Comparison
| Trail | Length | Elevation Gain | Permit Required? | Best Time to Visit | Difficulty |
|---|---|---|---|---|---|
| Angels Landing | 2.5 miles | 1,488 ft | Yes | Spring/Fall | Moderate-Strenuous |
| Half Dome | 14-16 miles | 4,800 ft | Yes | Late Summer/Early Fall | Strenuous |
| Bright Angel | 12 miles | 5,000 ft | No | Spring/Fall (early AM) | Moderate-Strenuous |
| Delicate Arch | 3 miles | 480 ft | No | Sunrise/Sunset | Moderate |
| Skyline Trail | 5.5 miles | 1,700 ft | Yes (May–Sept) | July–October | Moderate |
| Fairyland Loop | 8.3 miles | 950 ft | No | April–October | Moderate |
| Emerald Lake Path | 3.2 miles | 406 ft | Yes (May–Oct) | May–October (early AM) | Easy |
| Lost Mine Trail | 4.8 miles | Moderate | No | October–May (early AM) | Moderate |
Essentials for All Trails
- Permits: Check requirements and apply early.
- Gear: Sturdy boots, water, layers, and navigation tools.
- Timing: Start early to avoid crowds and heat.
- Safety: Monitor weather, carry first aid, and stay hydrated.
Plan ahead, pack wisely, and enjoy the breathtaking views these trails offer in 2025!
The Ten Best National Park Hikes | From Personal Experience
1. Angels Landing Trail – Zion National Park
Angels Landing Trail is one of the most well-known hikes in the U.S. national park system. This 2.5-mile trek climbs 1,488 feet through Zion National Park’s stunning terrain, ending with a challenging final stretch that requires extra care.
The last half-mile of the trail is especially daring, with a narrow ridge flanked by steep drop-offs on both sides. Fixed chains are in place to assist hikers along this section.
| Trail Details | Specifications |
|---|---|
| Total Length | 2.5 miles (4.0 km) |
| Elevation Gain | 1,488 feet (454 m) |
| Final Section Length | 0.5 miles (0.8 km) |
| Final Section Elevation | 450 feet (137 m) |
| Difficulty Level | Moderate to Strenuous |
2025 Permit Requirements
To hike the chain-supported section between Scout Lookout and Angels Landing, you’ll need a permit. The National Park Service offers two lottery systems: an advance lottery (available 2–5 months ahead of your planned hike) and a daily lottery (open from midnight to 3 PM MT the day before your hike). If you’re planning a summer hike, applications in August tend to have better success rates than those in June.
Best Times to Visit
Spring and fall generally offer the best weather for hiking, though spring conditions can be unpredictable. Keep in mind that trail maintenance is scheduled from April 21–24, 2025, and no permits will be issued during this time.
Safety Tips
Safety should always come first on this trail. Since 1983, 18 fatalities have been recorded in the Angels Landing area. Before heading out, check the weather and flash flood warnings. Bring plenty of water, wear sun protection, and use sturdy hiking boots. Avoid hiking during icy conditions or thunderstorms. Also, save a digital copy or screenshot of your permit, as cell service is limited in the area.
Keep reading to discover another unforgettable national park experience.
2. Half Dome Trail – Yosemite National Park
The Half Dome Trail in Yosemite National Park is a challenging hike that ends with a steep cable climb to the summit. Completing this hike requires careful planning and a permit, which helps manage the number of hikers and ensures safety.
Permit Details
Permits are a must for this trail. Here’s what you need to know:
| Trail Details | Specifications |
|---|---|
| Permit Limit | 300 per day (225 for day hikers, 75 for backpackers) |
| Permit Application Fee | $10 |
| Additional Permit Fee | $10 per person |
| Cable Route Season | Late May/Early June through Columbus Day weekend |
| Best Success Rate | Late September to October (nearly 100% on weekdays) |
2025 Permit System
The preseason lottery for 2025 permits runs from March 1 to March 31, with results announced on April 11. Applications can be submitted for up to six people via recreation.gov/permits/234652. To increase your chances, try these tips:
- Apply for weekday permits (lower demand compared to Saturdays).
- Choose dates in early summer or early fall.
- Include several date options in your application.
Safety Tips
The cable section of the trail is demanding and can be dangerous. Since its creation, the Half Dome route has seen over 20 fatalities, with more than 60 deaths recorded along the entire trail. Weather conditions play a major role in safety:
"Half Dome is the ultimate Yosemite day hike – the one you can’t die without doing, and the one you’re most likely to die while doing." – Yosemite Hikes
When to Go
Summer (late June to early September) is the most popular time to hike, but autumn (September to mid-October) has its perks:
- Cooler temperatures make hiking more comfortable.
- Fewer crowds let you enjoy the trail in peace.
- Fall foliage adds a beautiful touch to the scenery.
- Higher chances of securing a permit.
Key Updates for 2025
For last-minute planners, the daily lottery system is still available, allowing you to apply two days before your hike. Keep these points in mind:
- Either the permit holder or their designated alternate must show the permit at the subdome base.
- Submitting multiple applications as either the holder or alternate will lead to automatic cancellation of all entries.
Starting your hike early is crucial to avoid heat and potential thunderstorms. The subdome’s switchbacks lead directly to the cable section, so prepare accordingly.
3. Bright Angel Trail – Grand Canyon National Park
The Bright Angel Trail is the most traveled hiking route in the Grand Canyon, offering stunning views and a well-maintained path. It descends about 5,000 feet into the canyon, featuring rest stops and seasonal water sources to support hikers along the way.
Trail Highlights and Landmarks
As you make your way down the trail, you’ll come across several key points:
| Checkpoint | Distance (Round Trip) | Elevation Change | Water Availability |
|---|---|---|---|
| First Tunnel | 0.1 miles | Minimal | None |
| Second Tunnel | 1.8 miles | ~500 feet | None |
| Mile-and-a-Half Resthouse | 3.0 miles | ~1,200 feet | May–October (seasonal) |
| Three-Mile Resthouse | 6.0 miles | ~2,000 feet | May–October (seasonal) |
| Havasupai Gardens | 9.0 miles | ~3,000 feet | Year-round |
| Plateau Point | 12.0 miles | ~5,000 feet | None |
2025 Trail Conditions
Before heading out, check the latest trail updates. Plateau Point is closed for maintenance until May 15, 2025. According to the National Park Service:
"Offering big views, morning and afternoon shade, resthouses, vault toilets, and drinking water during the summer, this trail offers an excellent first trip into the canyon."
Temperature and Safety Considerations
Temperatures can vary widely, with a swing of up to 60°F – from 40°F at the trailhead to over 100°F near Indian Garden. Proper preparation is critical to ensure a safe hike.
Essential Planning Tips
- Water Management
- Confirm water availability at the Visitor Center before starting.
- Bring enough water for the entire trip.
- Remember: the return climb takes about twice as long as the descent.
- Trail Etiquette
- Step to the uphill side when mule trains pass.
- Stay still and quiet, following the wrangler’s instructions.
- Wait for all mules to pass before continuing.
- Timing Your Hike
- Start early to avoid the heat.
- Allow extra time for the uphill climb.
- Plan rest stops into your schedule.
The trail’s design accommodates mule traffic, keeping the descent steady even in steep sections. One of the tougher parts is Jacob’s Ladder, a series of sharp switchbacks. Indian Garden offers the only shaded rest area, providing much-needed relief from the sun.
4. Delicate Arch Trail – Arches National Park
The Delicate Arch trail is your gateway to one of Utah’s most famous natural landmarks – a towering 52-foot sandstone arch that’s even featured on the state’s license plates. It was also part of the 2002 Winter Olympic Torch relay. This 3-mile round-trip hike offers a chance to explore a breathtaking desert landscape.
Trail Specifications
| Feature | Detail |
|---|---|
| Total Distance | 3 miles (round-trip) |
| Elevation Gain | 480 feet |
| Average Time | 1 hour 35 minutes |
| Difficulty | Moderate to moderately strenuous |
| Best Time to Visit | Early morning or late evening |
| Water Sources | None – bring at least 2 liters per person |
Trail Conditions and Safety
This trail isn’t for the unprepared. With no shade and often intense conditions, hikers should plan carefully. The path includes a steep slickrock section that can be slippery when wet or icy, adding to the challenge. Rangers frequently assist hikers who underestimate these conditions.
Photography Tips
Delicate Arch, standing 52 feet tall and 33 feet wide, is an incredible sight, especially with the La Sal Mountains in the background. For the best photos, visit between mid-afternoon and sunset. The lighting during this time enhances the dramatic scenery, making your effort worthwhile.
Essential Safety Guidelines
- Water and Weather Preparedness
Bring at least 2 liters of water per person. If you’re hiking during winter, pack grippers, spikes, or crampons to navigate icy sections safely. - Trail Etiquette
On narrow sections, especially along the sandstone fin, step toward the rock wall to let others pass safely. Avoid the drop-off side.
Planning Your Visit
The trail begins at the Wolf Ranch parking area, which fills up quickly during busy seasons. Arriving early is your best bet to secure a spot.
sbb-itb-5a98267
5. Skyline Trail – Mount Rainier National Park
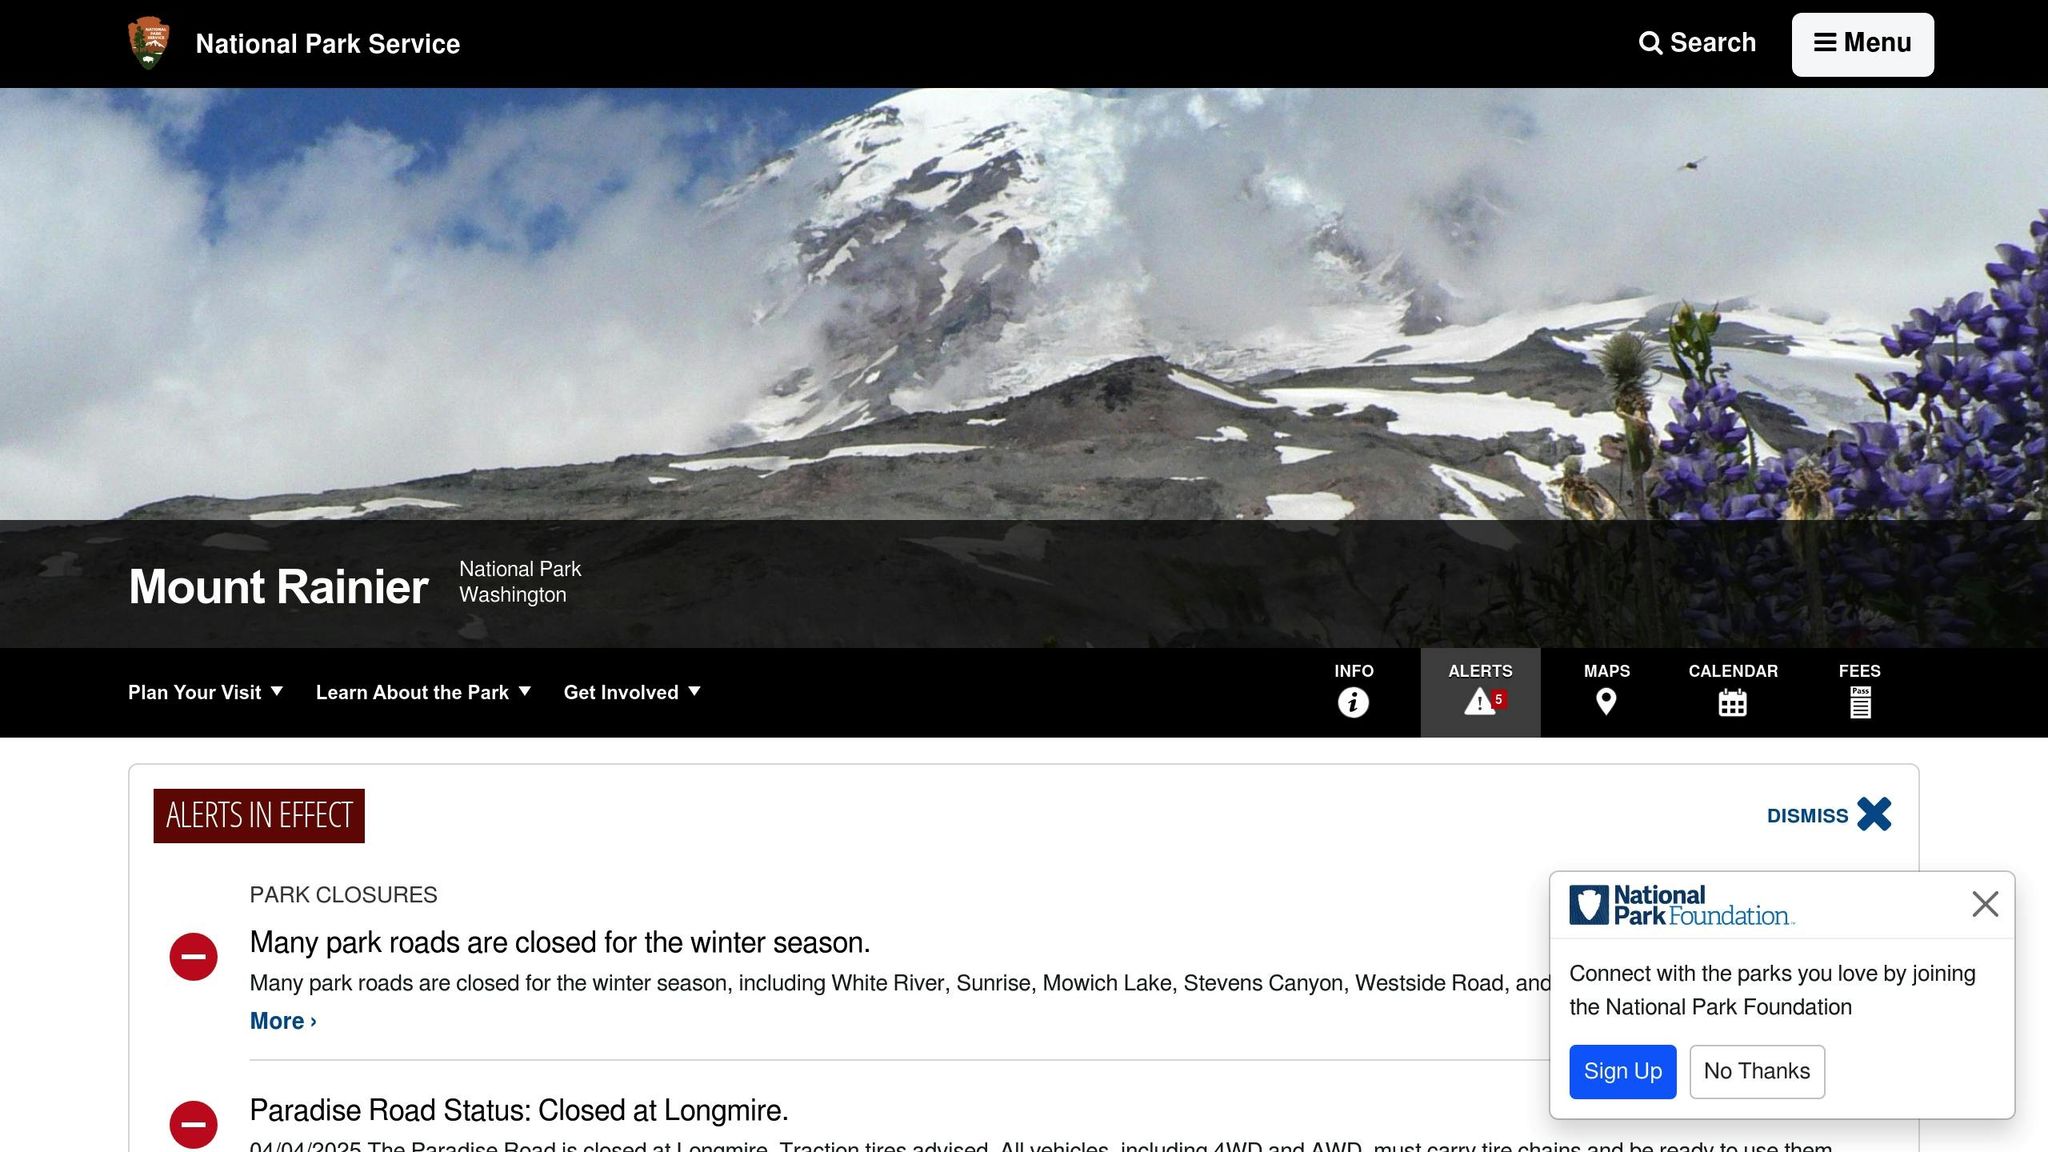
The Skyline Trail is a standout hike in Mount Rainier National Park. This 5.5-mile round-trip trail starts at Paradise and offers stunning alpine scenery, including glaciers, waterfalls, and colorful wildflower meadows. On clear days, Panorama Point provides views of Mount St. Helens, Mount Adams, and Mount Hood. The subalpine meadows are at their best from July to August. Here’s what you need to know to plan your adventure.
Trail Specifications
| Feature | Detail |
|---|---|
| Total Distance | 5.5 miles (round-trip) |
| Elevation Gain | 1,700 feet |
| Highest Point | 6,800 feet |
| Average Time | 4 hours |
| Difficulty | Moderate |
| Best Season | Mid-July to Mid-October |
Highlights and Scenic Views
The trail’s Panorama Point is a must-see, offering expansive views of the Nisqually Glacier and vibrant wildflower meadows during their peak.
Accessibility and Trail Conditions
The first section of the Skyline Trail is partially paved, making it easier for a variety of visitors. Power chair users can navigate this segment independently, while manual chair users may need assistance to reach Myrtle Falls.
Key Planning Tips
Hiking expert Karen Sykes suggests choosing the Skyline Trail if you only have time for one hike on a sunny day.
- Permits and Entry: A National Park Pass is required. If visiting between May 24 and September 2, you’ll also need an advance reservation for park entry.
Weather and Safety Advice
From October to May, bring spikes or snowshoes, hiking poles, and extra layers to handle sudden weather changes. Starting early helps avoid crowds and ensures better visibility. Stop by the Henry M. Jackson Visitor Center for updated trail maps and conditions before heading out.
6. Fairyland Loop – Bryce Canyon National Park
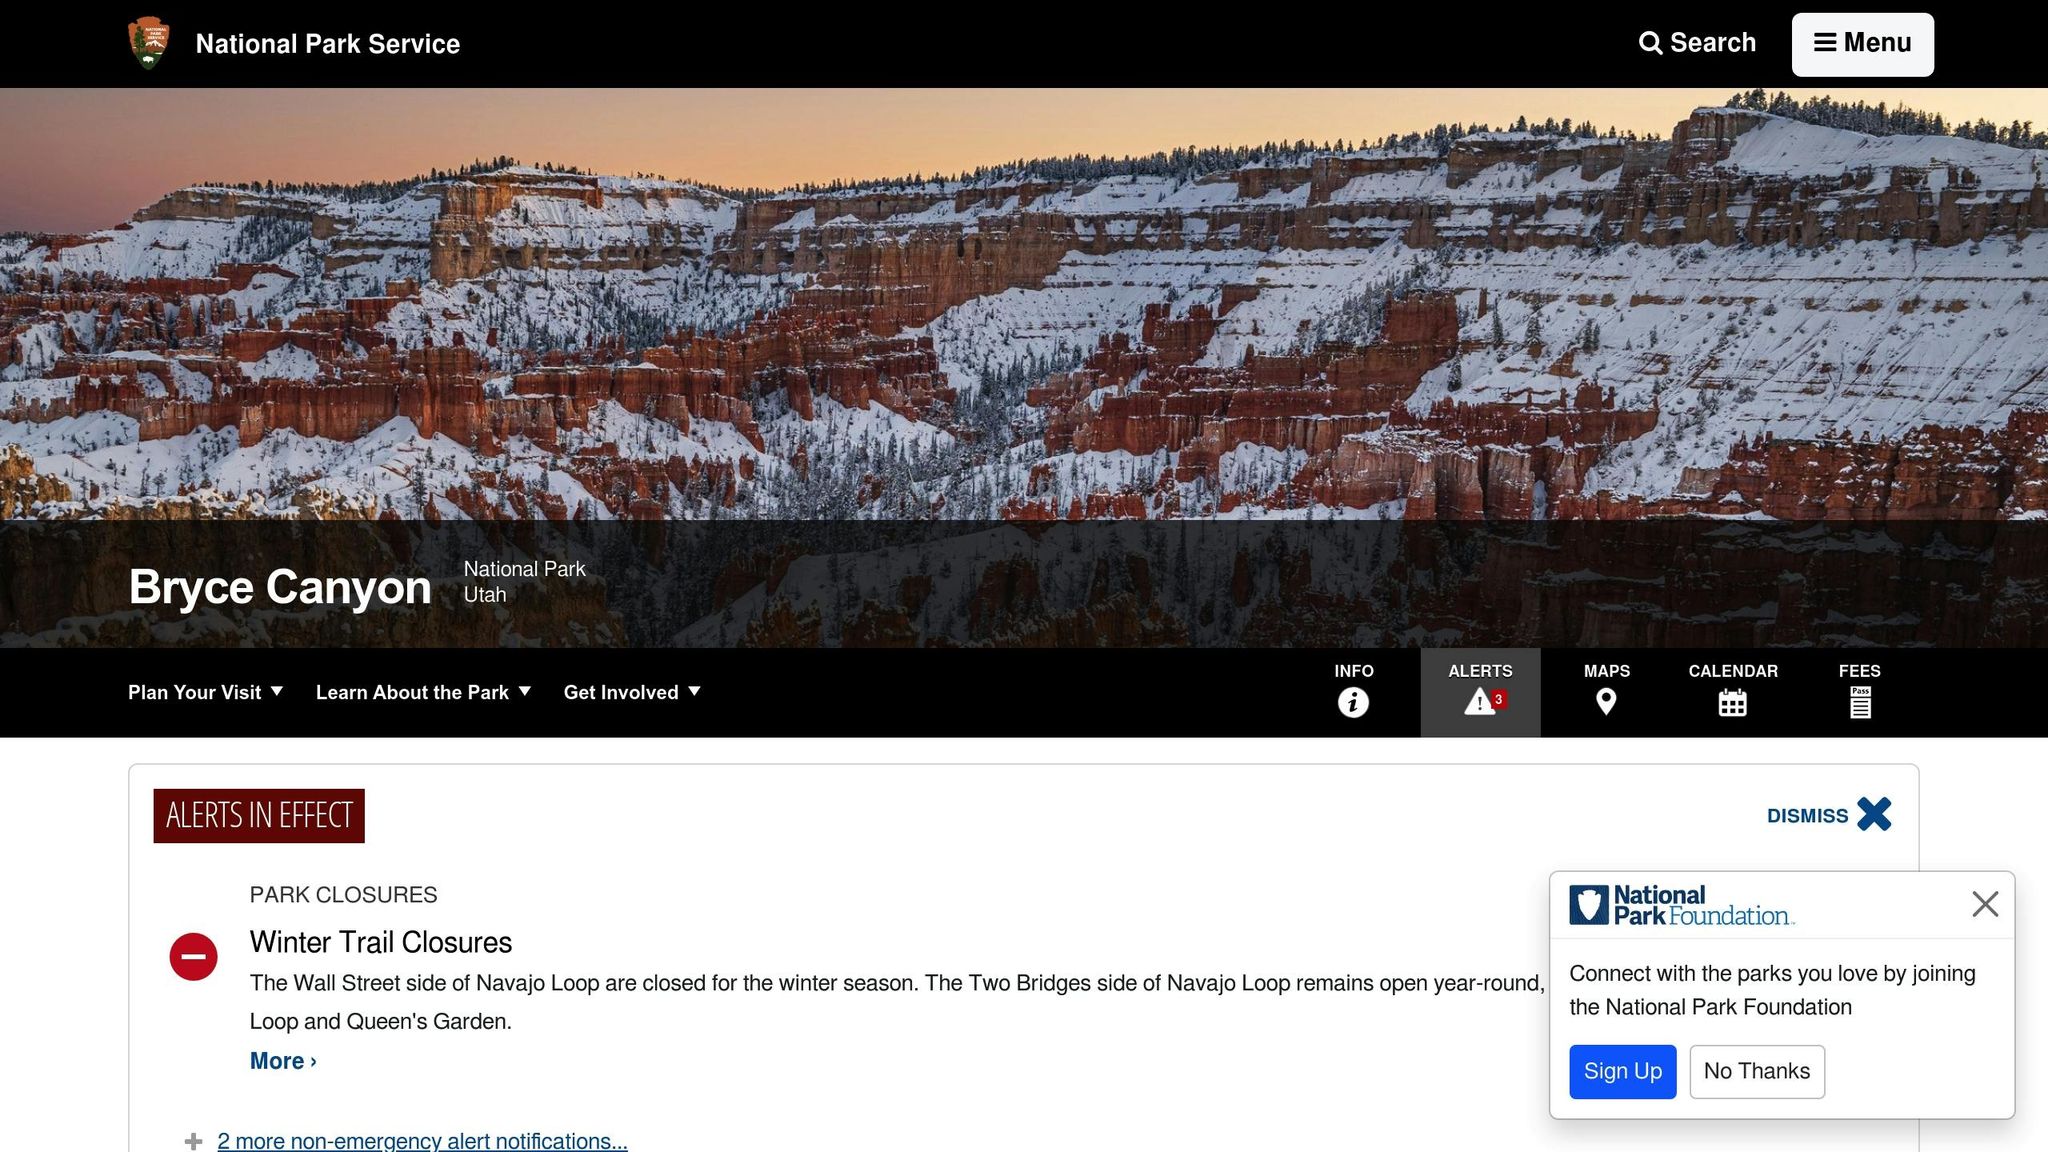
The Fairyland Loop Trail is an 8.3-mile hike that takes you through some of Bryce Canyon National Park’s most striking scenery. Tucked away in the park’s northern area, this loop offers a moderately challenging experience and is a quieter way to enjoy the park’s famous hoodoo formations and dramatic views.
Trail Details
| Feature | Detail |
|---|---|
| Total Distance | 8.3 miles (loop) |
| Elevation Change | 950 feet |
| Difficulty | Moderate |
| Best Season | April through October |
| Trail Access | Fairyland Point or Sunrise Point |
Highlights of the Trail
This trail takes you through lower-elevation areas compared to the park’s southern routes. Along the way, you’ll encounter landmarks like Tower Bridge and Chinese Wall, as well as canyons, ridges, pinnacles, and wooded sections.
What to Expect
The Fairyland Loop is less crowded than other trails, making it a peaceful option for hikers. However, the area near Tower Bridge can attract more visitors, so plan accordingly.
This trail is a perfect example of Bryce Canyon’s incredible natural beauty and is just one of many unforgettable hikes the park has to offer.
7. Emerald Lake Path – Rocky Mountain National Park
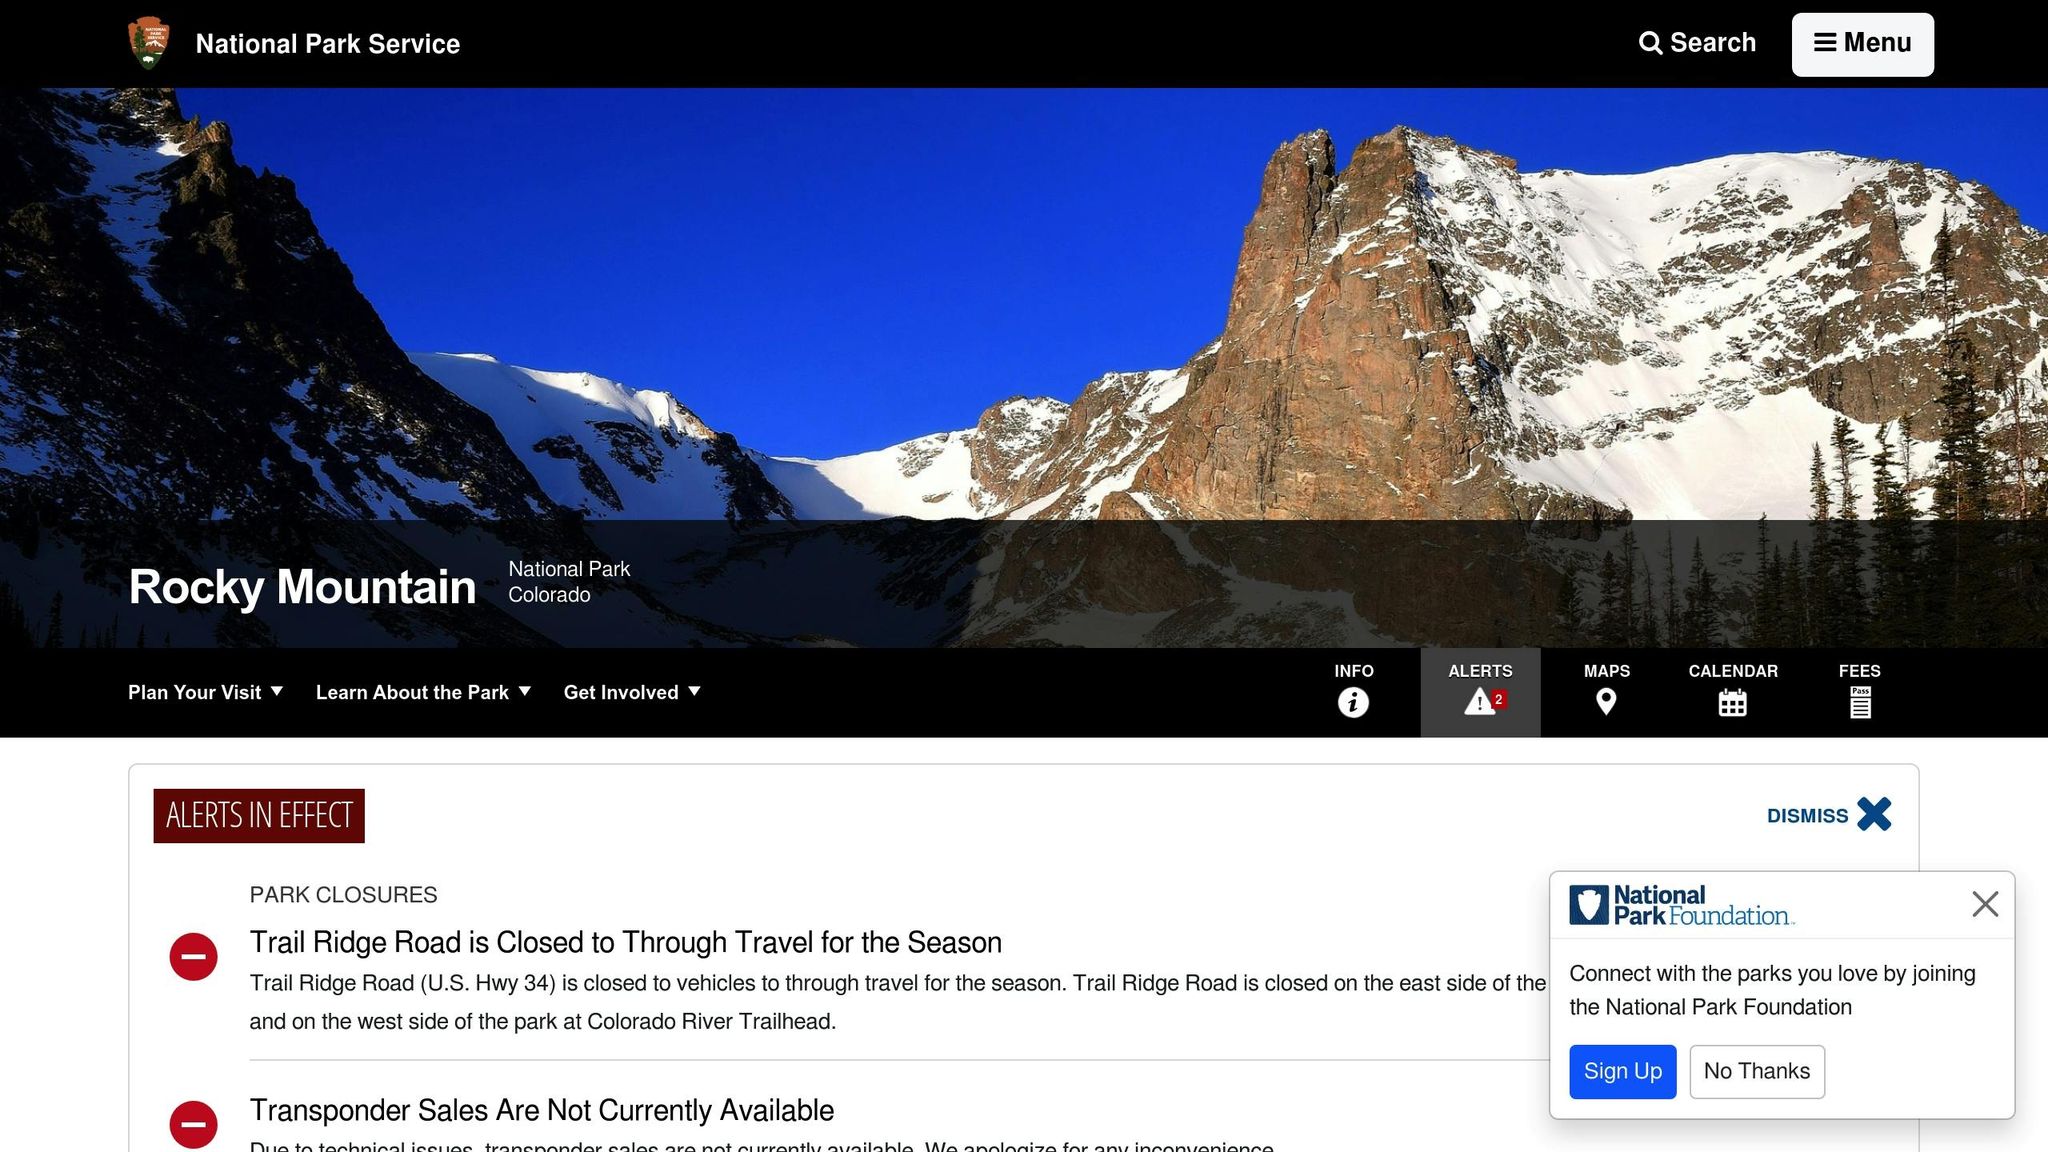
The Emerald Lake Path offers a breathtaking alpine hike through picturesque mountain lakes and stunning vistas. Starting at the Bear Lake Trailhead, located at 9,475 feet, the trail climbs to Emerald Lake, which sits at an elevation of 10,111 feet.
Trail Details
| Feature | Detail |
|---|---|
| Total Distance | 3.2 miles (round trip) |
| Elevation Gain | 406 feet |
| Starting Elevation | 9,475 feet |
| Difficulty | Easy |
| Best Season | May through October |
| Estimated Time | 1 hour 20 minutes |
Planning Your Visit
To access the Bear Lake Road area during peak season, you’ll need a timed entry permit between 5:00 AM and 6:00 PM. Parking at the Bear Lake Trailhead fills up quickly in the summer, so arriving before sunrise is highly recommended. Alternatively, you can use the park’s shuttle service. Be sure to make advance reservations for the Bear Lake Road corridor to guarantee access to the trail.
Weather and Altitude Tips
Hiking at high altitudes requires preparation, as mountain weather in Colorado can shift quickly, often bringing afternoon thunderstorms. Here’s how to stay safe:
- Start early to avoid afternoon storms.
- Pack extra layers for temperature changes.
- Carry plenty of water.
- Consider using trekking poles for better stability.
Winter Access
Hiking this trail in winter requires additional preparation. Bring the right gear and knowledge to stay safe in snowy conditions:
- Micro-spikes or snowshoes, depending on trail conditions.
- Winter hiking experience.
- Avalanche safety equipment and awareness.
- Extra warm clothing and emergency supplies.
The Emerald Lake Path is a fantastic way to experience the beauty of the Rockies, offering well-maintained trails and unforgettable views. Ready for more adventure? Check out the Lost Mine Trail at Big Bend National Park.
8. Lost Mine Trail – Big Bend National Park
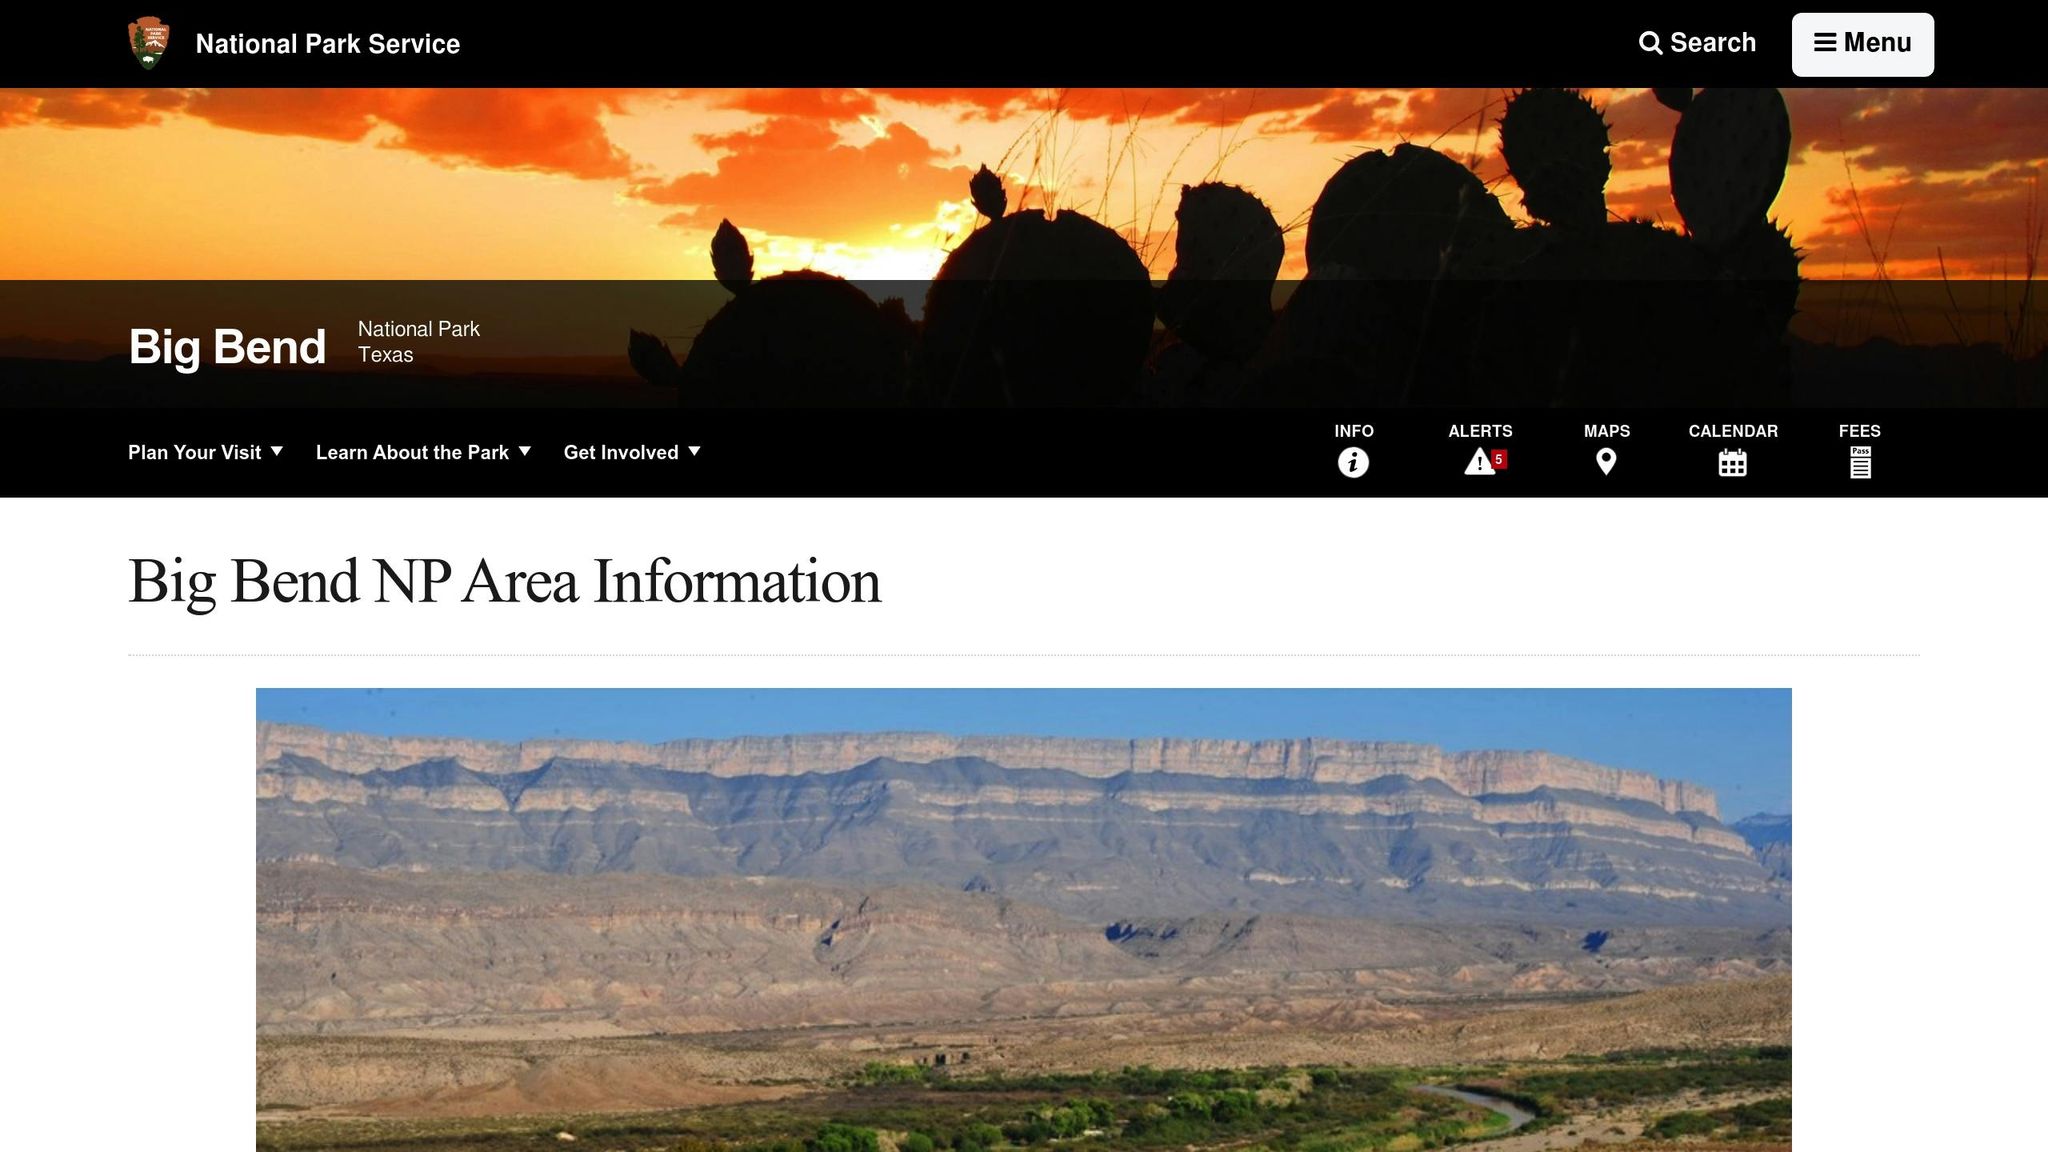
The Lost Mine Trail is one of the must-see hikes in Big Bend National Park. It offers stunning panoramic views of Casa Grande, Juniper Canyon, Pine Canyon, and the Chisos Basin Mountains. Here’s everything you need to know to plan your hike.
Trail Details
| Feature | Detail |
|---|---|
| Total Distance | 4.8 miles (round trip) |
| Hiking Time | About 3 hours |
| Location | 5.1 miles from Basin Road start |
| Best Season | October to May |
| Difficulty | Moderate |
| Peak Times | Sunrise and sunset |
Weather and Timing
The best time to hike is between October and May, when temperatures are more comfortable. Summers can be extremely hot, making the hike much harder. Start your trek early in the morning to avoid the heat and secure parking. Bring extra layers for cooler mornings and evenings, as winds near the summit can be strong. Hiking during sunrise or sunset not only avoids the crowds but also provides incredible lighting for photos.
Safety Tips
Big Bend’s desert conditions require careful preparation. Always bring plenty of water, wear sunscreen, and use a wide-brimmed hat to protect yourself from the sun. Since the trail passes through areas with mountain lions and black bears, keep children nearby and stay alert. If you encounter a mountain lion, stand your ground and avoid running. Take breaks in shaded spots to stay cool and energized.
Wildlife and Vegetation
As you climb, you’ll experience the unique environment of the Chisos Mountains. The trail is home to a mix of desert plants and offers chances to spot local wildlife, making the journey as interesting as the destination.
Planning Your Trip
To make the most of your hike, check the weather forecast before heading out. Weekdays are less crowded, and you’ll want to set aside extra time to enjoy the scenic viewpoints along the way. With its blend of breathtaking views and a moderate challenge, the Lost Mine Trail is a must-do for anyone visiting Big Bend National Park.
Planning Your National Park Hikes
Use these tips to make your national park hikes as enjoyable as the trails themselves.
Permit Requirements and Reservations
Many trails require permits, so it’s important to check the specific park’s process. For instance, some parks use a lottery system for popular trails like Half Dome. Between April and October 2025, several parks will implement timed entry systems. Here’s a quick overview:
| Park | Reservation Period | Booking Window |
|---|---|---|
| Arches | April – October | 3 months ahead |
| Mount Rainier | Late May – Early September | 3 months ahead |
| Rocky Mountain | Late May – Mid-October | Month prior |
| Glacier | Late May – Mid-September | 120 days ahead |
Once your permits are secured, be ready for changing weather and gather all the gear you’ll need.
Weather Considerations and Timing
After getting your permits, check the weather forecast. Aim for hikes when temperatures are between 50°F and 70°F (10°C–21°C). Spring and fall often provide the best conditions, but every season has its own challenges. Mornings are ideal for cooler temperatures and fewer crowds, especially in summer when afternoon thunderstorms are more likely.
Plan your hike timing carefully, and bring gear to handle sudden weather changes.
Essential Gear and Safety
Make sure to pack these ten essentials:
| Category | Key Items |
|---|---|
| Navigation | Maps, compass, GPS |
| Protection | Sunscreen, sunglasses, hat |
| Insulation | Jacket, gloves, rain shell |
| Illumination | Headlamp, flashlight |
| First Aid | Basic medical supplies |
| Fire | Matches, lighter |
| Tools | Multi-tool/knife |
| Nutrition | Extra food |
| Hydration | Water, filtration system |
| Emergency | Space blanket, shelter |
If you’re hiking at elevations above 8,000 feet, allow time to adjust to avoid altitude sickness. Check park alerts and visitor centers for the latest trail conditions.
For those visiting multiple parks, consider purchasing the America the Beautiful Pass. It covers entry fees ($30–$35 per vehicle) and can save you money. Keep in mind, additional permit fees ($1–$6) might still apply.