
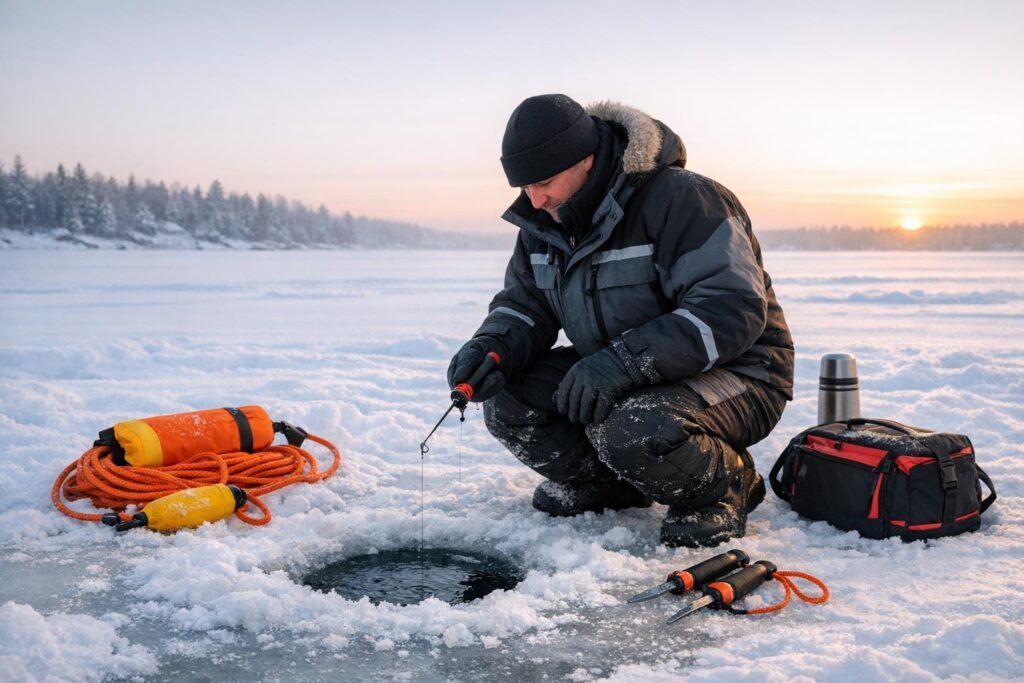
Ice fishing can be dangerous without proper preparation. Falling through thin ice, getting caught in a blizzard, or facing extreme cold can turn deadly fast. Here’s how to stay safe:
- Ice Safety: Only clear, solid ice (blue or black) is reliable. Avoid white or gray ice. Minimum thickness: 4 inches for walking, 8–12+ inches for vehicles.
- Gear Essentials: Always carry ice picks, a throw rope, waterproof clothing, a flotation device, and a whistle. Pack spare dry clothes in a waterproof bag.
- Emergency Actions: If you fall in, stay calm, control breathing, and use ice picks to pull yourself out. For hypothermia or frostbite, replace wet clothes, warm the core, and call for help.
- Trip Planning: Share your plan with someone onshore, avoid fishing alone, and use GPS or maps to mark safe routes.
Preparation is key. With the right tools, knowledge, and precautions, you can enjoy ice fishing while staying safe.
Complete Guide To Ice Fishing – #1 – Ice Safety
Ice Safety Basics
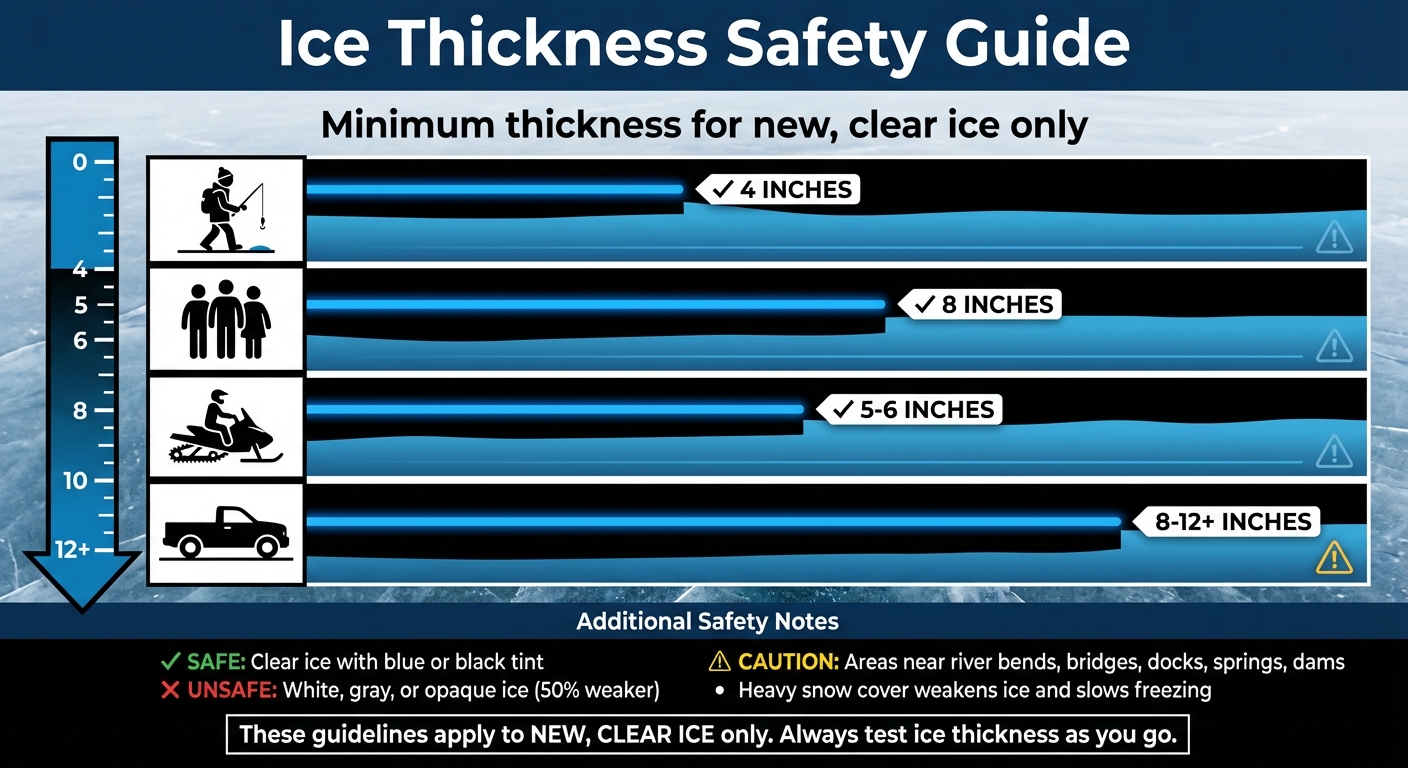
Ice Thickness Safety Guidelines for Ice Fishing Activities
Before stepping onto ice, it’s essential to know what makes it safe – or unsafe. The strongest ice is clear with a blue or black tint, formed when temperatures drop quickly, creating dense, solid sheets. On the other hand, white or opaque ice, often made from refrozen snow or slush, is weaker because it contains air pockets – only about half as strong as clear ice. Be cautious of gray or dark areas, as these often signal melting or water beneath the surface, making the ice unstable. Signs of thawing, like cracked or soft ice near the shoreline, visible slush, or ice pulling away from the land, are clear red flags.
| Activity | Minimum Ice Thickness |
|---|---|
| Single angler on foot | 4 inches |
| Groups on foot | 8 inches |
| Snowmobiles or ATVs | 5–6 inches |
| Small vehicles | 8–12+ inches |
These thickness guidelines apply only to new, clear ice. Be extra cautious around areas like river bends, bridges, docks, or near springs and dams, as flowing water can weaken the ice. Heavy snow cover is another factor – it slows freezing and adds extra weight, reducing the ice’s ability to support loads. Below are tips to help you identify safe ice, check its thickness, and stay safe while fishing.
How to Identify Safe Ice
The best ice for safety is solid, clear, and blue or black in color. Avoid white or opaque ice, as it’s weaker and less dependable. Also, stay away from areas with visible water, discolored patches, or cracks. Before heading out, it’s a good idea to check with local bait shops or resorts for updates on thin spots or changing conditions. Local knowledge can be invaluable.
Testing Ice Thickness as You Go
Always carry an ice spud or chisel and use it to tap the ice ahead of you. If the tool breaks through with a single, solid tap, the ice is too thin – turn back immediately. Another important tool is an auger, which you can use to drill test holes at regular intervals, especially when nearing areas like inlets, pressure ridges, or spots where the ice changes color.
When conditions are uncertain, such as after fresh snow, warmer temperatures, or visible cracks, increase the frequency of your tests. To reduce risk, travel in single file with plenty of space between people. Pull heavy gear, like sleds or shelters, behind you so the ice is tested before it bears your full weight. And remember, safety isn’t just about the ice – it’s also about having a plan and the right precautions.
Never Fish Alone
Having a fishing partner can be life-saving in an emergency. A partner can assist in a rescue without putting themselves in unnecessary danger. Before heading out, share your trip details with someone onshore. Include who’s going, the fishing location, your planned route, access points, start and return times, and any details about vehicles or snowmobiles.
Carry a waterproof, fully charged cell phone and a loud whistle to signal for help if needed. For remote or large lakes with limited cell service, consider bringing FRS/GMRS or marine-band radios for backup communication. Staying alert to changing ice conditions is critical, and having a partner ensures someone is there to help if the unexpected happens.
Emergency Survival Gear for Ice Fishing
Having the right gear can mean the difference between a close call and a disaster when you’re out on the ice. Anglers who carry essential tools and keep them accessible are far better equipped to handle emergencies. Always pack these critical items before heading out, and make sure to keep life-saving gear on your person – not stashed away in a sled where it could be out of reach if you fall through the ice.
Flotation and Insulation Equipment
Your first line of defense is a U.S. Coast Guard–approved personal flotation device (PFD) or an ice fishing float suit. These are designed to keep your head above water and provide buoyancy if the ice gives way, giving you precious minutes to act before cold shock or hypothermia sets in. Float suits go a step further by combining buoyancy with insulation, keeping you warm throughout your trip while also serving as emergency flotation. Regular winter clothing, once soaked, becomes heavy and loses its ability to insulate – making a PFD or float suit a must-have.
Waterproof insulated boots are also essential, helping to retain body heat and prevent frostbite during long hours in freezing conditions. Additionally, always carry a full set of spare dry clothing in a waterproof dry bag. If you manage to pull yourself out of the water, changing into dry layers immediately can significantly improve your chances of avoiding hypothermia. Store the dry bag in your sled or shelter for quick access, and include a thermal (space) blanket and chemical hand warmers to help restore circulation and body heat.
Self-Rescue Equipment
Self-rescue tools are non-negotiable in ice emergencies. Ice picks (also known as ice claws or awls) are among the most important tools you can carry. Worn around your neck or kept in an easily accessible pocket, these sharp-handled picks allow you to grip solid ice and use a kicking motion to pull yourself out of the water while staying horizontal to distribute your weight. Rescue experts emphasize that ice picks are a "basic precaution" that can save lives.
A throw rope or throw bag (at least 50 feet long) is another critical item. It allows someone on solid ice to help pull a victim to safety without risking their own life by approaching the weak spot. To further ensure your safety, carry a pealess whistle for signaling help when yelling isn’t enough, and a water-resistant flashlight or headlamp to improve visibility during low-light conditions or whiteouts.
Navigation and Signaling Equipment
Once you’re equipped with flotation, insulation, and self-rescue tools, the next step is ensuring you can navigate and signal for help when conditions worsen. A handheld GPS unit, paired with a magnetic compass and a paper map of the lake, provides reliable navigation even in poor visibility. Mark key locations like the shoreline, access points, and your shelter as waypoints in the GPS. Unlike smartphones, which often fail in freezing temperatures, modern GPS devices are built to withstand the cold. Keep your GPS and spare batteries in an inner pocket to keep them warm, and always know the compass bearing back to shore.
For signaling, a high-output flashlight or headlamp with a strobe feature can send an SOS signal at night. Chemical light sticks (glow sticks) are excellent for passive marking – crack one and hang it on your shelter, sled, or auger to make your location visible in a whiteout. You can also use a series of glow sticks to mark a safe path back to shore. Adding reflective markers or tape to your gear, like tip-ups, sleds, and shelters, makes it easier for rescuers to spot you with headlights or flashlights, especially in blowing snow or other low-visibility conditions.
sbb-itb-5a98267
How to Handle Ice Fishing Emergencies
Being prepared for emergencies during ice fishing can make all the difference, whether it’s saving your own life or someone else’s. Here’s how to handle some of the most common ice fishing crises.
What to Do If You Fall Through Ice
Falling through ice is a life-threatening situation, but keeping calm is your first and most important step. When you hit the icy water, your body may experience cold shock, causing an involuntary gasp reflex that peaks within the first 1–3 minutes. To avoid inhaling water, focus on controlling your breathing with slow, deliberate breaths until the shock subsides.
Once you’ve steadied your breathing, turn toward the direction you came from – the ice there is more likely to hold your weight. Spread your arms out on the ice to keep yourself afloat, and use ice picks or your hands to pull yourself up while kicking forcefully. After getting back on the ice, don’t stand up right away; instead, roll or crawl to distribute your weight and move toward thicker ice or the shore.
When you reach a safe location, immediately remove your wet clothes, dry your skin, and put on dry layers if you have them. If no dry clothing is available, wring out your wet layers and wear them under a windproof shell to retain some insulation. Warm your core with blankets, body heat, or chemical hand warmers, and call 911 – even if you feel okay – since cold-water immersion can lead to delayed complications like dangerous heart rhythms.
If someone else falls through the ice, follow the steps below to assist without endangering yourself.
How to Rescue Someone Who Fell Through
Rushing toward the hole to help someone can lead to more victims. Instead, use the PREACH-REACH-THROW-ROW-GO method to safely assist:
- PREACH: From a safe distance, encourage the person to stay calm and horizontal while you call 911. Give clear instructions like, “Kick and roll toward the edge.”
- REACH: Lie flat on the ice to distribute your weight and extend an object – such as a branch, pole, or ladder – toward the person. If they pull you toward the hole, let go immediately and reposition farther back.
- THROW: Toss a rope, throw bag, or floating object like a personal flotation device or cooler. Make sure they secure it before their strength gives out.
- ROW: If possible, push a lightweight boat or sled across the ice while staying low. This provides a stable platform to pull the person to safety.
- GO: Leave entering the water to trained rescuers with proper equipment. Your role is to call for help and assist from a safe distance.
When Caught in a Blizzard or Whiteout
Sudden blizzards or whiteouts can be disorienting and dangerous. If visibility drops and you can’t see fixed landmarks, sheltering in place is often the safest choice. Use any available cover – an ice shanty, your vehicle, or even a snow wall you dig yourself – to block the wind, which is the main driver of frostbite and hypothermia.
Layer up with extra clothing or emergency blankets to conserve body heat, and use hand warmers or chemical heat packs on your core and extremities. If you’ve marked your route with GPS waypoints or reflective stakes, retrace your steps carefully in groups, stopping if your path becomes unclear.
According to NOAA winter safety data, exposed skin can freeze in as little as 10–30 minutes in typical Great Lakes wind chills. Cover all exposed areas, monitor each other for signs of frostbite, and call for help early using precise GPS coordinates. If you’re in a heated shelter, ensure proper ventilation to prevent carbon monoxide poisoning.
Treating Hypothermia and Frostbite
Hypothermia begins with shivering, clumsiness, slurred speech, and confusion. As it worsens, shivering stops, and the person may become drowsy or irrational, with a slowing pulse and breathing. Handle the person gently to avoid triggering dangerous heart rhythms. Replace wet clothing with dry layers and insulate them with blankets or sleeping pads. Apply heat to the trunk with warm bottles or chemical packs wrapped in cloth, but avoid direct heat or rubbing. If the person is alert, offer warm, sugary drinks; if not, do not give anything by mouth and call for emergency medical help immediately.
Frostbite starts with tingling and numbness, progressing to pale, waxy skin and eventually hard, frozen areas that may blister when rewarmed. Move the person to a warmer area and rewarm the affected area in water between 99°F and 104°F. Prevent refreezing, protect the skin with loose dressings, and avoid rubbing or using dry heat. Seek medical attention immediately for severe frostbite or if the person shows signs of hypothermia.
Escaping a Vehicle or Snowmobile That Breaks Through
If your vehicle or snowmobile plunges through the ice, act fast. Unbuckle your seatbelt immediately and open or break a window – water pressure will make doors nearly impossible to open. Don’t waste time grabbing gear; exit through the window as quickly as possible. If the ice around you is still intact, climb onto the roof or hood to stay above water.
Once out, move away from the vehicle by crawling or rolling to spread your weight. Use ice picks to pull yourself to thicker ice or shore, staying horizontal and kicking forcefully. If others are present, rely on the PREACH-REACH-THROW method to assist without putting yourself at risk. Once safe, address any signs of hypothermia and call 911 immediately.
Planning Ahead to Prevent Emergencies
Emergencies on the ice can often be avoided with careful preparation. Choosing the right location, sharing your plans, and managing your gear load are key steps to staying safe.
Picking Safe Locations and Routes
When selecting a spot, smaller, sheltered lakes or ponds are generally safer than large reservoirs or rivers. Areas with moving water, such as river mouths, inlets, or near structures, tend to weaken the ice, creating hidden danger zones. Before venturing out, check with local experts or your state’s Department of Natural Resources to get updates on ice thickness, recent weather patterns, and known hazards like pressure ridges or slushy areas.
Use tools like maps or GPS to mark areas to avoid, such as feeder streams, docks, dam structures, or places with cracks or open water. Plan both your main route and an alternate path to shore, marking safe access points like public landings or boat ramps with GPS waypoints. Aim to wrap up your trip well before dark, as daylight makes it much easier to spot potential risks like cracks or thin ice.
Once you’ve identified a safe location, take the time to create a detailed plan.
Making a Trip Plan and Sharing It
Write down all the critical details: the name of the lake, parking location, planned route, fishing area, contact information, vehicle description, and your schedule. Share this plan with someone you trust so they can alert emergency services if you fail to check in at the agreed time. Keep your phone in a waterproof case and close to your body to protect it from the cold and preserve battery life.
Set a clear turnaround time and stick to it if conditions start to deteriorate. A solid plan is the foundation of safe ice activities.
Managing Weight on the Ice
Another crucial factor is keeping the weight you bring onto the ice under control to prevent unnecessary strain on its surface.
Even thick ice has limits, and too much weight in one spot can lead to cracking or even a breakthrough. Spread out your gear using sleds or toboggans instead of piling everything in one area. Avoid driving vehicles on the ice unless absolutely necessary, and if you must, confirm the ice thickness and avoid stopping for extended periods.
When crossing questionable ice, space people out at least 10 feet apart. Distribute weight by staggering heaters, shelters, and other equipment. Also, remember that deep, wet snow adds extra weight and can weaken the ice below. If the ice barely meets safety guidelines, it’s better to wait for improved conditions or choose another location. Your safety is worth the extra caution.
Conclusion
Ice fishing can be a safe and enjoyable activity when approached with preparation, the right gear, and a clear plan for handling emergencies. The basics are simple but crucial: check local ice conditions before heading out, test ice thickness as you go, share your trip details with someone onshore, and avoid fishing alone. These steps are widely recommended by state agencies and seasoned anglers across the U.S. for good reason – they significantly reduce the chances of accidents.
Your survival kit is your lifeline. Pack essentials like ice picks, a 50-foot throw rope, a flotation device, a whistle, a waterproof phone, dry clothes, and a compact first-aid kit. These items are inexpensive compared to the cost of a rescue and can make all the difference if you fall through the ice. If that happens, remember this sequence: stay calm, turn back toward the direction you came from, get horizontal, use your ice picks to pull yourself out, then roll away from the hole and head to shore immediately.
If someone else falls through, call 911 first and use the REACH–THROW–ROW method to help, avoiding direct contact that could put you at risk too. For hypothermia or frostbite, take immediate action: replace wet clothing with dry layers, insulate the person from the cold ground, and seek medical attention, even if they seem to recover.
Every outing should be treated like a winter backcountry mission. Careful planning, proper gear, and practiced skills not only keep you safe but also let you focus on what really matters – the serenity of the lake, the thrill of the catch, and quality time with loved ones. At Adventurism.co, we believe that preparation is the foundation of every successful adventure, and that mindset applies to every outdoor pursuit.
FAQs
How do I know if the ice is safe for ice fishing?
To stay safe on the ice, it’s crucial to check its thickness. As a general rule: 4 inches is safe for walking, 5-7 inches can support snowmobiles or ATVs, and 8-12 inches is needed for vehicles. Pay attention to the ice’s color – clear, blue, or green ice is usually stronger, while white, gray, or black ice may signal weakness or instability. Use tools like an auger or chisel to test the ice in multiple spots, and watch for warning signs like cracks, slush, or flowing water. Always adhere to local safety recommendations and remain mindful of changing conditions.
What should I do if I fall through the ice while ice fishing?
If you fall through the ice, the first thing to do is stay calm and focus on controlling your breathing. Facing the direction you came from is a smart move since that ice is likely to be more stable. Spread your arms out over the surface to evenly distribute your weight, and kick your legs to help push yourself back onto the ice. Once you’re out, roll away from the hole instead of standing up immediately – this helps prevent the ice from cracking again.
After getting to solid ground, find shelter as quickly as possible to warm up and avoid hypothermia. If you can, take off any wet clothing and put on dry layers. Should you feel disoriented or unable to warm up, don’t hesitate – get medical help right away.
What gear should I always have for ice fishing emergencies?
When heading out for ice fishing, being ready for emergencies is non-negotiable. Make sure to have ice picks handy; they can save your life if you need to pull yourself out after falling through the ice. A personal flotation device is another must-have for added safety, along with a whistle to alert others if you’re in trouble.
Pack essentials like a small first aid kit, extra warm clothing stored in a waterproof bag, a flashlight, and a multi-tool to handle unexpected situations. Also, carry a fully charged cell phone in a waterproof case so you can call for help if necessary. A little preparation can go a long way in ensuring your safety out on the ice.