
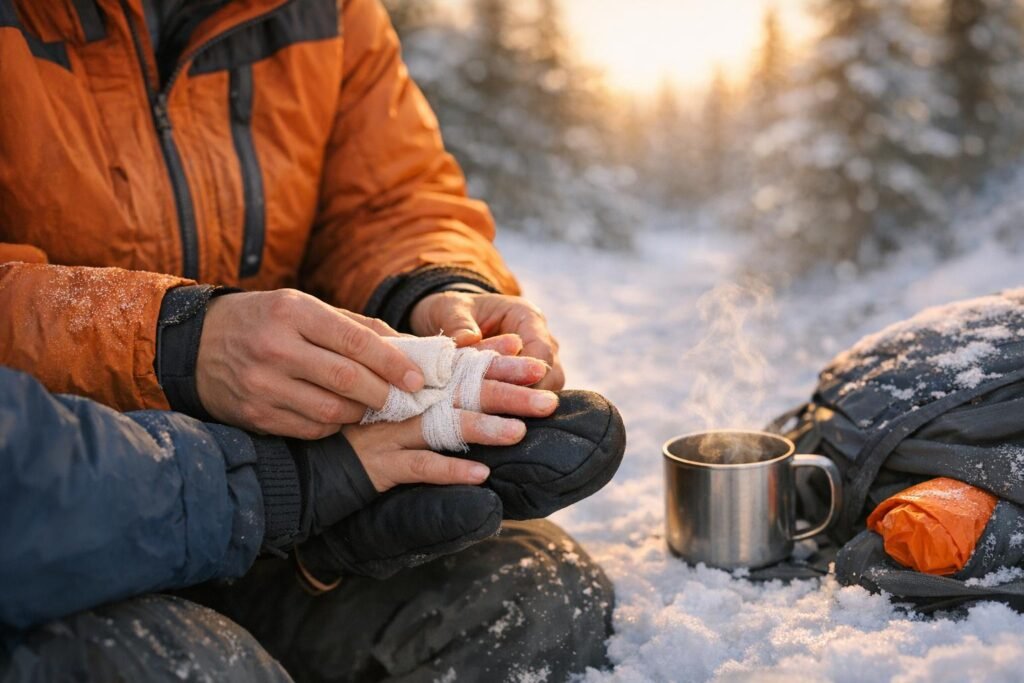
Frostbite is a serious risk when exposed to freezing temperatures, especially in the wilderness. It damages tissue when the skin and underlying layers freeze. Acting quickly is critical to prevent long-term harm. Here’s what you need to know:
- Early Signs: Red or pale skin, tingling, and cold sensations. Can progress to numbness and hard tissue.
- Immediate Steps: Get to shelter, remove wet clothing, and protect the affected area from further damage. Avoid rubbing the skin.
- Rewarming: Use a warm water bath (98–102°F) or body heat. Never use direct heat like fires or heaters, as they can cause burns.
- Post-Rewarming Care: Apply loose, dry dressings, keep the area elevated, and avoid movement.
- When to Seek Medical Help: Persistent numbness, dark blisters, or hard, cold skin after rewarming signal the need for professional care.
Preparation is key. Dress in layers, monitor for symptoms, and act fast if frostbite occurs. Follow these steps to manage frostbite effectively and reduce risks of lasting damage.
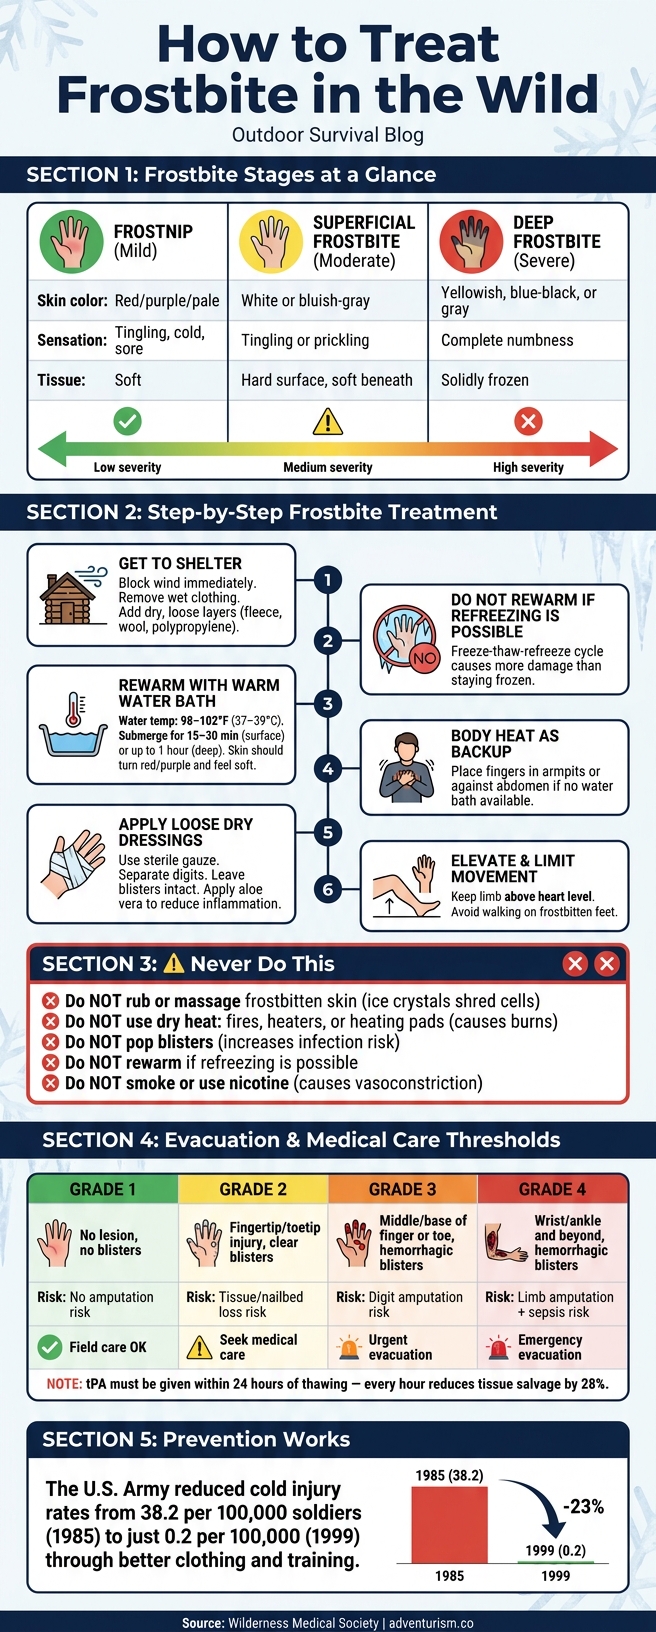
How to Treat Frostbite in the Wild: Step-by-Step Guide
Wilderness Medicine: Frostbite – Rewarming
sbb-itb-5a98267
How to Recognize Frostbite: Symptoms and Severity
Frostbite can sneak up on you, numbing nerves and concealing serious damage. Spotting the symptoms early can make all the difference.
Early Signs of Frostbite
The earliest stage, known as frostnip, causes the skin to turn red, purple, or pale. It feels cold, sore, and tingly, but the tissue remains soft. If you warm up right away, there’s no lasting harm. The next stage, superficial frostbite, changes the skin to a white or bluish-gray color. While the surface feels hard, the tissue underneath still gives slightly when pressed. At this point, tingling may shift to prickling sensations.
A handy field tip is the "press test": Gently press the skin. If it feels firm but still indents a little, it’s likely superficial frostbite. It’s also a good idea to have someone else check areas like your face and ears, which you might not notice yourself.
If these signs worsen, you may be dealing with more serious tissue damage.
Severe Frostbite Symptoms
Deep frostbite is far more serious. The skin becomes completely hard and numb, and you may lose the ability to move nearby joints or muscles.
"The final amount of tissue damage is directly related to the time it stays frozen, not to the temperature to which it was exposed." – WebMD
After rewarming, monitor the affected area closely for the next 24 to 48 hours. Clear, fluid-filled blisters are a relatively good sign, suggesting damage is only superficial. However, dark or blood-filled blisters are more concerning, as they indicate deeper tissue damage and a higher risk of permanent injury, including necrosis – when the skin turns black and forms a hard crust.
Here’s a quick breakdown of what to watch for at each stage:
| Stage | Skin Color | Sensation | Tissue Feel |
|---|---|---|---|
| Frostnip | Red, purple, or pale | Tingling, cold, sore | Soft |
| Superficial | White or bluish-gray | Tingling or prickling | Hard surface, soft beneath |
| Deep | Yellowish, blue-black, or gray | Complete numbness | Solidly frozen throughout |
Understanding these signs is essential before finding shelter and carefully warming the affected area.
Step 1: Get to Shelter and Stop Further Cold Exposure
When frostbite strikes, the first thing you need to do is get out of the cold. Every second in freezing conditions worsens the damage, so act fast. This step lays the groundwork for proper rewarming and recovery.
Find Shelter and Add Dry Layers
Look for any place that blocks the wind, like a tent, hut, or even a vehicle. Wind protection slows down tissue freezing, giving you precious time. Strip off any wet clothes immediately and replace them with dry, loose layers made of materials like fleece, wool, or polypropylene.
Remove anything tight or constrictive right away. As the tissue warms, swelling will occur, and tight items can cut off circulation, making things worse. When adding layers, keep them loose – wrapping too tightly can cause similar problems.
"If environmental conditions are such that thawed tissue could refreeze, it is safer to keep the affected part frozen until a thawed state can be maintained." – Wilderness Medical Society
This advice is critical. If you’re far from a warm, stable environment, don’t thaw the frostbitten area yet. The freeze-thaw-refreeze cycle does far more damage than leaving the tissue frozen until you can ensure it stays thawed. Stick to cold-weather safety protocols to avoid refreezing.
Protect the Frostbitten Area from Further Damage
Don’t rub or massage the frostbitten skin. Ice crystals within the tissue can shred cells if the area is manipulated. Instead, gently blot away moisture. If you have dry gauze or sterile cotton, loosely place it between frostbitten fingers or toes to keep them separated.
Pad and splint the affected area to prevent further injury during transport. If walking on a frozen foot is unavoidable, it’s better than thawing it prematurely and risking refreezing. Treat the frostbitten limb with care – it’s as fragile as it gets right now. Once you’ve found shelter and stabilized the situation, you’ll be ready to rewarm the tissue properly.
Step 2: Rewarm Frostbitten Tissue the Right Way
Before anything else, make sure you’re in a stable, warm environment where refreezing won’t be a risk. Rapid rewarming is crucial to saving tissue, but the method you choose can make all the difference – doing it incorrectly could lead to burns or worsen the damage.
Using a Warm Water Bath
Once you’re in a safe spot, rewarming the frostbitten area should be your next priority. The best way to do this is with a warm water bath. Choose a container that allows the affected area to be fully submerged without touching the sides or bottom. The water temperature should be between 98°F and 102°F (37–39°C) – comfortably warm, not hot. If you don’t have a thermometer, someone with an uninjured hand can test the water for about 30 seconds to ensure it’s safe to use.
You’ll need to keep the water at this temperature, replacing it as necessary. Rewarming typically takes 15 to 30 minutes for surface-level frostbite and up to an hour for deeper injuries. You’ll know it’s working when the skin turns red or purple and feels soft and pliable. Keep in mind, this process can be painful, but it’s crucial to continue until the tissue is fully rewarmed.
"The most common error in this stage of treatment is premature termination of the rewarming process because of reperfusion pain." – Medscape
Using Body Heat
If you don’t have access to a warm water bath, body heat is a backup option. You can place frostbitten fingers in your armpits or press them against your abdomen. A companion can also help by using their body heat. While this method is slower and less effective for more severe frostbite, it’s safe and doesn’t carry the risk of burns.
What Not to Do When Rewarming
There are some critical mistakes to avoid during rewarming. Never rub the frostbitten tissue – this can dislodge ice crystals and cause further damage. Stay away from dry heat sources like fires, heaters, or heating pads, as these can lead to burns, especially since frostbitten skin often loses its ability to sense temperature.
"Direct dry heating using fire or a heater can lead to burns secondary to loss of temperature sensation and so should be avoided." – Medscape
Keep the heat moist and controlled, and don’t forget to remove rings, watches, or tight clothing that could restrict circulation. These small steps can make a big difference in the recovery process.
Step 3: Care for the Area After Rewarming
Once the affected tissue has been safely rewarmed, the focus shifts to immediate post-care to support recovery. At this stage, the tissue is fragile and needs careful attention to avoid further damage. Proper dressings, minimal movement, and elevation are key steps to aid healing and reduce swelling.
Apply Loose, Dry Dressings
Let the skin air dry or gently blot it – never rub. A thin layer of aloe vera gel or cream can help reduce inflammation by counteracting harmful substances like prostaglandins and thromboxanes. Afterward, cover the area with loose, dry, sterile gauze. Swelling is a natural response, and loose dressings paired with elevation can help manage it. For frostbitten fingers or toes, place small pieces of gauze between each digit to prevent them from sticking together. If blisters have formed, leave them intact – popping or disturbing them increases the risk of infection.
"A recently thawed extremity should ideally not be used for walking, climbing, or other maneuvers and should be protected to prevent further trauma." – Wilderness Medical Society
Limit Movement and Keep the Area Elevated
Once dressings are applied, protect the area by restricting movement. Elevate the affected limb above heart level whenever possible to prevent fluid buildup in the injured tissue. Walking on frostbitten feet or toes should be avoided unless it’s absolutely necessary. If movement cannot be avoided, splint or pad the area to minimize motion during transport. This helps safeguard the vulnerable tissue and improves the chances of recovery until professional medical care is available.
When to Get Medical Help
Once immediate threats are addressed in the field, it’s crucial to keep monitoring for signs that require professional medical attention. While superficial frostbite can often be managed with basic care, deeper injuries demand prompt evacuation to prevent long-term damage.
Signs That Need a Doctor
If, after rewarming, the skin remains hard, cold, and white – or begins to darken – seek medical help immediately. Blisters are another critical sign: clear or milky blisters typically indicate a superficial injury, while persistent numbness that doesn’t resolve after rewarming is another serious warning.
To gauge the severity of frostbite, wilderness medicine experts often rely on the Cauchy classification system. This system predicts the extent of injury based on how far it extends after rewarming:
| Cauchy Grade | Extent of Injury (Post-Rewarming) | Blister Type | Amputation Risk |
|---|---|---|---|
| Grade 1 | No visible lesion | None | None |
| Grade 2 | Fingertip or toetip | Clear blisters | Tissue/nailbed loss |
| Grade 3 | Middle or base of finger/toe | Hemorrhagic | Digit amputation |
| Grade 4 | Wrist or ankle and beyond | Hemorrhagic | Limb amputation and sepsis risk |
Grades 3 and 4 are severe and require hospital-level treatments. One option is tissue plasminogen activator (tPA), a clot-busting drug that must be administered within 24 hours of thawing. Delays are costly – every hour reduces the tissue salvage rate by 28%. Another treatment, the vasodilator iloprost, can be used up to 72 hours after injury. Research shows that none of the patients treated with iloprost required amputation, compared to 60% of those receiving standard care. Unfortunately, neither of these treatments is available in the field.
"If you notice any of the symptoms of the second or third stages of frostbite, get immediate medical treatment to prevent long-lasting damage." – Cleveland Clinic
Pain Relief and Hydration During Evacuation
If evacuation becomes necessary, managing pain and maintaining hydration are essential. Ibuprofen serves a dual purpose during this time: it alleviates pain while also reducing prostaglandins and thromboxanes – compounds that contribute to tissue damage. The Wilderness Medical Society recommends a dose of 12 mg/kg per day, split into two doses, with a maximum of 2,400 mg/day. Administer this as soon as possible.
Hydration is equally critical, as dehydration can further restrict blood flow. Additionally, ensure the patient avoids smoking or using nicotine products, as nicotine causes vasoconstriction, which slows the healing process. Throughout the evacuation, keep the rewarmed limb elevated, protected, and immobile to minimize further injury.
Conclusion: Staying Safe in Cold Weather
Frostbite is a serious condition, but the good news is that it’s highly avoidable. The U.S. Army demonstrated this on a large scale – by upgrading clothing standards and implementing better cold-weather training, they managed to cut cold injury rates from 38.2 cases per 100,000 soldiers in 1985 to a mere 0.2 per 100,000 by 1999. This dramatic improvement highlights the power of preparation and awareness.
"The adage that ‘prevention is better than treatment’ is especially true for frostbite, which is typically preventable and often not improved by treatment." – Wilderness Medical Society
The best defense against frostbite is preparation. Before venturing into freezing conditions, dress in several light, loose layers rather than a single bulky coat. Opt for moisture-wicking materials like wool or polypropylene, and choose mittens over gloves to keep your hands warmer by reducing exposed surface area. Ensure your boots fit properly – not too tight, as restricted circulation can quickly lead to frostbite.
When you’re out in the cold, stay vigilant. Check your own skin and your companions’ every 10–20 minutes for signs like numbness or pale patches. Frostbite is tricky because the numbness it causes can mask pain, your body’s natural warning signal. If you notice frostnip – a milder form of frostbite – act fast. Warming the area immediately with body heat can stop it from progressing into something more serious.
If frostbite does occur, prioritize these steps: seek shelter, rewarm the affected area only if there’s no chance of it refreezing, protect thawed tissue, and evacuate for professional care if the damage goes beyond the superficial. Acting quickly and correctly can make all the difference in preventing long-term harm. For more tips on cold-weather safety and outdoor survival, visit Adventurism.co.
FAQs
How can I tell frostnip from real frostbite?
Frostnip is a mild condition that affects the skin temporarily. It may cause redness, numbness, tingling, or slight pain, but it doesn’t result in permanent tissue damage. Once the skin is warmed, these symptoms typically go away.
Frostbite, on the other hand, is much more serious. It involves the actual freezing of tissue and presents symptoms like white or waxy skin, swelling, numbness, and sometimes blisters or even areas that turn black. Unlike frostnip, frostbite can cause permanent damage and needs immediate medical care.
The main difference lies in severity: frostnip is superficial and reversible, while frostbite can lead to long-term harm.
Should I rewarm it if it might refreeze?
If there’s any chance of the frostbitten area refreezing, don’t attempt to rewarm it. Rewarming followed by refreezing can lead to even more severe tissue damage. Only rewarm the area if you’re absolutely sure it will remain warm afterward. If you can’t guarantee this, it’s better to wait until you’re in a stable, warm environment to prevent further harm.
What pain meds are safest for frostbite in the field?
When dealing with frostbite in the field, nonsteroidal anti-inflammatory drugs (NSAIDs) are the safest choice for managing pain. Among these, ibuprofen is the go-to option. It’s best to start ibuprofen as early as possible and continue its use until the affected area has healed or surgery is required. This medication not only helps with pain relief but also minimizes tissue damage. If ibuprofen isn’t an option, aspirin (ASA) serves as a reliable alternative, offering similar benefits for pain control and recovery support.