
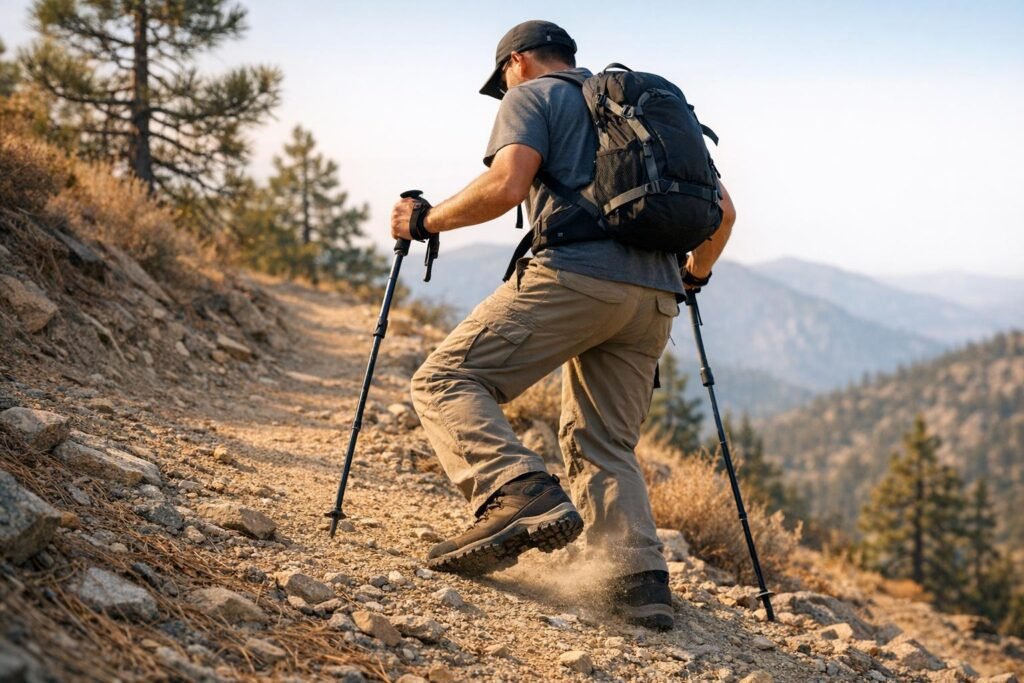
Descending a trail can be harder on your body than climbing up. It puts more strain on your muscles and joints, increasing the risk of soreness and injury. To stay safe and comfortable, follow these 10 tips:
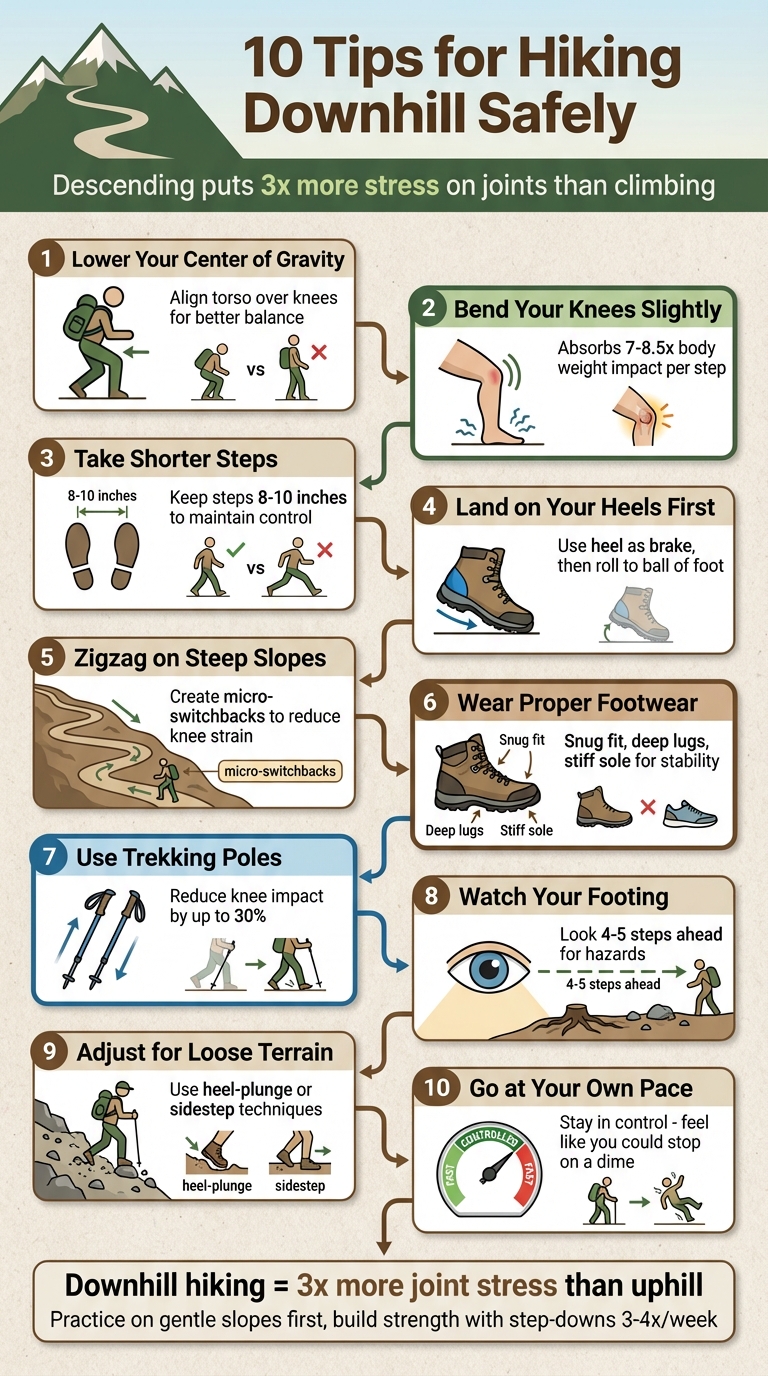
- Lower your center of gravity: Keep your torso aligned over your knees for better balance.
- Bend your knees slightly: Soft knees absorb impact and reduce joint stress.
- Take shorter steps: Control momentum and avoid overstriding to protect your joints.
- Land on your heels first: Use your heel as a brake to stabilize your descent.
- Zigzag on steep slopes: Side-to-side movements reduce strain on your knees.
- Wear proper footwear: Snug boots with good traction prevent slips and blisters.
- Use trekking poles: They reduce knee impact by up to 30% and provide extra stability.
- Watch your footing: Look 4–5 steps ahead to avoid loose rocks and slippery spots.
- Adjust for loose terrain: Use techniques like heel-plunging or sidestepping on scree.
- Go at your own pace: Stay in control and avoid rushing, even if others are faster.
These techniques will help you descend trails safely, reduce fatigue, and protect your body from unnecessary strain. Focus on controlled movements, proper gear, and pacing yourself to enjoy your hike without injury.
10 Essential Techniques for Safe Downhill Hiking
How To hike Downhill | Reduce pain when going downhill
sbb-itb-5a98267
1. Keep Your Center of Gravity Low
Keeping your center of gravity low is crucial for staying stable on steep terrain. When your center of gravity is too high, you become top-heavy and more likely to lose your balance. A lower stance not only enhances control but also allows you to respond quickly to changes in the ground beneath you.
To achieve this, align your torso directly above your knees and avoid leaning too far forward or backward. Gates Richards, Associate Director of Wilderness Medicine at the National Outdoor Leadership School, explains:
You want to feel like you could stop on a dime. If you don’t think you can, slow down.
Picture a basketball player in a defensive stance: feet shoulder-width apart, knees slightly bent, and head up. This position helps keep your weight centered while allowing your body to stay flexible and ready to adjust to uneven surfaces.
One common misstep is standing too upright. While it might feel instinctive to straighten up and "fight" gravity, this can shift your weight over your back leg, making your front foot more likely to slip. Instead, lean forward slightly at the hips to evenly distribute your weight. If your backpack starts pulling you forward, loosen the top straps to regain balance. This posture promotes stability and control, especially during descents.
2. Bend Your Knees Slightly
Keeping your knees slightly bent is a simple yet crucial way to reduce the impact on your body when heading downhill. This small adjustment helps absorb the shock of each step, which can otherwise place significant stress on your joints.
Why is this important? Well, during a descent, each step can put 7 to 8.5 times your body weight on your knees. If your knees are locked, that force bypasses your muscles and goes straight to your bones and joints. Gates Richards from the National Outdoor Leadership School explains the issue with locked knees:
If your legs are fully extended when your heels strike the ground, your muscles won’t be able to help absorb the impact.
In other words, locked knees leave your joints to take the hit, increasing the risk of pain and injury.
By keeping your knees "soft" – slightly bent – you allow your quadriceps to act as a braking system, controlling your descent. This technique spreads the load across your muscles, reducing strain on your joints. While this might leave your quads sore, Richards points out that "sore tissue will bounce back much quicker than your pummeled joints and bones".
To take it a step further, bend your ankles, knees, and hips together. This distributes the force more evenly across your muscles, shifting the stress from shear force (which can cause lingering pain) to compressive force (which your body handles better). Physical therapist Mandie Majerus adds:
Maintain a slight bend in the knees, but mostly remember to avoid tensing up throughout your body, as if you’re trying to preempt a spill by resisting gravity.
This bent-knee posture naturally encourages shorter, more controlled steps, keeping your center of gravity directly over your feet. The result? Better stability on uneven ground and less strain on your joints.
3. Take Shorter Steps
Taking shorter steps while descending helps you stay in control and minimizes strain on your joints. Longer strides can build momentum, leading to higher forces when your foot hits the ground. This extra force gets transferred to your muscles and joints, increasing the risk of discomfort or injury.
Asen Stoyanchev from Gear Up Hiking explains:
Any time you can choose smaller steps you will decrease the impact on the joints. The longer the step the more momentum builds up creating a higher force you have to control when your foot touches down.
Short steps also improve stability by keeping your center of gravity aligned over your feet. This alignment reduces the chance of overextending or falling. In contrast, long strides can cause your front leg to lock out, tiring your muscles more quickly and increasing the risk of a misstep or fall.
A helpful tip: try to keep your steps within 8 to 10 inches – roughly the height of a standard stair. This range helps maintain control and lessens the impact on your joints. Beyond this height, especially when carrying a pack, many hikers lose muscular control, resulting in a harsh "thud" instead of a smooth landing.
Additionally, shorter steps engage your glutes more effectively. These muscles are stronger than your quads and help shift the load to your hips, making the descent easier on your body. For better stability and muscle engagement, aim for a heel-to-toe transition with each step.
4. Land on Your Heels First
Once you’ve nailed proper posture and shorter steps, focusing on a heel-first landing can make a big difference in stabilizing your descent. Landing on your heel engages your leg muscles to act as brakes, helping you manage gravity’s pull. This keeps you from feeling like you’re hurtling downhill uncontrollably, especially on steep slopes.
Your heel provides a more stable anchor than your toes or midfoot. Grayson Haver Currin, a hiking columnist at Outside Online, explains:
You’ll modulate momentum this way by counteracting gravity from your very position. Too, you’re using a more stable part of your foot.
Landing on your toes, on the other hand, can leave you feeling unstable. It increases the chance of your foot sliding forward, which could lead to a sudden and dramatic loss of balance.
Hiking boots are designed to support this heel-first technique. Many feature heel lugs that grip loose dirt, gravel, or mud when you plant your heel firmly. On steep or slippery terrain, try the "plunge step." This involves leaning back slightly and driving your heel into the surface, cutting into it to create a secure platform. This technique helps prevent forward sliding and sets you up to use your stronger leg muscles.
Speaking of muscles, landing on your heel also activates your glutes more effectively. As Asen Stoyanchev from Gear Up Hiking points out:
To maximize glute engagement, make sure your heel is on the ground rather than on your toes.
Your glutes are stronger than your quads and better suited to handle the demands of descending. After your heel makes contact, let your foot roll through the arch to the ball. This heel-to-ball transition spreads the impact evenly and absorbs shock. Combined with the other techniques, this approach ensures that the forces of descent are managed efficiently by your body’s strongest muscles.
5. Use a Zigzag Pattern on Steep Slopes
After mastering proper posture and step techniques, consider another approach for tackling steep descents. If you’re navigating a slope without natural switchbacks, creating your own zigzag path can help protect your knees. Instead of heading straight down, move deliberately from one side of the trail to the other in a controlled pattern. These "micro switchbacks" reduce the steepness of your descent, making it easier on your body.
Opting for a zigzag route instead of a direct line shifts the effort required. Your legs will work as if performing continuous squats, which trades off knee strain for a longer, more gradual descent. As Gates Richards, Associate Director of Wilderness Medicine at the National Outdoors Leadership School, explains:
I’ll take distance over basically doing squats all the way down.
This technique also redistributes the load. By zigzagging, your hips take on more of the effort, relieving some of the stress on your knees. This lateral movement engages your hip muscles, offering a much-needed break for your joints.
Zigzagging isn’t just about joint protection – it also improves your control. Moving side to side helps you manage your speed, maintain traction on steep or slippery surfaces, and avoid dangerous momentum. Just be sure to stay within the trail’s width to respect Leave No Trace principles, preventing damage to vegetation and minimizing erosion. This approach promotes a safer, more controlled descent.
6. Wear Proper Footwear and Pack Your Gear Securely
Your boots and backpack are your best allies when tackling downhill terrain. The right footwear gives you the grip and control you need, while a well-packed and secured backpack keeps your center of gravity steady. Get either wrong, and you’re inviting slips, discomfort, and unnecessary strain.
Let’s start with footwear. Your boots should fit snugly, especially around the heel, to avoid pistoning – that annoying up-and-down movement that can lead to blisters and throw off your balance. Aim for about a half-inch of space between your longest toe and the front of the boot. This extra room will save your toes from painful jamming when your feet slide forward on steep descents. When testing boots, try walking on an incline (many stores have ramps for this) and shop in the evening when your feet are naturally a bit swollen – just like they’ll be after hours on the trail.
When it comes to descending, traction is more critical than ankle support. Look for boots with deep, widely-spaced lugs that can shed mud and debris instead of trapping it. A stiff sole is key for keeping your foot stable on uneven ground, while ankle collar height is less important. Before heading downhill, tighten your laces for extra support. If you want even more security, try a surgeon’s knot: unlace down to the eyelet in front of your ankle, twist the laces two or three times, pull them tight, and then continue lacing to the top.
Your backpack setup is just as important. A poorly packed or shifting load can throw off your balance, making you lean backward – exactly what you want to avoid. Keep heavy items like food, water, and your stove packed close to your back and about two-thirds of the way up. Fill gaps with softer items, like clothing, to keep everything from bouncing around. On steep descents, loosen your load lifter straps just slightly. This adjustment allows the pack to pull back a bit, helping you stay centered over your feet rather than fighting against the weight.
7. Use Trekking Poles for Extra Support
Trekking poles can make a big difference when hiking downhill, giving you two extra points of contact with the ground. They act as shock absorbers, reducing up to 30% of the impact that would otherwise strain your knees, hips, and ankles. By sharing the load with your upper body muscles, trekking poles ease the burden typically handled by your quadriceps and the smaller muscles around your knees.
For downhill sections, adjust your poles by lengthening them 2 to 4 inches. This adjustment helps keep your elbows at a comfortable 90-degree angle when the tips touch the ground ahead of you. Plant the poles slightly in front of your body – not directly underneath – to create a braking effect, which helps you control your speed and momentum. On steep descents or when stepping down large drops, plant both poles at the same time and press down on the grips to shift some weight off your lead knee.
"When walking downhill, poles allow the muscles of the upper body to ‘take over’ some of the cushioning tasks often assumed by the quadriceps and smaller, discrete muscles that support the knee." – American Hiking Society
Your grip technique also plays a key role on steep terrain. For maximum leverage, place your palms flat on top of the pole grips and press down. Thread your hand through the wrist strap from below so it cradles the base of your palm – this way, you can transfer weight through the strap instead of relying entirely on your grip. However, on steep and rocky sections, it’s a good idea to remove your hands from the straps. This precaution can help prevent wrist or shoulder injuries if you happen to lose your balance.
Finally, before starting your descent, check that your pole locks are secure. Downhill hiking puts extra pressure on the locking mechanisms, and a pole collapsing mid-step can throw you off balance when you need stability the most.
8. Watch Where You Step
When tackling steep trails, where you place your feet can make all the difference. Loose rocks, sand, and pebbles on hard-packed dirt can act like tiny ball bearings underfoot, causing unexpected slips. A single misstep on an unstable surface can lead to serious consequences, like a twisted or even broken ankle.
To navigate safely, look ahead – about 4–5 steps in front of you – rather than fixating on your current footing. This gives you time to identify the smoothest and most stable path. Think of rocky stretches as unpredictable boulder fields, where every step needs extra care. Pay close attention to hazards like exposed roots, loose gravel, or slippery surfaces caused by water or ice, as these can significantly reduce traction.
"I often compare hiking downhill to clambering through a new-to-me boulder field, when I am acutely aware that each rock may shift and cause me to wipe out." – Grayson Haver Currin, Hiking Columnist
Approach challenging terrain with caution. Move deliberately from one secure spot to the next, especially in steep or cluttered sections. If you’re unsure about the stability of a rock or the depth of mud, use your trekking pole to test it before committing your full weight. Always aim for solid, stable surfaces to maintain control and avoid unnecessary risks.
Keep your weight centered over your feet rather than leaning back. This allows your boot’s lugs to grip the ground more effectively. On steep descents, try angling your feet slightly outward. This technique engages your hips for added stability and reduces strain on your knees, working in harmony with a low center of gravity for better control and balance.
9. Adjust Your Technique for Loose Rock and Gravel
When the trail shifts to loose rock and gravel, your approach needs to change. Unlike stable surfaces, scree – small, broken rock fragments that easily shift – and talus (larger boulders) demand a technique that works with the terrain rather than against it. The goal is to stay in control as the ground moves beneath you.
For steep scree, try the heel-plunge technique: flex your toes toward your shins and drive your heel firmly into the loose debris to form a stable anchor. Hiking columnist Grayson Haver Currin explains:
You’ll modulate momentum this way by counteracting gravity from your very position. Too, you’re using a more stable part of your foot.
Take short, quick steps to recover easily from minor slips. Keep your knees bent – they act like shock absorbers, reducing the strain on your joints as you navigate the shifting terrain.
In particularly steep and unstable areas, descending backward (facing uphill) can give you better control. Another option is sidestepping, where you use the edges of your boots to grip the slope, shifting your weight onto your uphill foot for stability.
Avoid leaning too far back or locking your knees. Instead, keep your weight centered and maintain a slight bend in your knees. Gates Richards, Associate Director of Wilderness Medicine at NOLS, emphasizes:
You want to feel like you could stop on a dime. If you don’t think you can, slow down.
These techniques build on earlier advice, helping you adapt your stance and movements for unpredictable, loose surfaces.
10. Go at Your Own Speed
Hiking downhill might seem easier than climbing, but it can be surprisingly tough on your body. While you may not get as winded, your muscles are constantly working to act as brakes, and your joints take on at least three times more stress compared to going uphill. This braking action, called eccentric contraction, puts a lot of strain on your leg muscles and can lead to serious fatigue.
The trick is to hike at a pace that keeps you in full control. Gates Richards, Associate Director of Wilderness Medicine at the National Outdoors Leadership School, offers this advice:
You want to feel like you could stop on a dime. If you don’t think you can, slow down.
Moving too quickly increases the risk of falling. A steady, controlled pace not only helps conserve your energy but also keeps you safer on the trail.
Don’t feel pressured to keep up with faster hikers. Trying to match their speed can force you into longer strides, which tire your muscles faster and throw off your balance. Instead, focus on creating a consistent, manageable rhythm that prevents your steps from gaining unwanted momentum.
If you’re hiking with others, leave about two body lengths between you and the person ahead. This spacing ensures that one person’s misstep won’t interfere with your balance. Also, make time for short breaks to hydrate and grab a quick snack before fatigue creeps in.
Conclusion
Descending a trail can put up to three times more stress on your joints compared to climbing. To ease this impact, keep your center of gravity low, bend your knees, and take shorter steps. These adjustments allow your muscles to absorb more of the force, reducing the strain on your joints.
Using the strategies outlined – like wearing proper footwear, using trekking poles, zigzagging on steep paths, and pacing yourself – helps distribute the forces more evenly, lowering the risk of injury. Experts agree that these techniques not only reduce muscle fatigue but also boost your confidence when tackling steep descents.
Start practicing on trails with gentler slopes to build your skills and confidence. Gradually, as you master these techniques, you’ll find your movements becoming second nature, even when navigating loose rocks or slippery roots. Incorporating strength exercises, such as forward step-downs and Bulgarian split squats, into your weekly routine (3–4 times a week) can further enhance the muscle strength needed for controlled descents.
Before heading downhill, take a moment to tighten your boot laces, secure your pack straps, and scan the trail ahead for the safest route. These small steps, combined with the techniques you’ve learned, will help you tackle downhill sections with better control and less fatigue. The goal is to descend with confidence, always feeling like you could stop instantly if needed.
FAQs
How do I know if I’m going too fast downhill?
If you notice signs like feeling unstable, losing balance, or having trouble controlling your speed, chances are you’re moving too quickly downhill. Slipping, stumbling, or struggling to navigate obstacles are clear indicators. To stay safe, focus on keeping a balanced posture, take smaller, controlled steps, and stay aware of potential hazards. Adjusting your pace on steep or uneven ground can help prevent falls and minimize strain on your joints.
What downhill technique is safest on loose gravel or scree?
To safely descend loose gravel or scree, it’s crucial to focus on your posture and balance. Keep your center of gravity low by leaning slightly forward at the hips and bending your knees. This stance not only helps you stay steady but also minimizes the chances of slipping on the uneven surface.
How should I adjust my pack and poles for a steep descent?
To maintain stability on steep descents, make sure to tighten your hip belt and shoulder straps to minimize pack movement. Adjust your trekking poles by lengthening them a bit – this provides extra support and balance. Avoid making the poles too short, as this might cause you to lean backward. Instead, lean slightly forward with your knees bent to lower your center of gravity. This approach not only helps prevent slips but also reduces strain on your joints.