

Staying overnight in the great outdoors can be both uplifting and challenging. Between fighting off hordes of insects and staving off hunger, you’ll need a nice campfire if you want to endure the elements and have sustenance to do so, but lighting a match isn’t all it takes to properly set up a campfire, as things like safety, positioning, and the exact use you are hoping to get out of the campfire all play an intricate role in how it should be set up.
What Type of Campfire to Choose for Your Meal?
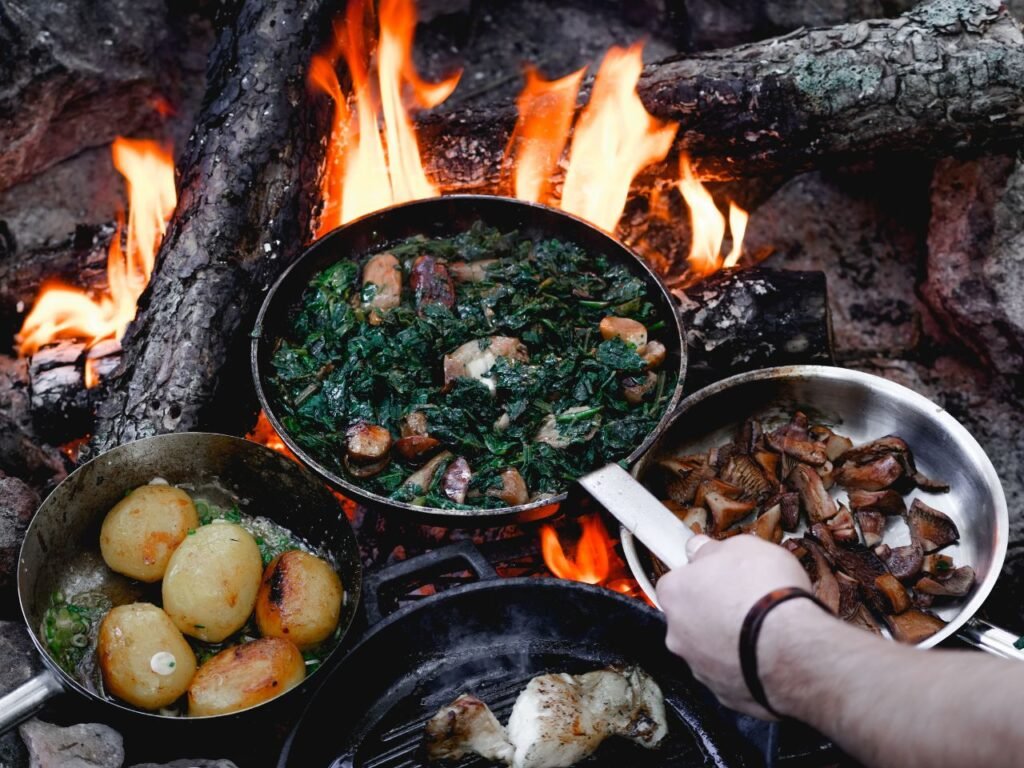
Despite most campfires being fully capable of doubling down on giving you warmth, protecting from certain bugs (depending on the wood you burn), and giving you a slightly better lighting situation at night, the kind of campfire you opt to make will heavily influence the kind of food you are going to be able to make.
If you are short on time and are only wanting to heat something quick, like a can of soup or beans (preferably not IN the can, as poor venting can lead to it exploding and becoming dangerous), alternatively, if time is on your side, you can build a fire that will roar on until late in the night, setting you up to make a large pot of campfire stew, perfect for keeping spirits high and bellies full.
In most scenarios, the type of wood, size and length of the wood itself, and general positioning of the firepit you make will govern how long and how hot the campfire itself will get, as not all woods burn equally, and even more importantly, some types of wood emit smoke that is either an irritant or dangerous to breathe in entirely, so a bit of research on what kinds of things you are attempting to burn would be a wise choice.
1. Prolonged Campfires for Slow Cooking
A slow, clean-burning campfire is made from denser wood types. These types add complexity to the flavors they are exposed to, so consider Sugar Maple, most Fruitwoods (Cherry, Pecan, and Apple), and finally Hickory, with notes on how different scents affect different foods.
Hickory, for example, burns for a long time and creates wonderful scents and flavor for certain meats, making it a prime candidate for cooking brisket over, then perhaps adding pieces to a stew, or using it with any meat you’d cook.
If you’re leaning toward a more vegan palette, the smoke and aroma from Sugar Maple wood live up to its name, leaving a sweet aftertaste on anything cooked over it and pairing well with fruits, veggies, and smaller meats like chicken and pork.
2. Long-Lasting Campfires for Long, Hearty Meals
Woods like Hornbeam and Beech are very dense, meaning it takes longer for them to be reduced to ash and will last for an incredibly long time, and even more importantly, can open the door to more unique cooking options, like coal cooking, a process where you wrap certain eligible food types in foil or even clay (If you intend on cooking with clay, you’ll need a suitable outer layer to surround the food, acting as a barrier for both the clay and obviously any ash that may sneak in; think banana leaves, cabbage leaves, or even parchment paper to aluminum foil.
When cooking over a campfire, especially soups that take hours to make, make sure you cover your food to keep ash, bugs, and leaf litter from drifting in. You can use the same wrapping method for large cuts of meat you want to cook for long periods.
When cooking over these long-lasting campfires, you’ll also want to take some time to set shifts, or give specific timeframes where certain people are watching over the fire and food across the longer time frames, as anything can happen, and having someone keep an eye on open flames is just a precautionary measure to keep not only your friends and family safe, but to prevent wildfires from potentially starting.
3. Quick-Burning Campfire for Quick Meals
Last but certainly not least, quick-burning logs, most notably softwoods, can be used purely to make a flame to cook over, albeit at the cost of less ideal scents and sometimes annoying things like sparking and popping.
A good note here would be to think about woods like spruce or pine that can have small bits of sap that get hot and pop, potentially startling people, or casting ash and kindling outside of the campfire area, proving dangerous if left unattended, not that the wood itself will last long in the first place.
These faster-burning wood types are notorious for leaving bad aftertastes on food, especially when exposed directly to it and not cooked in a sealed container or pot, so things like an ash or soot aftertaste can be much more commonplace than you’d think, offset only by the understanding that it is less likely to happen due to things like cans of soup, or heating smaller pre-made meals having substantially less time to get these ill flavors attached to the food.
How Should You Set Up a Campfire for Cooking?
Scour the forest or campground for a suitable location that is not only away from other people, has a source of water either nearby or procured, to help put the fire out in an emergency, has readily available wood for burning, and finally is spacious enough for any equipment you intend on using, without anyone potentially falling over said cooking pots, or the fire itself.
1. Choose the Right Location
The right location should be, or be very close to, an all-in-one location, having your wood, room, and options to put the fire out; ideally, it isn’t too far away from your method of transportation (meaning you don’t have to hike for miles to get here, unless you want to), and be a respectable distance away from tents that could get within dangerous range of a floating bit of kindling.
It’s worth noting that you can’t simply start a campfire in the middle of an open area; you’ll want to survey what is going on, and carve out a designated spot, free of plant matter in roughly a five-foot area (ten if you are feeling ambitious), and check to ensure the fire itself isn’t nestled on peat, or worse, tree roots that are nestled just beneath the surface.
If you don’t, you can ignite the roots or set the surrounding area ablaze in moments if you aren’t paying attention. You’ll also want to be mindful of not just the surrounding floor, but check your overhead coverage as well; if there are tree branches, limbs, or even man-made structures directly over you, they can be ignited, or keep smoke trapped too low to the ground, proving to be just as dangerous as the fire itself.
2. Gather What Materials You Need to Use
The materials typically apply to the wood types you intend to use throughout your stay, but can also include whatever you plan to use as kindling, plus the equipment, pots, pans, and grates you opt to cook over.
Having these things in place before you set up the fire will make things much less complicated and can be a great way to get family and friends involved, create unique memories, or break the ice with people, or relatives you haven’t met or spoken with in a while!
Fuel (Pick the Right Type of Wood)
As noted above, different woods provide different types of burn, with the best of them complementing flavors or burning for extended periods of time, whilst the wrong ones are merely used for survival alone, offering poor scents and worse aftertastes, but ultimately giving you fire and warmth when choosing them.
You can obviously source wood types on location in real time if you want to, but for true culinary masters, getting the specific wood type for the right flavor balance is imperative. However, you’ll take up a considerable amount of room in your car, truck, or trailer by hauling all the wood you intend to burn for the duration of a camping trip.
While we briefly touched on the kinds of wood that offer benefits for food, scent, or burn, you’ll likely want to research the meal you plan to make and which local woods pair best with it.
Metal Grate
While not entirely a groundbreaking inclusion, it is notable because a metal grate (along with an appropriate metal pairing to rest it on) can let you cook a wider variety of food due to you being able to control the height your pots, pans, and spits are elevated from the fire itself, effectively giving you a way to control the heat and set your own parameters on how fast, or slow, the foods you cook will take.
Metals aren’t all created equal, however, and as you might suspect, different kinds of metal can offer different boons depending on how you utilize them; cast iron gives you a very evenly distributed heat, guaranteeing certain things like meats are cooked to perfection, or staving off burning veggies due to having more precision on the heat itself.
304 Stainless Steel, on the other hand, offers a much more plug-and-play experience, and it’s highly resistant to corrosion and rust. It won’t deform despite exposure to extreme heat. Another feather in steel’s cap is that it often cleans much easier than cast iron, which is a great choice considering how difficult cleaning in the woods can be at times.
Utilize Cast Iron Pots and Pans
As noted above, cast iron offers more control than most other metal types when cooking over a campfire. With proper seasoning and care, you’ll get better flavor pairings when used correctly; remember to use mittens or something similar to protect your hands when pulling the pot from the fire.
3. Build a Stable and Secure Structure
Rome wasn’t built in a day, but your cooking structure definitely could be; while it’s hard to offer an exact building template without knowing what you have available, if it’s built much the same way, it can fall.
If you throw together a structure with spare parts, it’s likely to fall over or be unbalanced. Still, something you plan (perhaps a few good cinderblocks atop a metal grate to keep things simple) can be easy to set up, but much more stable and balanced than whatever rocks are available at the campsite.
4. Make Sure to Zone Your Fire Properly
Safety is always the top priority with open flames, especially when burnable materials like leaves, sticks, twigs, and branches surround you. To keep yourself and others safe, respect that five- to ten-foot perimeter we mentioned earlier, and bring a rake and shovel to remove everything combustible from the campfire area before setting up shop.
This is another fantastic opportunity to get everyone, of all ages, involved in making the camping experience memorable, with young ones able to pick up bundles of sticks. Older kids can help rake large clumps together, and pre-teens and up can clear the clumps, creating a great dynamic where everyone has a place and meaningful interactions that aren’t exactly forced.
5. Clean the Grate Before Cooking Each Meal
In an ideal world, you’d clean your grates when you are done using them, after you remove them from the fire. Still, more often than not you’ll be tired and looking to bed down after deconstructing the fire and putting it out, or packing up to leave, making cleaning the grate a problem for “tomorrow you”, but a little elbow grease in the moment will not only save you time in the future, but also keep everyone safe.
Forgetting to clean your grates even once can leave food particles mingling with fresh food, causing cross-contamination; worse, bug remnants can stick to the grate from heat or from poor cleaning beforehand, adding a gross layer to your next meal if you feel lazy.
6. Maintain the Heat
Any chef worth their weight knows heat determines how efficiently you cook. While you might not have a knob to control the fire’s temperature, you can adjust the height of your grate or tell the difference between a raging fire and one that is about to be reduced to embers.
Observing this, or using specialized scanning thermometers, will let you cook with a bit more know-how under your belt; similarly, knowing when to add more wood to the fire to get it to burn hotter, or how to stoke the flame, is a pivotal skill that can make you a more accomplished chef in the wilds.
7. Put Out the Fire Fully After You Are Finished
Smokey the Bear always said, “Only you can prevent forest fires,” and that is more or less true. Taking the time to not only put the flame out, but also ensure the ground beneath isn’t ready to be set ablaze, and that a spare wind doesn’t cast kindling hundreds of feet into the air around you, is a chore only you can do in the moment.
It is for this reason alone that having readily available water for putting out the fire was mentioned earlier, partially for safety in real time (if a fire got out of control and needed to be put out immediately), or, when it’s served, it’s use, and needs to be taken care of until the next day.
While it isn’t necessarily a rule of thumb, it should be agreed upon that at least two people verify that a fire is fully put out, as the person dousing the fire is usually the last one awake, and we all know we aren’t exactly on our A game when sleep-deprived; for that reason alone, two people shouldering the burden of accountability makes sense.
Conclusion
Creating a suitable campfire for heat is a simple enough request, but hand-crafting a fire that lets you display culinary excellence, with wood choices that impart flavor, creates a world of difference in the experience you want to give your meals. While not everyone needs to aspire to be an artiste in the kitchen, it is fun to explore new methods and cooking possibilities, even if only for self-betterment!