
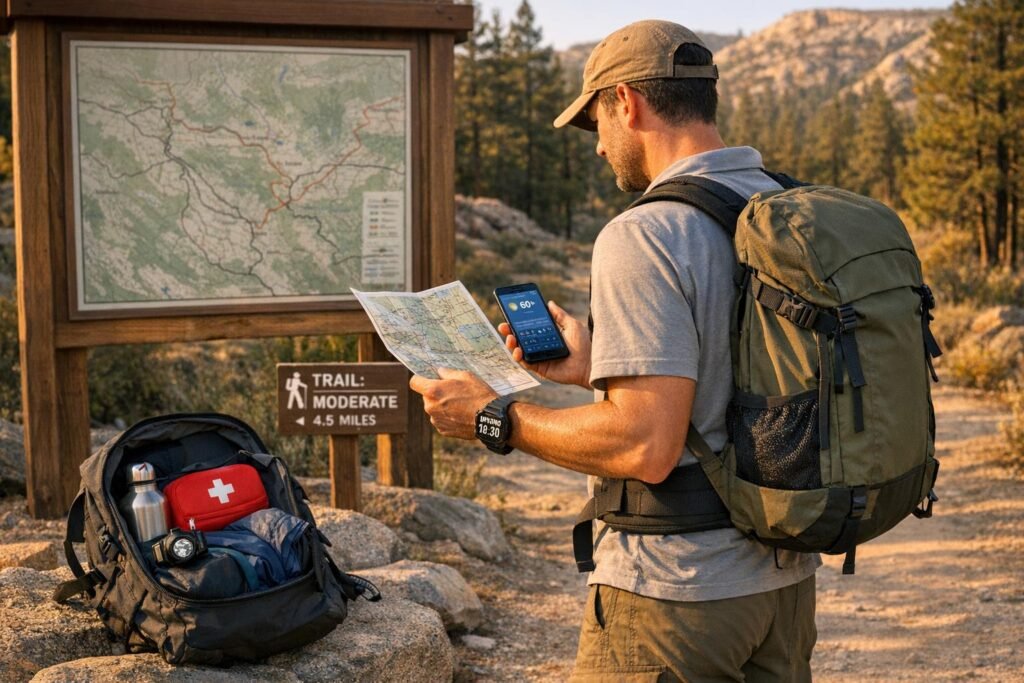
When preparing for a hike, assessing trail risks is critical to staying safe and avoiding emergencies. Many hiking accidents stem from poor decisions, not gear failure or rare events. Here’s a quick guide to making informed choices before hitting the trail:
- Know Your Limits: Match trail difficulty (distance, elevation, terrain) with your fitness, experience, and group abilities.
- Research Trail Conditions: Use reliable sources like ranger stations, AllTrails, and government sites for updates on weather, closures, and hazards.
- Plan for Weather: Check detailed, location-specific forecasts (e.g., NOAA). Be aware of seasonal risks like heat, snow, or storms.
- Understand Terrain: Read topographic maps to identify elevation changes, steep sections, and potential hazards like water crossings or exposed ridges.
- Set Clear Plans: Establish turnaround times, decision points, and backup routes. Always leave your trip plan with someone you trust.
- Pack Smart: Bring essentials like maps, first aid, weather-appropriate gear, and navigation tools.
Preparation reduces risks and helps you respond to challenges confidently. A safe hike starts with planning, awareness, and smart decision-making.
Just How Safe Are You? – Hike and a Coffee Series
sbb-itb-5a98267
Know Your Goals and Abilities
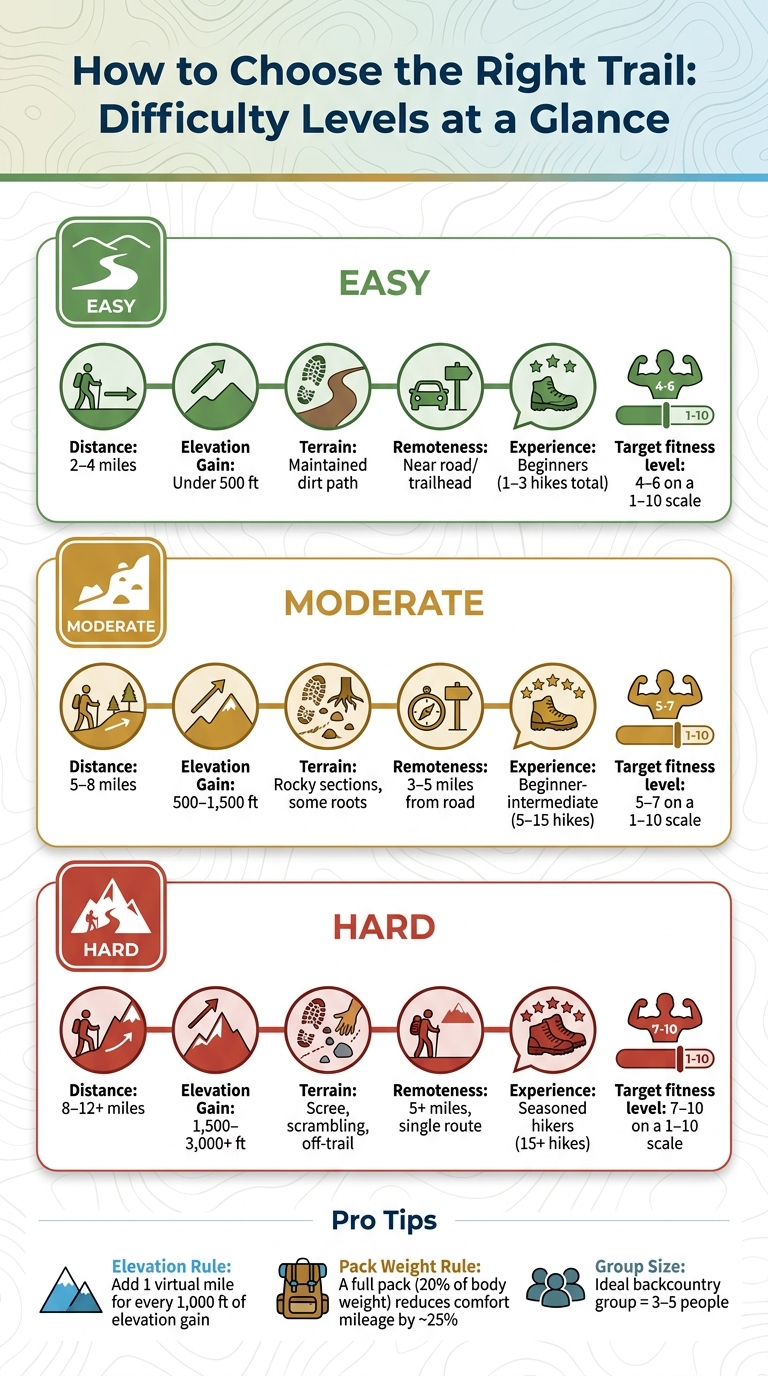
Trail Difficulty Guide: Distance, Elevation & Terrain by Level
Set Realistic Hiking Goals
Before choosing a trail, take a moment to define your hiking goal. Are you looking for a relaxing stroll through the woods, or are you aiming for a challenging summit? Each goal comes with its own set of risks and requirements, so being clear about your objective helps you establish a realistic risk threshold right from the start.
One helpful mindset is to create multiple definitions of success. Instead of focusing solely on reaching the summit, think about what a successful turnaround might look like. As Giggles, a Wilderness EMT and Educator, explains:
"Having more than one story in your head about what a successful hike looks like will allow you to be nimble and flexible while still being proud of yourself and having fun."
This perspective can help you avoid "summit fever", the dangerous urge to push forward even when conditions suggest turning back is the safer choice.
Evaluate Your Group’s Capabilities
When planning a hike, always consider the abilities of the least experienced or least fit member of your group. Here are some key factors to keep in mind:
- Fitness level: Use a simple scale from 1 to 10. For example, a 4 might describe someone who exercises 3–5 times a week with activities like 30-minute walks, while a 7 could represent someone who regularly enjoys outdoor recreation, such as weekend hikes. Most casual hikers fall between 4 and 6.
- Experience: Beginners (1–3 hikes total) should stick to shorter trails – under 5 miles – with less than 500 feet of elevation gain. More experienced hikers (15+ hikes) can tackle longer routes of 8–15 miles and up to 3,000 feet of elevation gain.
- Medical considerations: Pre-existing health issues, such as heart conditions, joint pain, or sensitivity to altitude, can affect what’s safe, especially on remote or strenuous trails.
- Group dynamics: Ideally, your group should have 3 to 5 people for backcountry safety. Larger groups can be harder to manage, and studies suggest that in emergencies, no more than 5 people can be effectively cared for. Be mindful of groupthink too – the subtle pressure to agree with a decision even if you have concerns.
By understanding these factors, you can better plan a hike that suits everyone in your group.
Select Trails That Match Your Capabilities
Once you’ve assessed your group’s abilities, it’s time to choose a trail that fits. Consider the trail’s distance, elevation gain, terrain, and how remote it is.
| Difficulty | Distance | Elevation Gain | Terrain | Remoteness |
|---|---|---|---|---|
| Easy | 2–4 miles | Under 500 ft | Maintained dirt path | Near road/trailhead |
| Moderate | 5–8 miles | 500–1,500 ft | Rocky sections, some roots | 3–5 miles from road |
| Hard | 8–12+ miles | 1,500–3,000+ ft | Scree, scrambling, off-trail | 5+ miles, single route |
As a rule of thumb, for every 1,000 feet of elevation gain, add one "virtual mile" to the trail’s total distance. For instance, a 6-mile trail with 2,000 feet of elevation gain feels more like an 8-mile hike in terms of effort. Also, carrying a full pack (no more than 20% of your body weight) can reduce your comfortable mileage by about 25%.
Don’t forget to factor in remoteness. A trail 7 miles from the nearest road means help will take longer to reach you in an emergency. Solo hikers, in particular, should weigh this carefully when planning.
Research Trail Conditions and Hazards
Where to Find Reliable Trail Information
Once you’ve chosen a trail that matches your skills, it’s crucial to confirm the current conditions. Trails can change rapidly – what was safe last week might now be risky.
Start by checking official government resources. Websites like the National Park Service (nps.gov) and the U.S. Forest Service provide up-to-date alerts, closures, and wildfire risks. These are excellent initial sources. To dig deeper, contact the local ranger station for the latest updates. As professional adventurer Andrew Skurka explains:
"Rangers, for example, are great at this, because they are in those woods almost every day and often hold those jobs for many years, so they understand that seasonal nuance better than anyone."
For more detailed information, use tools like CalTopo for elevation profiles and terrain details. Combine this with NOAA (weather.gov) for precise weather forecasts and SNOTEL data to check snowpack levels on mountain trails. If you’re looking for recent, firsthand reports, filter AllTrails reviews to show only those from the last 30 days.
Equipped with this knowledge, you’ll be better prepared to spot potential hazards during your hike.
Spotting Hazard Warning Signs
Recognizing hazards means knowing both what to look for and where to find it.
- Swollen creeks: These can become dangerous after heavy rain or snowmelt, turning a simple crossing into a risky challenge.
- Lingering snowfields: Found on north-facing slopes, these can stick around well into summer and may require gear like microspikes or an ice axe.
- Wildlife activity: Spring and early summer bring protective mothers – like bears – so stay alert for signs of animals.
- Afternoon thunderstorms: On exposed ridges, storms are common in the summer. The 30-30 rule is a handy guide: if there’s 30 seconds or less between lightning and thunder, seek shelter. Wait at least 30 minutes after the last thunder before continuing.
- Faint trails: Trails that are barely visible can signal poor maintenance or increase the risk of losing your way.
Being aware of these warning signs can help you navigate safely and avoid unnecessary risks.
Build a Pre-Hike Hazard Checklist
To simplify your preparation, create a pre-hike checklist based on your research. As Philip Werner, founder of SectionHiker.com, points out:
"Better up front trip planning would have probably prevented many of these rescue call outs."
Organize your checklist into categories like weather, trail conditions, water, wildlife, and logistics. Here’s an example:
| Hazard Category | What to Verify | Where to Check |
|---|---|---|
| Weather & Climate | Forecast at trail’s highest point, wind, precipitation | NOAA, Mountain Forecast |
| Trail & Footing | Mud, snow, scree, water crossings | Ranger stations, AllTrails (last 30 days) |
| Snow & Water | Snowpack levels, stream flow, water source reliability | SNOTEL, river gauges |
| Biological | Bear activity, ticks, poisonous plants | Park alerts, ranger stations |
| Logistics | Permits, trail closures, cell coverage, exit options | NPS.gov, National Forest websites |
Finally, don’t overlook one of the simplest but most critical steps: leave a detailed trip plan with someone who isn’t joining you. Include the trail name, your expected return time, and instructions on what to do if they don’t hear from you. This small effort could make a huge difference in an emergency.
Check Weather and Seasonal Risks
How to Read Weather Forecasts
When planning a hike, relying on basic town forecasts won’t cut it. Instead, use the NWS point forecast tool to get weather details specific to your route’s elevation, including both the highest and lowest points. This ensures you’re prepared for conditions tailored to your exact location.
For a detailed breakdown, check the hourly graph. It shows not just when precipitation might hit but also how intense it will be. For example, light rain at 0.04 inches per hour might only make the trail muddy, but 0.4 inches per hour sustained over three hours could lead to flash flooding, especially on steep terrain. Another valuable resource is the Forecast Discussion section on the NWS site. It offers insight into the reasoning behind the forecast and highlights areas of uncertainty that numbers alone can’t explain.
Don’t forget that temperature drops as you climb. A good rule of thumb: expect it to get about 3°F to 5°F cooler for every 1,000 feet of elevation gain. Also, consider the apparent temperature – factors like wind chill or heat index determine how your body actually feels.
"Knowing the weather will not change the weather, but it may change my decisions, like where I camp and the boldness of my route." – Andrew Skurka
Arming yourself with accurate weather information allows you to adjust your plans and avoid unnecessary risks tied to seasonal changes.
Risks by Season
Every season brings its own challenges, and knowing what to expect can make all the difference.
| Season | Key Hazards | Watch Out For |
|---|---|---|
| Summer | Extreme heat, dehydration, afternoon thunderstorms | Heat index above 105°F; drink at least 1 liter/hour at 100°F |
| Fall | Rapid temperature swings, dry wildfire conditions, snakes | Warm trailhead temperatures but near-winter conditions at summits |
| Winter | Snow, ice, short daylight, battery drain on devices | Cold temperatures quickly draining phone and GPS batteries |
| Spring | Snowmelt flooding, unstable snowfields, wildlife activity | (Additional details provided in the hazard checklist) |
In summer, the NWS issues extreme heat warnings when the heat index exceeds 105°F for multiple days, with nighttime lows staying above 75°F. Shade can significantly reduce the perceived temperature – by as much as 15°F to 20°F – so consider routes with north-facing slopes or deep canyons to stay cooler.
Fall brings unpredictable conditions. Anna DeBattiste of the Colorado Search and Rescue Association explains:
"It can be warm and sunny at the base of a peak, and winter conditions at the summit."
Winter hiking is all about timing. Short daylight hours and icy trails leave little room for error. Always carry a hard-copy map and compass in case your electronic devices fail due to the cold.
Recognizing these seasonal risks helps you prepare and adjust your plans accordingly.
Adjusting Plans Based on Weather
Once you’ve reviewed your pre-hike hazard checklist, use current weather updates to fine-tune your timing and route. For example, if afternoon thunderstorms are likely, start your hike at 4:00 AM or sunrise. Set clear go/no-go rules like, “If rain exceeds 0.3 inches in three hours, we turn back,” or “If wind gusts hit 23 mph, we skip the ridge.” These thresholds remove emotion from decision-making when conditions take a turn for the worse.
While on the trail, keep an eye out for warning signs of changing weather. Darkening clouds, sudden temperature drops, or static buildup could signal trouble. Learn to recognize cloud formations: towering cumulonimbus clouds indicate approaching thunderstorms, while lenticular clouds (those UFO-shaped ones) warn of strong ridge winds.
During spring and fall, always pack for conditions worse than forecasted. These shoulder seasons are known for unpredictable weather, where even slight temperature changes can turn rain into ice.
Analyze Terrain and Trail Difficulty
How to Read Topographic Maps
Trail mileage alone doesn’t tell the full story of a hike’s difficulty. Topographic maps provide a clearer picture by showing elevation changes through contour lines. On standard USGS 7.5-minute maps, each contour line typically represents a 40-foot elevation change, and the scale is 1:24,000 – meaning one inch on the map equals about 2,000 feet on the ground.
Understanding contour spacing is key. Closely spaced lines mean steep terrain – potentially even cliffs – while widely spaced lines indicate gentler slopes or flat areas. To estimate elevation gain, count the uphill contour crossings and multiply by the contour interval. For timing, a helpful formula is: Total Time = distance (miles) + [elevation gain (in thousands of feet) ÷ 2]. For example, a 6-mile hike with 2,000 feet of elevation gain would take roughly 7 hours at a steady pace.
"Apps tell you where you are. Topo maps tell you where you are in the landscape. There’s a big difference." – True North Map Co
The shapes of contour lines reveal even more. A "V" pointing uphill usually marks a drainage or stream, while a "V" pointing downhill signals a ridge. Closed circles show peaks, with more concentric circles indicating higher summits.
Once you understand the elevation profile, the next step is to identify specific terrain hazards.
Common Terrain Hazards to Watch For
Knowing how to read a map is only half the battle – you also need to recognize potential hazards. Blue features, for example, indicate water sources, which could mean stream crossings or flash flood risks. White or lightly shaded areas represent open alpine zones, where exposure to wind, sun, and lightning is high. Green shading shows forested areas, which provide shelter but can hide obstacles like downed trees or overgrown trails.
Physical terrain hazards often fall into predictable categories. Loose scree and boulder fields require careful footing and sturdy ankle support. Exposed ridgelines pose risks from lightning and wind chill, so aim to be below the treeline by early afternoon. Stream crossings can be particularly dangerous during spring snowmelt, even if they appear shallow. In mountain regions like the Rockies or Sierras, snow can linger well into summer, turning trails into snowfields that require navigation skills.
"A simple trail map can’t tell you whether you’re walking into a gentle slope or a brutal 1,200-foot climb in a mile." – Marcus Osei, Founder of Trailwise Gear
To stay informed about current trail conditions, check recent trail reviews on platforms like AllTrails. Filtering for the last 30 days can reveal issues like washed-out sections, fallen trees, or lingering snow that might not appear on a map.
With this knowledge, consider whether the trail’s challenges align with your group’s abilities.
Match Terrain to Your Group’s Skills
Trail difficulty involves more than just distance – it’s a mix of elevation gain, technical terrain, and remoteness. A difficult section 10 miles from the trailhead is far riskier than the same challenge near a parking lot.
It’s important to match the trail to your group’s experience level. Beginners should steer clear of exposed ridgelines or loose scree, while experienced hikers can tackle more technical sections farther from help. For those new to hiking (fewer than 3 hikes), aim for trails that are 3 to 5 miles round trip with less than 500 feet of elevation gain. Beginner-intermediate hikers (5 to 15 hikes) can handle 5 to 9 miles with 500 to 1,500 feet of gain. Seasoned hikers with 15 or more outings can take on 8 to 15 miles, including technical terrain like scrambling.
"Elevation gain is the most underestimated difficulty factor, particularly by beginners. Elevation gain has a multiplicative effect on effort." – Marcus Osei, Founder & Lead Reviewer, Trailwise Gear
When unsure, choose an out-and-back trail over a point-to-point route. They’re easier to navigate and provide a natural turnaround point if conditions worsen.
Use a Simple Risk Assessment Framework
Building on your understanding of trail hazards and terrain, this framework provides a methodical way to evaluate and manage risks step by step.
Steps in the Risk Assessment Process
Start by listing potential hazards – things like cold temperatures, steep snow slopes, swollen streams, exposed ridgelines, and high UV exposure. For each one, ask yourself two key questions: How likely is this to happen? and How serious would it be if it did? If the risk outweighs your group’s ability to handle it, treat it as a red flag.
It’s also important to distinguish between hazards you can control and those you can’t. A river crossing, for instance, might be avoidable by finding another route, making it controllable. On the other hand, a lightning storm over an exposed ridgeline is entirely out of your hands. For controllable risks, explore ways to reduce the danger – like crossing a stream early in the morning when water levels are lower. For risks beyond your control, you might need to rethink your plans entirely.
"Summit fever refers to when you have a goal that you really care about… and it becomes harder and harder to turn back or make an objective risk assessment the closer you get to completing the goal." – Giggles, Wilderness First Aid Educator and WEMT
Once you’ve put mitigation strategies in place, conduct a final risk-reward check. Does the potential reward justify the remaining risks for everyone involved? If not, it might be time to reassess.
Finally, prioritize hazards and establish clear decision points before moving forward.
Set Go/No-Go Decision Points
Establish firm limits right at the trailhead. Decide on non-negotiable turnaround points ahead of time, such as: "If we haven’t reached the lake junction by 1:00 p.m., we’ll turn back." This eliminates the stress of making decisions under pressure.
Follow the 1/3 rule: use one-third of your time and energy to reach your destination, one-third to return, and keep one-third in reserve as a safety buffer. Aim to finish your hike at least an hour before sunset to avoid navigating in the dark. If conditions slow you down – like heavy rain or snow – adjust your turnaround time accordingly. For example, snow might double your travel time, while rain could add 30–50%.
Be mindful of the Swiss Cheese Effect: emergencies on the trail often result from a series of small, poor decisions rather than one major mistake. Fixing even one weak point in the chain can prevent an incident.
Group Communication and Decision Making
Once you’ve set your risk criteria and goals, clear communication within the group becomes critical. A common pitfall in backcountry decision-making is groupthink – when individuals hesitate to voice concerns to maintain group harmony.
"All decisions about risk in the backcountry or planning for a backcountry trip should be made by consensus." – Treeline Review
Before starting out, establish that everyone in the group has the right – and the responsibility – to speak up. For high-stakes decisions, like crossing a dangerous slope or continuing through worsening weather, aim for full group consensus. Lower-stakes choices can be made more democratically. Many avalanche safety courses even suggest keeping groups to 3–5 people, as this is the largest size that can still function effectively in an emergency.
Risk assessment doesn’t stop at the trailhead. Reassess at key points – before crossing a large stream, after a sudden weather change, or if someone in the group seems unusually tired. Conditions can shift quickly, so stay flexible and adjust your plan as needed.
Plan Your Gear, Timing, and Backup Options
Once you’ve identified potential risks, it’s time to align your gear, schedule, and contingency plans with those hazards. This step ensures you’re ready for whatever the trail throws your way.
Equip Yourself for the Identified Risks
Pack your gear to address the specific challenges you’re likely to encounter. For icy trails, bring along microspikes or crampons. Steep descents? Trekking poles are your best friend. If you’re tackling areas prone to rockfall or technical terrain, a helmet is essential. And when the weather turns cold, layering is key: a moisture-wicking base layer, an insulating mid-layer, and a wind or rain shell will keep you comfortable and safe.
Some items are non-negotiable for any hike: a headlamp with extra batteries, a topographic map and compass, a water filtration system, and a first-aid kit stocked with essentials like blister care and a tick remover. For remote areas without cell service, consider a satellite communicator like the Garmin inReach. Unlike a phone, which drains its battery searching for a signal, these devices can last up to 24 days and are far more reliable in emergencies.
"You don’t want to be counting on your phone flashlight to get you back to the car. Let’s be real, that thing sucks the life out of your phone battery like nothing else on this earth." – Sheena S., Author, The Wilder Dispatch
To keep your pack manageable, aim for a loaded day pack that weighs less than 10% of your body weight. For multi-day backpacking trips, try to stay under 20%.
Once your gear is ready, focus on timing your hike for maximum safety.
Plan Start Times and Turnaround Points
Timing can make or break your hike. Plan to finish at least an hour before sunset. To calculate your latest safe start time, use this formula:
Sunset time − (estimated hiking time + breaks + safety buffer + 1 hour)
For estimating hiking time, Naismith’s Rule is a handy guide: allow 1 hour for every 3 miles, plus an extra hour for every 2,000 feet of elevation gain. Adjust this based on trail conditions – for example, snow can add 50–100% to your time, while heavy rain might add 30–50%. Always base your timing on the slowest hiker in your group.
Even the best-laid plans can go awry, so it’s smart to have alternatives ready.
Create Backup Plans and Alternate Routes
Every hike should have three versions: a primary route (A), a shorter or less technical alternative (B), and a low-elevation bailout option (C). Mark specific exit points on your map where you can safely leave the trail if conditions take a turn for the worse.
Carry both paper overview maps, like Trails Illustrated, and digital maps that cover the surrounding area. This combination is invaluable if you need to leave your planned route unexpectedly. Share your route details – including alternates – with a trusted contact so they can notify Search and Rescue if you fail to check in by the agreed-upon time.
"Have a backup plan and backup maps, and appreciate the learning that goes along with failure." – Andrew Skurka, Professional Backpacker
It’s also helpful to set an alternative goal for the day, such as enjoying time in nature even if you don’t reach the summit. This mindset makes it easier to turn back when necessary, avoiding the "summit fever" mentioned earlier in this guide.
Conclusion: Head Out with a Clear Plan
Trail risk assessment is something you weave into every part of your hike. It starts with researching trail conditions and evaluating your group’s abilities. At the trailhead, you double-check your gear, confirm turnaround times, and ensure someone back home has your trip plan. Once you’re on the trail, you keep reassessing conditions as they unfold.
The goal here isn’t to avoid all risks – that’s impossible. Instead, it’s about understanding potential hazards and making thoughtful decisions along the way.
"Knowing how to assess risks and make decisions are skills we use often in the backcountry… they are skills that can help us stay dry, avoid hurting ourselves, and in some situations, can save our lives." – Treeline Review
One often overlooked part of this process is redefining what a "successful" hike means. Treeline Review puts it perfectly: "Having more than one story in your head about what a successful hike looks like will allow you to be nimble and flexible while still being proud of yourself and having fun." This approach ties directly to the preparation and in-the-moment adjustments discussed earlier.
For more advice on trails, gear, and outdoor planning, check out Adventurism.co. It’s packed with resources to help you make the most of your adventures.
FAQs
What should make me turn back?
You should always prioritize safety by turning back if the trail conditions surpass your skill level or become hazardous. Signs like poor visibility from snow, difficult terrain, or trouble navigating are clear indicators to stop. If the trail proves more challenging than your preparation allows, pushing forward could lead to exhaustion or injury. Take time to evaluate the weather, terrain, and your own readiness to ensure a safe journey.
How do I set a safe turnaround time?
To ensure a safe turnaround time, plan to complete your hike at least an hour before sunset. Start by checking the sunset time for your specific location and season, then factor in an extra hour to account for breaks or unexpected delays. For instance, if sunset is at 6:00 PM, aim to wrap up your hike by 5:00 PM. This precaution minimizes the risk of hiking in the dark and makes it easier to navigate back to your starting point safely.
What’s the minimum gear for day hikes?
When heading out on a day hike, you’ll need to pack a few essentials to stay safe and comfortable. At the very least, bring plenty of water, weather-appropriate clothing, sturdy footwear, and navigation tools like a map or GPS. Don’t forget some basic safety gear, such as a whistle or a small first aid kit.
Your gear should match the conditions of your hike. For example, consider the weather forecast, the difficulty of the trail, and how far you’ll be from help if something goes wrong. Tailoring your checklist to the specific hike ensures you’re prepared for whatever comes your way.