
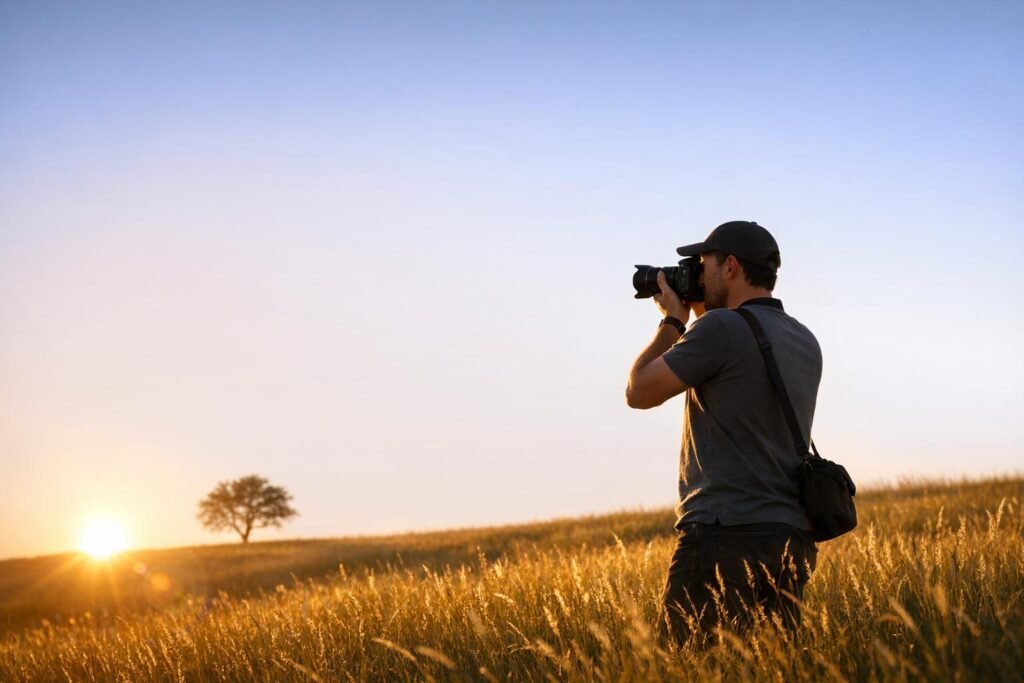
Natural light photography uses sunlight to illuminate subjects, avoiding artificial lighting. It’s perfect for outdoor enthusiasts who want to travel light and stay immersed in their surroundings. Key benefits include simplicity, authenticity, and the ability to capture fleeting moments like sunrise hues or wildlife in action.
Key Takeaways:
- Light Direction: Front lighting offers even tones, side lighting highlights texture, and backlighting creates silhouettes or dramatic effects.
- Light Quality: Hard light creates sharp shadows, while soft light (like cloudy days) produces even tones.
- Color Temperature: Morning and evening light (golden hour) is warm and flattering, while midday light is cooler and harsher.
- Practical Tips: Use reflectors for portraits, shoot in RAW for flexibility, and plan shoots with tools like The Photographer’s Ephemeris.
Whether it’s golden hour landscapes or midday challenges, understanding light direction, quality, and timing is crucial for stunning outdoor photography.
Understanding Natural Light Fundamentals
How Light Direction Affects Your Photos
The direction of light can completely change the feel and depth of a photo. The same scene can appear flat or full of character depending on where the light hits.
Front lighting – where the sun is positioned behind you – provides even illumination with minimal shadows. This makes it easier to expose your subject correctly. On the other hand, side lighting, where light strikes your subject at a 90-degree angle, emphasizes texture and adds depth. Think of rocky landscapes, the rough bark of a tree, or the weathered face of a hiker – side lighting brings out those details beautifully.
"The presence of gorgeous light can transform an otherwise unremarkable scene into an image of beauty and complexity." – Alexander Wrigley, Founder, Click and Learn Photography
Backlighting, where the sun is behind your subject and facing the camera, creates dramatic effects like silhouettes, rim light, or a glowing halo. However, it can be tricky to work with – your camera might struggle with the contrast between a bright sky and a darker foreground. Using bracketing to capture multiple exposures can help balance these extremes.
Overhead light, common during midday, is often the most challenging. It casts harsh, downward shadows that can flatten landscapes or create unflattering effects like dark eye circles in portraits. To counter this, move your subject into open shade for softer, more even lighting.
The way light hits your subject also determines the nature of shadows, leading to a deeper exploration of hard versus soft light.
Hard Light vs. Soft Light
The quality of light boils down to how sharp or soft the shadows appear. Hard light creates bold, defined shadows with high contrast, while soft light results in gentler, diffused shadows and richer colors.
Hard light is common on clear days when the sun shines directly without obstruction. In contrast, soft light occurs when the sun is diffused by clouds, fog, or even a tree canopy. An overcast sky works like a giant natural softbox, spreading light evenly and reducing harsh shadows. This makes cloudy days ideal for capturing wildflower fields or portraits in wooded areas, as the softer light enhances colors and minimizes distractions from shadows. If you’re stuck shooting under harsh midday light, consider switching to black and white photography. The strong tonal contrasts that can look harsh in color often translate into striking monochrome images.
Beyond shadow quality, the color temperature of light plays a key role in setting the mood of your photos.
Color Temperature and Mood
Along with direction and quality, light’s color temperature adds an emotional layer to your images. Natural light isn’t just about brightness – it can feel warm or cool, depending on the time of day. Measured in degrees Kelvin (K), lower temperatures produce warmer, orange-yellow tones, while higher values lean toward cooler, blue tones.
| Time of Day | Color Temp | Dominant Tones | Mood |
|---|---|---|---|
| Golden Hour (Sunrise/Sunset) | ~3,500K | Red, yellow, pastel | Warm, romantic, magical |
| Midday (Clear sky) | 5,000–6,500K | Neutral/white | Vibrant, high-contrast |
| Overcast/Cloudy | ~7,000K | Cool blue-gray | Soft, subdued, even |
| Blue Hour (Before/After sun) | ~11,000K | Deep blue | Mysterious, moody, cold |
Midday light, with its neutral tones, can make colors like reds and greens pop with intensity. Meanwhile, golden hour light wraps subjects in a soft, warm glow, making it a favorite for portraits and sweeping landscapes. Blue hour, with its cool tones, creates a quiet, serene atmosphere, perfect for capturing still water reflections or misty forest scenes.
For added control, shoot in RAW format. This allows you to tweak the color temperature during post-processing without losing image quality, giving you the freedom to adjust or enhance the mood as needed.
sbb-itb-5a98267
8 Natural Lighting Tips From National Geographic Photographer Bob Holmes
Working with Natural Light Throughout the Day
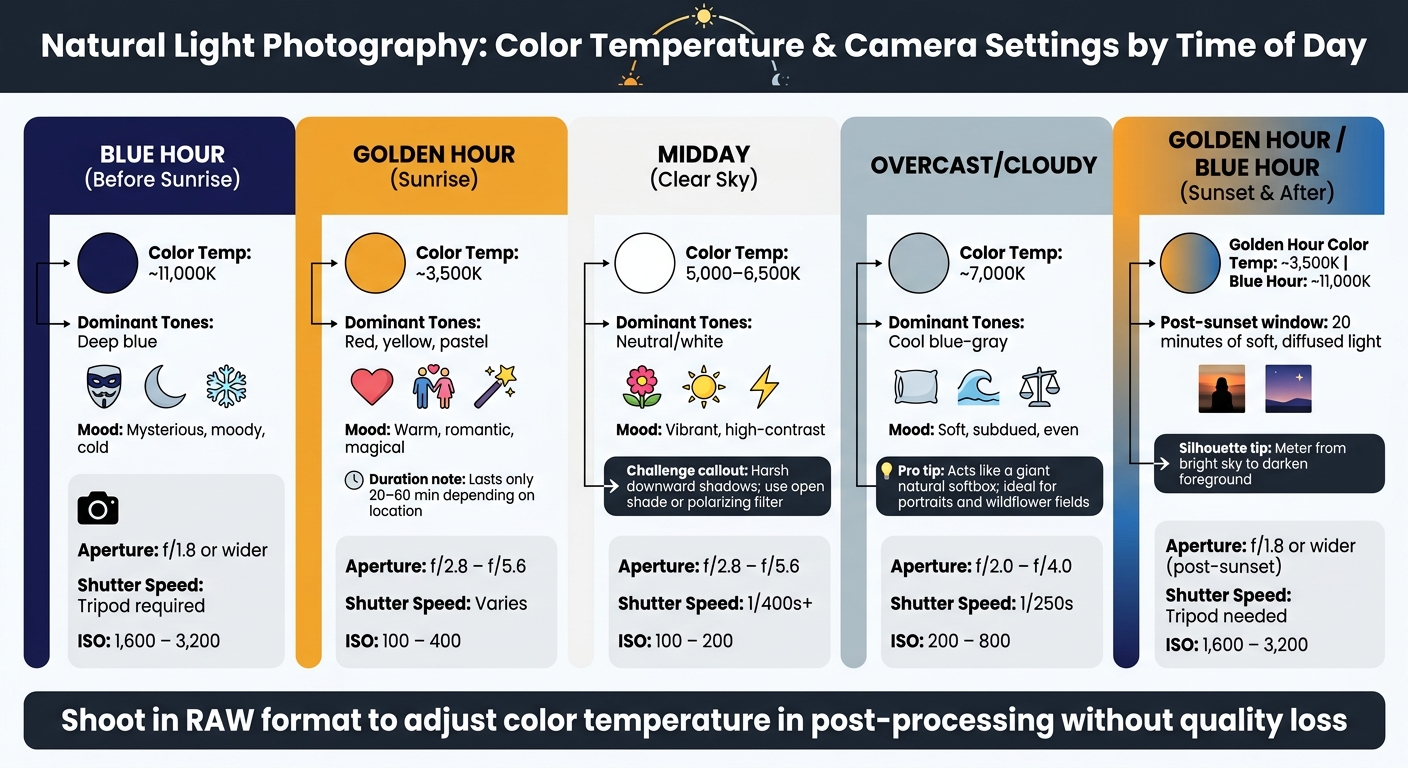
Natural Light Photography: Color Temperature & Camera Settings by Time of Day
Morning Light and Golden Hour
The hour right after sunrise is often considered the perfect time for outdoor photography. During this time, the sun is low on the horizon, and its light passes through more of the atmosphere. This process scatters blue light and leaves a warm, golden tone that’s tough to replicate artificially.
"The hour just before sunset and just after sunrise (the ‘golden hour’) is typically regarded as having the most desirable light for photography." – Cambridge in Colour
What makes the morning golden hour especially great for outdoor and adventure photography is the mix of soft light and long shadows. These shadows stretch across the landscape, wrapping around surfaces and adding depth and texture. Features like rolling hills, rocky paths, or tree lines appear more dimensional and striking in this light. On top of that, early mornings often bring natural elements like mist, dew, or calm waters – elements that can create a unique atmosphere in your shots.
A quick tip: golden hour doesn’t always last a full hour. Depending on your location and the season, it might only last 20–30 minutes. Fine-art photographer Jen Huang suggests scouting your location ahead of time. Knowing the best angles in advance is crucial because the light changes quickly once it starts moving.
As the day progresses, however, the softer morning light gives way to the challenges of midday.
Dealing with Harsh Midday Light
Midday light is often the trickiest to work with. The overhead sun creates harsh, downward shadows that can flatten landscapes and cast unflattering patches on faces in portraits.
"The fastest way to improve a natural light portrait is to move your subject out of direct midday sun and into open shade." – Pye Jirsa, Co-founder, SLR Lounge
One solution is open shade, which you’ll find just inside the edge of a shadow cast by a tree, building, or cliff. This kind of shade offers soft, even light without the harshness of direct sunlight. Be careful to avoid dappled or uneven shade, as it can create distracting light spots on your subject. For portraits, try positioning your subject so one side is lit by soft, reflected light while the other side faces deeper shade. This setup adds depth without introducing harsh shadows.
For landscapes or adventure photography, where shade may not be an option, consider embracing the challenge. Midday’s high contrast can work well in black-and-white photography, where bold shadows and stark highlights create striking compositions. A polarizing filter can also be a game-changer – it reduces glare, cuts through haze, and enhances the blue tones of the sky. Learning to handle midday light effectively allows you to adapt to any outdoor scenario.
As the day winds down, the harsh midday sun transitions into the softer tones of evening light.
Evening Light and Sunset
Evening golden hour offers the same warm, directional light as the morning, but with a key difference: the light intensifies as the sun sets, rather than fading as it does after sunrise. This gradual build-up gives you more time to fine-tune your settings and compositions before the light reaches its peak.
Sunset is an excellent time to create silhouettes. To achieve this effect, meter your exposure from the bright sky instead of your subject. This technique darkens the foreground, turning your subject into a bold silhouette against a colorful sky. It’s a simple method that delivers dramatic results.
Don’t pack up your gear as soon as the sun sets. The 20 minutes after sunset – often called the post-sunset window – offers soft, diffused light that’s easy to work with. During this time, colors are subtle and balanced. However, the lower light levels mean you’ll need to adjust your gear accordingly. A fast prime lens (f/1.8 or wider) and an ISO of 3,200 or higher can help you capture clean, sharp images in the fading light.
Practical Techniques for Outdoor Photography
Building on the basics of working with natural light, these techniques can help you take your outdoor photography skills to the next level.
How to Read and Anticipate Light
Capturing great outdoor photos starts with understanding and predicting how light behaves. Tools like The Photographer’s Ephemeris can help you track the sun’s movement and plan your shots, especially in areas where features like mountains or canyons might block light during key moments like golden hour.
But technology isn’t the only answer – nature itself is full of clues. South-facing slopes receive direct sunlight for most of the day, while north-facing areas stay shaded longer. Valleys often trap morning mist, creating a dreamy atmosphere, and open fields allow for uninterrupted light. Spending time outdoors and observing these patterns will sharpen your ability to anticipate light conditions.
Positioning Subjects and Using Reflectors
Where you place your subject in relation to the sun can dramatically affect your photo. For a natural look, position the light source at a 45-degree angle, slightly above the subject’s eye level. This creates soft, dimensional shadows. Adding a reflector angled below and to the side of the subject’s face can enhance the image with catchlights – those tiny reflections in the eyes that bring portraits to life.
A 5-in-1 reflector is a must-have tool for outdoor photography.
"A 5‑in‑1 reflector is one of the most versatile and affordable lighting control tools in a photographer’s bag." – Westcott University
Each side of this reflector has a specific use. The silver surface delivers a bright, crisp fill light, perfect for bouncing light from a distance. The white surface softens light for close-ups, while the gold/silver combo adds warmth and balances cooler tones. The black side reduces light, deepening shadows for a dramatic effect. The closer you hold the reflector to your subject, the stronger the light; pulling it back creates a gentler fill.
This level of control over light helps manage contrast and shadows with precision.
Managing Contrast and Shadows
Once you understand light direction and quality, you can balance highlights and shadows in tricky scenarios. For example, if your subject is in shadow against a bright background, you can use a silver reflector to bounce sunlight onto the subject, avoiding the need for artificial flash.
In high-contrast scenes – like shooting into a sunset or against a bright sky – bracketing is a reliable technique. By capturing multiple exposures at different settings and blending them later, you can recover details in both the brightest and darkest areas.
On sunny days, a diffusion panel is your best friend. Placed between the sun and your subject, it softens harsh light, mimicking the effect of a cloud. On overcast days, a reflector positioned below your subject can prevent images from looking dull while also creating those all-important catchlights.
Gear and Camera Settings for Natural Light Photography
Camera and Lens Options
You don’t need to break the bank to capture stunning natural light photos, but having the right tools can make a noticeable difference.
For camera bodies, modern mirrorless systems like the Canon EOS R5 and Nikon Z6 excel in low-light conditions, thanks to their impressive high-ISO capabilities. If you prefer a DSLR, the Nikon D850 remains a powerhouse in this category.
When it comes to lenses, fast apertures (like f/1.8 or f/2.8) are key for pulling in more light during dimly lit scenarios, such as shaded forests or blue hour. Versatile options include the Canon RF 15-35mm f/2.8L and Tamron 24-70mm f/2.8, which are reliable choices for outdoor photography. Want to experiment with a creative touch? The Lensbaby Velvet series delivers a soft, glowing effect straight out of the camera – no editing required. These lenses typically range from $449.95 to $549.95.
Once you’ve got your camera and lens sorted, don’t forget to add filters and other essential gear to your kit for even better results.
Filters and Accessories
One of the most useful tools for outdoor photography is a circular polarizing filter (CPL). This filter enhances blue skies, reduces glare from water or wet surfaces, and boosts color saturation in ways that editing software simply can’t replicate.
"If you are only going to purchase one filter, then it should be a circular polarizer (CP)." – Chrissy Donadi, Professional Photographer
CPL filters reduce light by 1–2 stops and are available at various price points, from basic models starting around $39 to premium options exceeding $110. Another must-have is a neutral density (ND) filter, which acts like sunglasses for your lens. ND filters reduce light, allowing slower shutter speeds to create effects like silky waterfalls or streaky clouds during bright daylight. A 10-stop ND filter, such as the LEE Big Stopper (priced around $128), can transform a quick exposure into one lasting several seconds.
A sturdy tripod is essential for long exposures or shooting during low-light times like dusk. Brands like Gitzo, Manfrotto, and Induro Carbon Fiber are trusted by professionals. Pair your tripod with a remote shutter release to eliminate camera shake during long exposures. Pro tip: buy filters for your largest lens and use inexpensive step-up rings to adapt them to smaller lenses. This saves money while keeping your setup flexible.
Camera Settings for Different Lighting Conditions
Once you’ve got your gear ready, it’s time to fine-tune your camera settings to match the lighting conditions. Always shoot in RAW format to preserve as much detail as possible for post-processing, especially when dealing with outdoor scenes’ wide dynamic range.
Here’s a quick reference table for common natural lighting scenarios:
| Lighting Condition | Aperture | Shutter Speed | ISO |
|---|---|---|---|
| Open Shade | f/2.0 – f/2.8 | 1/200s | 200 – 400 |
| Midday Sun (with scrim) | f/2.8 – f/5.6 | 1/400s+ | 100 – 200 |
| Post-Sunset / Blue Hour | f/1.8 or wider | Tripod needed | 1,600 – 3,200 |
| Golden Hour | f/2.8 – f/5.6 | Varies | 100 – 400 |
| Overcast | f/2.0 – f/4.0 | 1/250s | 200 – 800 |
For backlit scenes, like sunsets, try using HDR techniques or exposure blending to retain detail in both the bright sky and shadowed foreground. Want to capture a sunstar? Position the sun so it’s partially obscured by a sharp edge, like a tree branch or rock, and stop your aperture down to f/11–f/16. For wildlife photography with a telephoto lens, use Shutter Priority mode to ensure fast shutter speeds for sharp results.
Conclusion: Getting Better at Natural Light Photography
Key Takeaways
Natural light photography thrives on your ability to understand light’s direction and quality. Whether you’re using side light to create depth or soft light to evoke a specific mood, mastering these elements is crucial.
Timing matters. The golden hour, that magical time just after sunrise or before sunset, offers warm and flattering tones, lasting anywhere from 20 to 60 minutes depending on your location. Following that, the blue hour brings a softer, more ethereal quality. Even overcast days, often overlooked, can be perfect for portraits or woodland scenes. The clouds act like a giant softbox, diffusing light and reducing harsh shadows.
"The presence of gorgeous light can transform an otherwise unremarkable scene into an image of beauty and complexity." – Alexander Wrigley, Photographer and Educator
With these tips in mind, it’s time to step outside and put them into action.
Getting Out and Practicing
The best way to improve is by experimenting. Try photographing the same scene under different lighting conditions – golden hour versus midday, or cloudy skies versus direct sunlight. This hands-on approach will help you understand how light affects contrast, color, and shadows. Tools like The Photographer’s Ephemeris can also help you plan your shoots by tracking the sun’s position at any location, ensuring you’re always prepared.
Photographer Karthika Gupta shares a powerful insight: "Realizing that no light is inherently bad transformed my approach to photography." Shifting your mindset from avoiding challenging light to embracing it can elevate your work. So, grab your camera and head to a trail, campsite, or open field with this perspective. If you need ideas for where to start, Adventurism.co offers plenty of outdoor destinations perfect for practicing natural light photography.
FAQs
How do I quickly choose the best light direction?
To determine the best direction for light, start by observing how it interacts with your subject. If you’re outdoors, pay attention to the sun’s position. For a glowing effect, try backlighting by placing your subject between you and the sun. For more depth and texture, position your subject at a 90-degree angle to create sidelight. Indoors, experiment with a light source positioned at a 45-degree angle above your subject for a striking, dramatic look. Always evaluate the scene and adjust your position in relation to the light source to achieve the most flattering outcome.
What’s the easiest fix for harsh midday sun?
The easiest way to deal with harsh midday sunlight is to find some shade. Shade helps soften the intensity of direct sunlight, reduces harsh shadows, and creates a more balanced contrast in your photos.
If shade isn’t an option, try repositioning your subject to keep direct sunlight off their face. Alternatively, use natural elements like trees, walls, or buildings to diffuse the light and make it less intense. These simple adjustments can make a big difference in the quality of your shots.
How do I get clean shots after sunset without blur?
To snap crisp photos after sunset, a tripod is your best friend – it keeps your camera steady and prevents blur caused by longer shutter speeds. For low-light settings, tweak your camera by increasing the ISO (but keep an eye on potential noise) and selecting a wide aperture (a smaller f-number) to allow more light into the lens. These adjustments can make a big difference in capturing sharp, clear shots in dim lighting.