
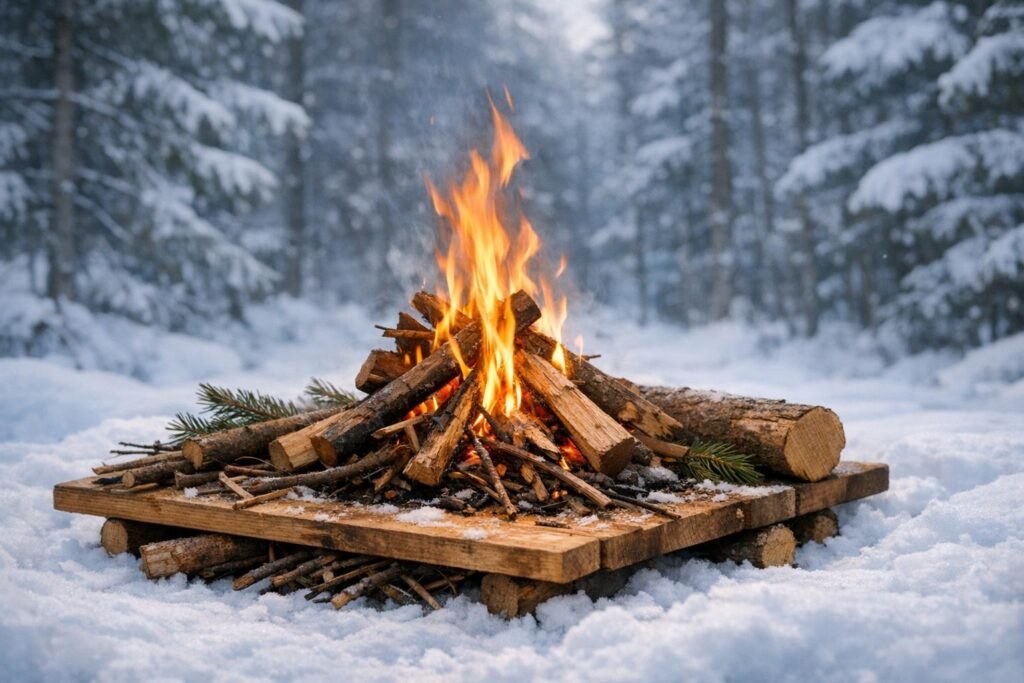
Building a fire in snowy conditions is challenging but essential for warmth, cooking, and survival. The snow, cold, and wind work against you, making preparation and technique critical. Here’s how to do it:
- Clear or Elevate the Base: Dig down to bare ground or build a platform using green wood or stones to prevent the fire from sinking into the snow.
- Gather Extra Materials: Collect 2-3 times more tinder, kindling, and fuel wood than you would in summer. Look for dry materials under trees or split wet wood to access the dry core.
- Use Reliable Fire Starters: Carry lighters, stormproof matches, or ferrocerium rods, along with fire starters like petroleum jelly-coated cotton balls.
- Choose the Right Fire Lay: Use a log cabin or teepee structure for stability and efficiency in snowy or windy conditions.
- Protect and Maintain: Keep materials dry, shield the fire from wind, and build a windbreak or reflecting wall to retain heat.
Preparation, patience, and practice are key to mastering these techniques. Start small, build a strong coal bed, and always ensure your fire is completely extinguished before leaving.
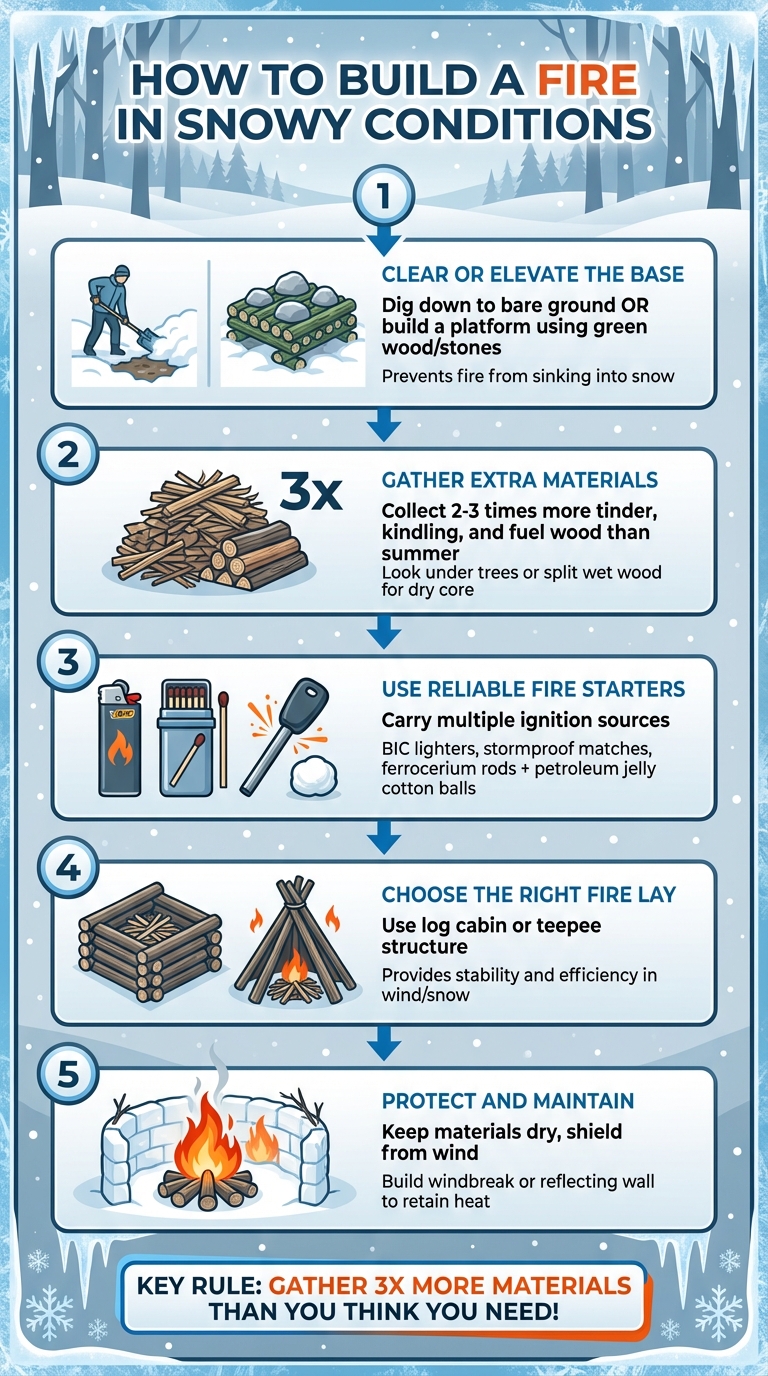
How to Build a Fire in Snow: 5 Essential Steps
Winter Fire-Building Basics
How Snow and Cold Affect Fires
Snow does more than just blanket your firewood – it actively works against your fire. If you build directly on snow, the heat will melt the base, turning it into slush. This slush seeps into your wood, smothers your coals, and causes the entire structure to sink, cutting off the oxygen your fire needs to thrive.
Cold weather adds its own challenges. Wood that looks dry might actually contain frozen moisture. That moisture needs to thaw and evaporate before the wood can catch fire. As Adventure Medical Kits points out:
Wood with its moisture frozen inside may appear deceptively ignitable yet fail to burn.
Winter winds make things even trickier, as they can blow out your flames before you’ve established a solid coal bed. On top of that, the cold can numb your fingers and make it harder to perform delicate tasks, like arranging tinder or striking a match. That’s why preparation is key – gather all your materials before you even think about lighting a spark. Stock up on plenty of dry tinder, kindling, and fuel wood to give yourself the best chance of success.
Tinder, Kindling, and Fuel Wood Explained
Tinder includes materials like birch bark or dry pine needles that catch fire with just a spark. Kindling refers to pencil-thick sticks that help raise the fire’s temperature enough to ignite larger pieces of wood. Finally, fuel wood consists of larger branches, about the thickness of your wrist or more, that burn for a long time and provide consistent heat.
In snowy conditions, you’ll need a lot more of these materials compared to summer. Experts recommend gathering two to three times the amount of tinder and kindling you’d typically use. Outdoor writer Will McGough emphasizes this point:
My goal is to have twice as much fuel as I would for a summertime fire – the hotter and bigger my bed of coals, the better the chance my blaze will endure.
This extra preparation helps offset the challenges of moisture and cold, ensuring your fire generates enough heat to overcome the snow’s cooling effects.
Choosing and Preparing Your Fire Site
Selecting the Right Location
Choose a spot that offers natural protection from strong winds. Valleys, hillsides, or areas near boulders are great options, as they can act as windbreaks while reflecting heat back toward your seating area. Features like rocky outcrops, large boulders, or even clusters of short brush can help shield your fire while keeping you warm. Check the snow depth before setting up – either clear the snow down to bare earth or build an elevated platform, depending on the conditions.
Avoid building your fire directly under snow-laden evergreen branches. Survival Dispatch cautions:
Some of the radiant heat of your fire will go straight up and turn the snow on those branches into slush. And guess where it will fall? Straight down and right on top of your fire.
Preparing the Fire Base
For shallow snow, clear a 3-foot-wide area down to bare earth using a shovel. This prevents meltwater from soaking into your embers and extinguishing your fire. Use the snow you clear to build a protective wall around the edges, which can help block wind.
If the snow is too deep to reach the ground, you’ll need to build a platform or "raft" to keep your fire elevated. Use green or live wood for the base logs, as Anton Mironov from Self Reliance Outfitters explains:
The goal is to start the fire one to two inches above the ground. This will help you avoid the snow and frozen ground, so your fire can start quickly and generate the most heat.
Green wood burns more slowly than dry wood, providing a sturdy base that won’t collapse for several hours. Once your platform is ready, prepare a separate dry area nearby to store your tinder, kindling, and fuel wood, keeping them safe from snow and moisture. With your base in place, it’s time to address potential risks around your fire site.
Checking for Hazards
Before lighting your fire, take a moment to scan your surroundings for potential dangers. Look overhead for branches heavy with snow, often referred to as "widow-makers." Rising heat or wind could dislodge these branches, potentially extinguishing your fire or causing injury.
On the ground, clear away moss, dry leaves, pine needles, and other organic debris until you reach mineral soil or rock. Even in winter, fire can spread through buried roots or flammable duff. Jim Joque, an adjunct adventure education instructor, warns:
Campfires built-in or on the ground can be potentially hazardous, especially if there are roots or flammable duff underneath.
Maintain a safety radius of at least 5 to 6 feet around your fire pit, clearing away brush and debris. Also, keep your gear and backpack well away from the fire to prevent accidents, especially in slippery or dark conditions.
Gathering and Protecting Fire Materials
Tools and Fire Starters You’ll Need
When preparing to build a fire in challenging conditions, having the right tools is essential. A hatchet or axe can help you split wet logs to access the dry wood inside, while a lightweight shovel is handy for digging through deep snow to create a fire pit or clear a space for your fire. Christian Schauf, founder of Uncharted Supply Co., stresses the importance of carrying multiple BIC lighters:
"My rule of thumb is to always carry several BIC lighters… you can hold a flame on your fuel much longer, helping raise the temperature and dry out the material which will then create a flame."
In addition to lighters, pack stormproof matches and a ferrocerium rod – both are reliable options, even in wet or windy conditions. For fire starters, consider cotton balls soaked in petroleum jelly, which ignite effortlessly, burn slowly, and can help dry damp tinder as they burn. Another great option is Tinder Quik tabs, which burn for two to three minutes and resist moisture and wind. Once you’re equipped, the next step is gathering materials that will ignite and sustain your fire.
Finding Dry Tinder and Kindling
With your tools ready, the priority shifts to finding dry, flammable materials. Start by checking under dense coniferous trees, like pines or spruces, as their canopies often shield the ground beneath from snow and rain. Avoid wood lying directly on the ground – it tends to absorb moisture. Instead, look for dead branches still attached to the lower limbs of living trees or standing dead trees.
Birch bark is another excellent resource. Thanks to its natural oils, it burns well even when damp. You can often peel away the wet outer layer to reveal a dry inner layer. If you encounter branches with damp exteriors, use a knife or hatchet to strip away the wet bark and expose the dry core. Additionally, search for fatwood, which is found where dead branches connect to living evergreens. This resin-rich wood burns intensely, making it a reliable choice in cold or wet weather. Survival expert Mark Harris offers this advice:
"The rule of thumb is to gather what you think you will need and then times that by 3!"
Keeping Materials Dry
Once you’ve gathered your fuel, keeping it dry becomes critical, especially in snowy or damp conditions. Store your materials under some form of cover and elevate them off the ground using a platform made of logs or boards. Stack the logs in alternating directions to create air pockets that allow airflow, which helps prevent moisture buildup. If you’re processing wood, use a foam sleeping pad or garbage bag as a barrier to keep it off the snow.
For slightly damp tinder, tuck it into an inner pocket close to your body – your body heat can help dry it out. Store tinder in waterproof containers, like Ziploc bags, to protect it from the elements. Keep firewood elevated to reduce the risk of it absorbing moisture. If your fire is already lit, you can place damp materials around its perimeter to dry them out before adding them to the flames.
How To Make A Fire In The Snow – Winter Fire With Wet Frozen Wood
sbb-itb-5a98267
How to Build and Light a Fire in Snow
When you’re out in snowy conditions, building and maintaining a fire takes some extra effort, but it’s entirely doable with the right approach. Here’s how to get started.
Building the Fire Base
The first step is to make sure your fire doesn’t sink into the snow. If the snow is shallow, grab a shovel and dig down until you hit the frozen ground. But if you’re dealing with several feet of snow, digging might not be practical. In that case, compact the snow to create a firm, flat surface.
If bare ground is out of reach, you’ll need to build an elevated base. Use large logs or flat stones to create a barrier between the fire and the snow. Another option is to lay down pieces of bark or flat rocks as a fire-resistant surface. As the Survival Dispatch Staff explains:
The trick to making this work is to build a raft or platform of some kind. Use a fireproof or fire-resistant surface that can allow a bed of embers to form underneath your burning firewood.
For example, writer Will McGough used a mini shovel to dig a pit and lined it with wet logs to create a sturdy platform. To start the fire, he used cotton balls coated in petroleum jelly and gradually added small pieces of split wood to build a coal bed.
Choosing a Fire Lay
With your base ready, the next step is to decide how to arrange your wood. The log cabin lay is a great choice for snowy, windy conditions. To build it, place two pieces of wood parallel to each other, then stack the next two on top at a right angle. Repeat this for about three layers. This structure is stable and helps protect the flame from wind. As survival expert Mark Harris points out:
The log cabin build also protects the fire from wind better than a typical teepee build.
The teepee lay is another option, especially if you need quick ignition. For this, pile your tinder loosely in the center and lean kindling around it in a cone shape. While it ignites easily, it may not hold up as well if the snow shifts or melts.
Here’s a quick comparison of fire lay types:
| Fire Lay Type | Best Use Case | Construction Method |
|---|---|---|
| Log Cabin | Windy conditions; long-lasting fires | Stack logs in a crisscross square pattern |
| Teepee | Quick ignition; calm weather | Lean kindling in a cone shape around tinder |
| Platform (Raft) | Deep snow; keeps fire from sinking | Lay large logs side-by-side as a base |
Pick the fire lay that fits your environment and weather conditions.
Igniting and Maintaining the Fire
Start by placing a small mound of tinder in the center of your chosen fire lay. A BIC lighter works well for steady ignition. Hold the flame on the tinder until it catches, then carefully add pencil-sized pieces of kindling one at a time.
Patience is key here – don’t rush. Gradually add fuel, making sure each piece is burning before adding the next. Your goal is to build a hot bed of coals, which will provide the heat needed to keep larger logs burning, even as the snow melts around the fire. Place damp logs around the edges of the fire to dry them out before use.
Keep an eye on the wind. If gusts threaten to blow out your fire, pile snow around the pit to act as a windbreak. Alternatively, you can stack logs 2 to 4 feet high behind the fire to create a reflecting wall. This wall not only blocks wind but also bounces heat back toward you. And one last tip: avoid building your fire directly under snow-covered evergreen branches. The rising heat can cause the snow to fall, which could put out your fire.
Safety and Leave No Trace Principles
Personal and Gear Safety
Keep your fire at least 15 feet away from tents, sleeping bags, and gear. Sparks can travel farther than you’d expect, and synthetic materials like fleece can melt quickly when exposed to heat. Always position your tent and gear upwind from the fire to avoid damage from stray embers.
Before lighting your fire, check the area above it. You’ll need vertical clearance three times the height of your flames to prevent igniting overhanging branches. Clear a 10-foot diameter around the fire pit, removing any flammable debris to reduce risk.
When gathering wood in cold weather, take it slow to avoid sweating. Moisture from sweat can cool you down quickly once you stop moving, increasing the risk of hypothermia.
By taking these precautions, you not only protect yourself but also help preserve the environment for others to enjoy.
Environmental Responsibility
To ensure the outdoors remain enjoyable for generations, follow these simple guidelines. Collect only dead and downed wood that can be broken by hand – nothing thicker than an adult’s wrist. This type of wood burns completely to ash, leaving minimal trace. Avoid cutting live branches or standing dead trees, as they provide critical shelter for wildlife during winter. Spread out your wood collection efforts away from your campsite to avoid depleting resources in one spot.
Whenever possible, use existing fire rings instead of creating new ones. Fires built near rock outcrops can leave black scars that linger for years. If you’re camping in snow, build a log platform or raft under your fire to protect the ground beneath from heat damage, which can harm healthy soil.
How to Properly Extinguish Your Fire
Plan ahead and stop adding wood to your fire well before leaving, allowing it to burn down to ash. Use the "Drown, Stir, Drown, Feel" method to fully extinguish your fire:
- Drown the fire by pouring water or packing snow onto it until the hissing sound stops.
- Stir the embers, ash, and dirt with a shovel, scraping logs and sticks to uncover hidden hot spots.
- Drown again with more water or snow to ensure everything is completely cool.
- Feel the ashes by hovering the back of your hand over them – if you detect any warmth, repeat the process.
Avoid using only dirt or sand to extinguish a fire. These materials can insulate hot coals, allowing them to smolder and potentially reignite hours later. Once the ashes are cold, scatter them and any crushed charcoal over a wide area to reduce your impact.
Conclusion
Starting a fire in snowy conditions takes extra preparation and a good dose of patience compared to summer camping, but it’s a skill that can make all the difference in a survival situation. The basics still apply: choose a spot shielded from the wind, create a sturdy base to keep your fire from sinking into the snow, gather dry fuel from standing deadwood or protected spots, and use a dependable fire lay to build strong coals before adding larger logs. If you need a refresher, revisit the earlier sections on site selection and fire-building techniques.
Don’t rely on just one way to light your fire. Always carry multiple ignition tools, like BIC lighters, stormproof matches, or ferrocerium rods, so you’re prepared to get a flame going even in freezing temperatures.
"This type of knowledge doesn’t become a survival skill until you use it, so it’s best to use it before you need it." – Philip Werner, Founder, SectionHiker
The key is practice. Take the time to test your skills on winter camping trips in controlled settings. Split damp wood to find a dry core, lay down log platforms on the snow, and experiment with different fire-building methods until they’re second nature.
Whether you’re braving the cold for fun or facing an emergency, a properly built fire can make all the difference. It provides warmth, melts snow for drinking water, and offers the mental boost to stay calm and focused. By honing these skills now, you’ll be ready to handle whatever winter throws your way.
FAQs
What are the best fire starters for snowy weather?
When dealing with snowy conditions, having a dependable fire starter is crucial for creating a steady flame in cold, damp environments. Here are some of the top choices to consider:
- Waterproof matches: These matches are specially designed to light even after being exposed to moisture or snow, making them an essential item for winter trips.
- Magnesium fire starters: Compact and reliable, they produce a hot and long-lasting spark when struck, even in freezing weather. Magnesium shavings ignite quickly, making them a favorite for cold conditions.
- Cotton balls coated in petroleum jelly: Lightweight and portable, these ignite effortlessly and provide a steady burn, even in sub-zero temperatures.
These options are practical, effective, and ideal for ensuring you can build a fire in snowy, freezing weather.
How do I find dry tinder and kindling in snowy conditions?
Finding dry tinder and kindling in snowy conditions might seem challenging, but with a few clever tricks, it’s entirely doable. Start by checking under dense pine or spruce trees – these areas often have drier ground beneath them. You can gather dry pine needles, which work great as tinder, or carefully peel thin layers of bark from standing birch trees. Birch bark is naturally resistant to moisture and catches fire with ease.
For kindling, focus on collecting small, dead twigs from branches above the snow line. These twigs are less likely to be damp compared to those lying on the ground. To protect your fire materials from getting wet, dig a shallow pit in the snow and line it with logs or rocks. This creates a solid, dry base for your fire. And for extra peace of mind, carry a backup fire starter – like cotton balls coated in petroleum jelly – to make igniting your fire much simpler in snowy conditions.
What’s the best way to build a fire in snowy and windy conditions?
When setting up a fire in snowy and windy conditions, start by digging a shallow pit down to the ground or frozen soil. This creates a stable base and prevents the fire from sinking into melting snow. Choose a naturally sheltered spot, like behind a boulder, near a hillside, or under an overhang, to shield the fire from harsh winds.
Build your fire in a teepee or cone shape, layering it with dry tinder in the center, surrounded by kindling, and topped with larger pieces of fuel wood. Make sure everything is as dry as possible. To keep the fire off the wet ground, use bark or a flat piece of wood as a base. Once the fire is lit, feed it gradually with fuel and keep it protected from the wind to ensure it stays burning.