
In the wilderness, untreated water can make you sick – even if it looks clean. Harmful microorganisms like bacteria, viruses, and parasites may lurk in streams, lakes, or springs. To stay safe, always treat water before drinking. Here’s a quick summary of reliable purification methods:
- Boiling: Heat water to a rolling boil for 1 minute (3 minutes at high altitudes).
- Filters: Use portable filters to remove bacteria and protozoa.
- Chemical Treatments: Chlorine dioxide tablets or iodine drops kill pathogens.
- UV Purifiers: Use UV light to neutralize microorganisms in clear water.
Tips for water safety:
- Choose flowing water over stagnant sources.
- Prefilter cloudy water to remove debris.
- Prevent cross-contamination by keeping clean and dirty containers separate.
Carrying a backup method, like chemical tablets with a filter, ensures you’re prepared for any situation. Proper water handling is just as important as purification – clean hands and gear can save you from getting sick. Treat every source as unsafe until purified, and you’ll stay hydrated and healthy on your adventure.
Ten Ways To Purify Water For Drinking In The Backcountry For Bushcraft, Camping, or Survival
Waterborne Risks in the Wilderness
When you’re out in the wild, drinking untreated water can pose serious health risks. Even the most pristine-looking water sources might be hiding harmful contaminants that aren’t visible to the naked eye.
Common Contaminants in Wild Water
Natural water sources can contain a variety of pollutants. These might include microorganisms like bacteria, viruses, and parasites, as well as chemical impurities. Wildlife, environmental runoff, and even occasional human activity can introduce these contaminants into the water. Because of these risks, it’s essential to treat all natural water as unsafe until it’s properly purified.
Why Clear Water Isn’t Always Safe
Just because water looks clean doesn’t mean it’s safe to drink. Microscopic pathogens or chemical pollutants can still be lurking in seemingly clear water. Relying on appearance alone can give a false sense of security. To stay healthy during your outdoor adventures, purification is a must. Taking this step helps protect you from potential waterborne illnesses and ensures you’re drinking water that’s truly safe. Understanding these risks is the first step in making informed decisions about water safety in the wilderness.
Finding the Safest Water Sources
Choosing the cleanest water source available makes purification easier and improves overall safety. Starting with cleaner water means your filters and other purification methods won’t have to work as hard, which is especially important when you’re out in the wilderness. Even though all natural water should be treated, selecting a better source at the start is a smart move.
Flowing water is your best option. Moving water, like streams and rivers, tends to have fewer contaminants because it disperses pollutants and oxygenates the water, which discourages the growth of harmful bacteria and algae. Stay away from stagnant water, as it’s a breeding ground for pathogens. In the U.S. backcountry, narrow streams or spring-fed trickles are usually safer than wide, slow-moving rivers.
Elevation matters, too. Higher-altitude sources are often cleaner since they’re farther from human activity and livestock, which can introduce contaminants. Avoid collecting water downstream from campsites, fire rings, or popular swimming areas, as these spots are more likely to be polluted with human waste, food scraps, or soap – potential sources of pathogens like Giardia or norovirus.
Even if the water looks crystal clear, it still needs treatment. Once you’ve picked a source, take care to collect it in a way that minimizes contamination.
Best Practices for Collecting Water
To keep sediment and debris out, collect water from the cleanest, upper layer of your source. Look for a clear spot and gently skim water from the surface, rather than scooping from the bottom where dirt and particles settle.
If you’re using a pump or gravity filter with an intake hose, position the hose a few inches below the surface but well above the bottom. This helps avoid both floating debris and settled particles. Timing is important, too – try not to collect water right after heavy rain, as runoff can make the water cloudier and harder to treat.
Keep your gear clean during the process. Use one container strictly for untreated water and another for purified water. Never dip clean bottles directly into the source, and avoid touching filter outlets or bottle openings with unwashed hands. After collecting, make sure the outside of clean containers stays dry, and keep filter hoses or bottle openings off the ground and out of the water source. If the water is murky, let it sit undisturbed for about 30 minutes so heavier particles can settle. Then, pour or siphon the clearer water from the top.
Prefiltering Collected Water
Even the cleanest-looking water can have debris that clogs filters or weakens chemical and UV purification methods. Prefiltering removes larger particles, helping your main purification process work more effectively and extending the lifespan of your gear.
You don’t need fancy equipment to prefilter. A clean bandanna, T-shirt, or microfiber cloth can work as a makeshift prefilter. Stretch the fabric over a container, secure it with a cord or rubber band, and slowly pour the collected water through it to catch leaves, insects, and coarse sediment. When the cloth gets dirty or the flow slows down, rinse it or switch to a fresh section.
For better results, you can layer fabrics – place a coarser cloth over a finer one, or even add coffee filters for an extra layer of filtration. This multi-stage approach is especially handy if you’re in an emergency situation without specialized gear.
Prefiltering is especially important if you’re using mechanical filters or UV purifiers. Large debris can clog filter pores, slowing down water flow and reducing the filter’s lifespan. Cloudy water can also block UV light, making the treatment less effective.
Preparation is key. Resources like Adventurism.co offer tips on water availability and contamination risks for different U.S. trail systems. Combine this information with topographic maps and recent trip reports to plan ahead. Knowing where to find springs or creeks and packing the right containers and prefiltering materials can save you a lot of trouble in the field.
Taking these steps ensures your water is ready for the final purification process.
Methods for Purifying Water
Once you’ve prefiltered your water, it’s time to make it safe for drinking. There are four main purification methods commonly used in the backcountry: boiling, filtration, chemical treatments, and UV light. Each of these methods targets pathogens differently, so understanding how they work can help you pick the best one for your trip and the conditions you’ll face.
Boiling Water
Boiling is the most dependable way to purify water because it kills all microorganisms, leaving no exceptions. According to the Wilderness Medical Society, heating water to 160°F (70°C) is enough to neutralize bacteria, protozoa, and viruses. To be safe, bring the water to a rolling boil for at least one minute if you’re below 6,500 feet. At higher elevations, where water boils at lower temperatures, extend the boiling time to three minutes.
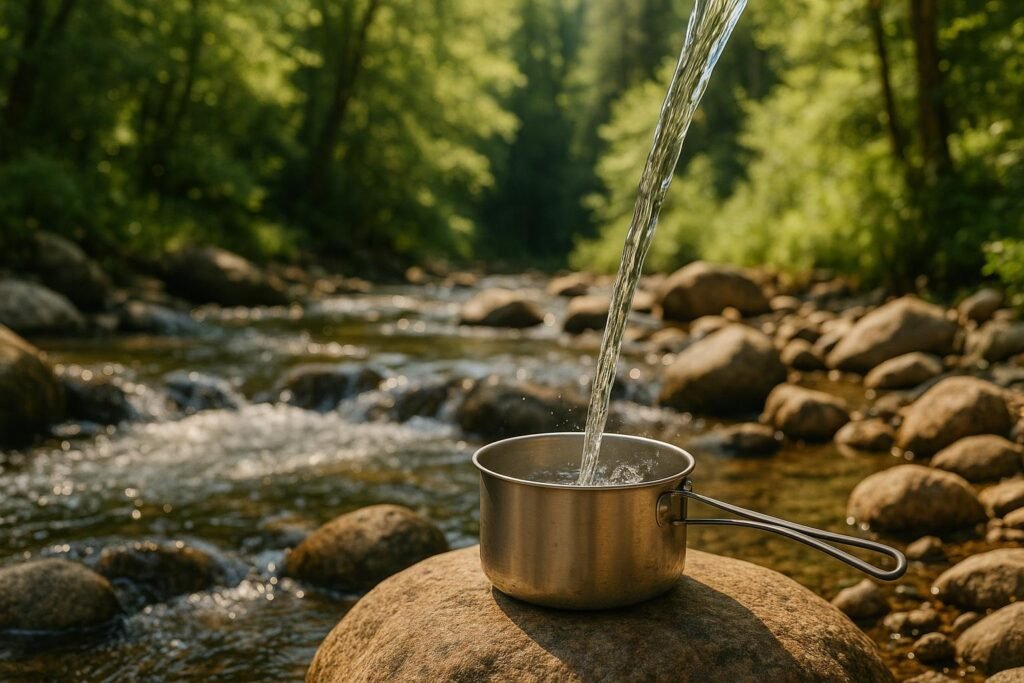
You can boil water using a backpacking stove or a campfire. To save fuel and speed up the process, use a lid to cover your pot. If you’re relying on a campfire, make sure open flames are permitted in your area, and set your pot on stable rocks or a grate for safety.
While boiling is highly effective at killing pathogens, it won’t remove sediment, chemicals, or improve the taste. If the water is cloudy, let it settle and prefilter it before boiling. The boiled water will be hot, so you can let it cool in a shaded area or pour it into a hydration bladder. If you’re trying to conserve fuel or need a more portable option, consider using a filtration system instead.
Using Portable Filters
Portable filters offer a physical barrier that removes pathogens by forcing water through tiny pores. Most backpacking filters have pore sizes between 0.1 and 0.3 microns, which are small enough to trap bacteria and protozoa like Giardia and Cryptosporidium.
There are three popular types of filters:
- Squeeze filters: Lightweight and easy to use, perfect for solo hikers.
- Pump filters: Provide manual control and work well with shallow water sources.
- Gravity systems: Great for groups or base camps since gravity does the work while you focus on other tasks.
To avoid recontaminating your clean water, keep your clean and dirty components separate. For example, don’t let untreated water come into contact with bottle threads or clean gear. Label your bags clearly, and always handle clean water with dry, sanitized hands.
Most filters can be backflushed to clear out debris and maintain flow. Follow the manufacturer’s instructions for how often to do this. If the flow rate slows significantly and backflushing doesn’t help, it’s time to replace the filter cartridge.
While filters are excellent at removing sediment and pathogens, they don’t eliminate dissolved chemicals or heavy metals. For those scenarios, chemical treatments or UV purifiers can provide an additional layer of safety.
Chemical Treatments: Tablets and Drops
Chemical treatments use oxidation or other chemical reactions to kill or inactivate harmful microorganisms. The two most common options for backcountry use are chlorine dioxide tablets and iodine drops, with chlorine dioxide being the go-to choice for its effectiveness.
Chlorine dioxide can kill bacteria, viruses, and protozoa, including Cryptosporidium. To use, follow the product’s instructions – usually one or two tablets per quart or liter of water. Drop the tablet into your water bottle, shake it for 10 to 20 seconds, and wait at least 30 minutes before drinking. If the water is very cold, you may need to wait up to four hours for full effectiveness.
Iodine is faster in some cases but less effective against Cryptosporidium. It also isn’t recommended for long-term use, pregnant individuals, or those with thyroid issues. If you choose iodine, measure carefully – typically a few drops per quart – and wait about 20 minutes for clear water or longer for colder water.
Cloudy water can interfere with chemical treatments because particles can shield pathogens. If the water is slightly murky, increase the contact time to ensure safety.
Both chlorine dioxide and iodine can leave an aftertaste. Chlorine dioxide has a mild chemical flavor, while iodine often leaves a stronger, medicinal taste. You can neutralize these flavors with vitamin C tablets or by adding a flavored drink mix once the treatment is complete.
In emergencies, unscented household bleach can serve as a backup. Add two drops per quart of clear water, mix thoroughly, and wait 30 minutes. For cloudy water, double the dose and extend the wait time.
Chemical treatments are lightweight and compact, making them ideal for ultralight backpacking or as a backup to a primary filtration system. Pairing chlorine dioxide tablets with a squeeze filter gives you two reliable options in a small, portable package.
UV Purifiers
UV purifiers use ultraviolet light to disrupt the DNA of pathogens like bacteria, viruses, and protozoa, making them harmless. These handheld devices are quick and effective but require clear water and a reliable power source.
To use a UV purifier, start with prefiltered water and follow the device’s instructions. Most units require you to stir the water with the UV lamp for 60 to 90 seconds per liter. A signal or indicator light will let you know when the treatment is complete.
Battery life is an important consideration. UV purifiers run on rechargeable or disposable batteries, but cold temperatures can drain them faster. Always carry spare batteries or a power bank, especially on longer trips. Some hikers even bring a small solar charger to keep their UV device powered during multi-day outings.
While UV purifiers are excellent for quick, small-scale treatments, they don’t remove sediment, particles, or chemicals. For the best results, combine UV treatment with a filter to improve both clarity and taste. However, treating each bottle individually makes UV purifiers less practical for large groups or high-volume needs. In those cases, boiling or a gravity filter is often more efficient.
For solo hikers or small groups with access to relatively clear water, UV purifiers are a convenient and effective option, especially for short trips or day hikes. Just make sure you’re prepared to manage the device’s battery needs.
sbb-itb-5a98267
Emergency and Natural Purification Techniques
When conventional water treatment methods fail during emergencies, improvising purification techniques can help prevent illness. These last-ditch methods are useful when your gear is lost, damaged, or you’re far from help without the usual supplies.
Improvised Sand and Charcoal Filters
Creating a basic filter can remove visible debris, sediment, and some unpleasant tastes and odors. However, it won’t eliminate bacteria, viruses, or protozoa like Giardia or Cryptosporidium. To build one, use a container with a small opening at the bottom – an inverted plastic water bottle with the bottom cut off works well. Plug the neck with a clean cloth or bandana to keep the filter materials in place.
Layer the following materials inside the bottle: small gravel, a thick layer of fine sand, crushed charcoal from a cooled campfire (hardwood coals work best), another layer of sand, and a final layer of gravel. Slowly pour untreated water through these layers. If the flow becomes too slow, rinse or replace the top layers and repeat the process as needed.
This filter is only a first step. Be sure to disinfect the water afterward by boiling it, using chemical treatments, or applying UV purification methods.
Solar Disinfection Methods
Solar disinfection, or SODIS, uses sunlight’s UV rays and heat to neutralize many pathogens in water. While it’s slower and requires specific conditions, it can be a practical backup when other methods aren’t available.
Start by prefiltering the water through a cloth until it looks clear – particles can block UV rays. Pour the water into a transparent bottle, such as one made of PET plastic or clear glass, and fill it completely before sealing it tightly. Lay the bottle horizontally on a reflective surface, like a light-colored rock or aluminum foil, and leave it in direct sunlight. Under bright, sunny conditions, expose the water for at least six hours. If it’s hazy or partly cloudy, you may need to extend the exposure time.
Once the water has been treated, you can drink it directly from the bottle or transfer it to a clean container, taking care to avoid contamination. Keep in mind that SODIS doesn’t remove chemical pollutants, so avoid using it with water that may be tainted by industrial or agricultural runoff.
If SODIS isn’t feasible or doesn’t produce enough water, a solar still might be an alternative.
Building a Solar Still
A solar still can purify small amounts of water by using the sun’s heat to evaporate moisture, which then condenses and collects as drinkable water. While it’s labor-intensive and produces limited quantities – just a few cups per day – it can be a lifesaver in survival situations.
To build one, dig a pit in a sunny spot and place a clean container at its center. Surround the container with damp soil, green vegetation, or any other moist material. Cover the pit with clear plastic, sealing the edges with soil or rocks, and place a small rock in the center of the plastic to create a slope. This directs condensation to drip into the container. For easier access, you can run a tube from the container to the outside, allowing you to drink without disturbing the setup. Let the still sit undisturbed during the hottest part of the day for the best results.
While solar stills can reduce microorganisms and some dissolved solids, they produce very little water – far less than what’s needed for hydration in hot or physically demanding conditions. Building multiple stills can improve your yield, but be cautious if the source water is suspected to contain industrial toxins, as these may not be fully removed.
Be Prepared
Improvised techniques like these are no substitute for proper planning. Carrying essentials like a compact filter, chemical purification tablets, a metal container for boiling, and clear bottles for potential solar disinfection can significantly reduce the need for emergency improvisation. For U.S.-based outdoor enthusiasts, Adventurism.co provides trip-planning tips and practical advice to integrate these skills into hiking, camping, or paddling trips. Knowing how to use sand, charcoal, sunlight, and plastic can help you stay hydrated until you reach safety, but these methods should always be treated as a last resort.
Safe Water Handling Practices
After purifying water, how you handle it can make all the difference in keeping it safe. Even the cleanest water can become contaminated again if mishandled. To avoid this, use clean containers, keep them away from dirty surfaces, and maintain good hand hygiene.
Avoiding Cross-Contamination
Keeping clean and dirty water separate is essential. Use clearly labeled containers – mark one as "DIRTY" for untreated water and another as "CLEAN" for purified water. Stick to their roles, even during a hectic trip, and store them in separate areas of your pack.
If you’re using a gravity or squeeze filter, take extra care to avoid contamination. Keep the filter outlets, mouthpieces, and bottle openings away from untreated water, dirty surfaces, or your hands. Always cap the clean side when not in use. For gravity systems, hang the dirty water bag high, direct the clean hose into a capped bottle, and make sure the outlet stays off the ground.
Before handling purified water or utensils, wash or sanitize your hands – especially after touching anything dirty. A simple hand-washing station with soap and water at camp works well, or keep a small bottle of alcohol-based hand sanitizer handy in your pack.
If untreated water accidentally gets into a clean container – or if you’re unsure whether a bottle is clean – treat all the water again to be safe. Never "top off" purified water with untreated water, as this will contaminate the entire supply.
When pouring treated water into another container, do it carefully to avoid contaminating the receiving container. If you’re sharing water with others, pour it into individual cups instead of passing bottles around, which can spread germs.
Be mindful of how long you store treated water. Heat, sunlight, and time can weaken some chemical treatments and allow bacteria to grow. Only treat as much water as you’ll need for the next 24 hours. Use clean, food-grade bottles with tight lids, and store them out of direct sunlight and away from any chemicals or fuel. If water smells or looks strange after storage, discard it and treat a fresh batch.
| Poor Practice | Better Practice |
|---|---|
| Letting clean hose or outlet touch dirty water or ground | Hanging dirty bag high, routing clean hose directly into capped bottle, keeping outlet off the ground |
| Treating water but skipping hand-washing before meals | Using soap or sanitizer before cooking, eating, or handling bottle mouths and utensils |
| Making several days’ worth of water and leaving bottles in hot sun | Treating only one day’s supply, storing in shaded, closed containers away from contaminants |
Packing a Water Purification Kit
A well-prepared water purification kit is your safety net in the wild. Gear can fail, so it’s smart to carry at least two separate treatment options, like a filter and chlorine dioxide tablets, in case your primary method breaks or freezes.
Here’s what a basic kit for U.S. wilderness trips should include:
- Primary filter or purifier (a compact squeeze or pump-style filter works well)
- Backup chemical treatments (chlorine dioxide tablets or drops)
- Metal pot for boiling (if your stove or fire setup allows)
- Hard-sided bottle (capable of withstanding boiling temperatures)
- Collapsible dirty water bag (to collect water from sources)
- Bandana or mesh prefilter (to remove silt and debris)
- Hand sanitizer (for hygiene when soap and water aren’t available)
- Spare parts (like O-rings, gaskets, batteries for UV purifiers, or replacement cartridges)
- Waterproof storage (for instructions – either printed or stored offline on your phone)
- Sealable plastic bags (to separate dirty items from clean gear)
Organize your kit so it’s easy to access. Use waterproof bags or cases for electronics and chemical treatments. Keep a checklist of all items and review it before every trip. Store the kit in a central spot in your backpack, not buried at the bottom.
Before heading out, take time to practice using all the components of your purification system at home. Test your filter, try mixing chemical treatments, and time how long it takes to boil water on your stove. Familiarity with your gear in a controlled environment can save you from fumbling when you’re tired or facing an emergency. As Adventurism.co often advises, testing your camping and backpacking setup ahead of time is key – and that includes water purification gear.
Safe water handling is part of a broader approach to camp hygiene and Leave No Trace principles. Think of clean water, clean hands, and clean cookware as one interconnected system. By planning ahead, using the right gear, and following these practices, you’re not just protecting yourself – you’re also helping preserve the environment and setting a positive example for others in the backcountry.
Conclusion
Having safe drinking water in the wild isn’t optional – it’s essential. Even the clearest streams can harbor dangerous pathogens, and untreated backcountry water can quickly turn an adventure into a health risk.
Thankfully, there are several reliable ways to purify water. Boiling is a tried-and-true method that kills pathogens effectively, provided you have enough fuel and time. Portable filters are great for removing protozoa and bacteria while also improving the taste of water. For a lightweight option, chemical treatments like chlorine dioxide tablets are easy to carry and use. And if speed is your priority, UV purifiers offer rapid disinfection for clear water, though they depend on battery power.
It’s smart to carry backup methods to ensure you’re never caught off guard. For example, pairing a hollow-fiber filter with chemical tablets gives you both quick filtration and added reliability. Before heading out, test your gear at home – practice boiling water, assembling filters, and measuring chemical dosages to avoid surprises in the field.
Purifying water is just one part of staying safe. How you handle water after treatment matters just as much. Choose cleaner water sources when possible, prefilter sediment, and take steps to prevent cross-contamination. According to the Wilderness Medical Society, most waterborne illnesses in the backcountry are caused by poor hygiene and person-to-person transmission – not untreated water alone. Simple habits like washing your hands, using separate containers for treated water, and handling everything carefully can make a big difference.
Water purification is as critical as packing your shelter, navigation tools, and first aid kit. Whether you’re out for a weekend or tackling a multi-day trek, take the time to test your methods, bring backups, and treat every water source with care. With the right preparation, you can focus on the adventure ahead, confident that your water is safe to drink.
FAQs
What are the best ways to purify water in the wild without modern tools?
When you’re exploring the wilderness without the convenience of modern tools, there are a few reliable ways to purify water and make it safe to drink. Boiling is one of the easiest and most dependable methods – just heat the water until it reaches a rolling boil and keep it there for at least one minute (extend this to three minutes if you’re above 6,500 feet). Another handy option is purification tablets. These are lightweight, easy to pack, and simple to use – just follow the instructions provided on the packaging. If you’re working with natural materials, you can try filtering water through layers of sand, charcoal, and cloth. However, this method alone isn’t enough; it works best when combined with boiling or chemical treatments to ensure the water is safe.
Keep in mind that even water that looks clean might still carry harmful bacteria, viruses, or parasites. Always treat it before drinking. To stay safe and hydrated during your outdoor adventures, it’s a smart idea to plan ahead and pack portable purification tools.
What’s the best way to purify water in the wild to remove both pathogens and chemical contaminants?
When you’re out in the wild, making sure your water is safe to drink is a top priority. You’ll need to tackle two main concerns: biological pathogens (like bacteria, viruses, and parasites) and chemical contaminants.
Start with a filter that can handle bacteria and protozoa. However, most filters can’t catch viruses because they’re too small. To deal with those, pair your filter with purification tablets or a UV light device. Tablets made with iodine or chlorine dioxide work well, though they need some time to do their job.
Worried about chemical contaminants? Go for an activated carbon filter. These filters can help reduce certain toxins and even improve the taste of your water. And if you’re in a pinch, boiling water is a dependable option to kill pathogens. Just boil it for at least 1 minute – or 3 minutes if you’re at higher altitudes. Keep in mind, though, boiling won’t remove chemicals.
Before heading out, take some time to research the water sources in the area and pack the right gear for your trip. Having the proper tools can make all the difference!
What can I do if my water purification method stops working during a backcountry trip?
If your main method for purifying water isn’t working, don’t worry – there are other ways to make water drinkable. Start by seeking out natural sources, like clear, fast-moving streams, which are often less polluted. One of the most dependable methods is boiling. Simply bring the water to a rolling boil for at least one minute (or three minutes if you’re at a higher elevation). No access to heat? You can try makeshift filters like a clean cloth or sand to remove debris, but remember, these won’t eliminate bacteria or viruses.
To be better prepared, it’s smart to carry backup tools, such as water purification tablets or a portable filter. Planning ahead can make all the difference – always pack a secondary option for purifying water. While staying hydrated is essential, always prioritize safety when gathering water in the wild.